Burgundy and Cream Triangle Crochet Bedspread
Easy
A great pattern for all skill levels.
Weekend Project
A satisfying weekend make — start Friday, finish Sunday, enjoy forever.
Handmade Gift
A beautiful keepsake — free forever. Read online or print at home.
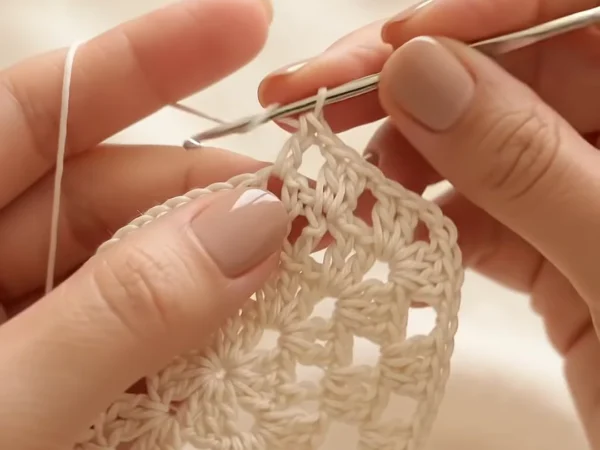 Magic ring & first rounds
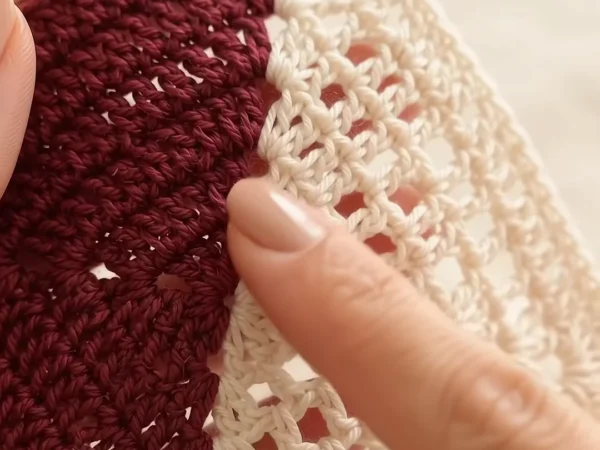 Building the shape
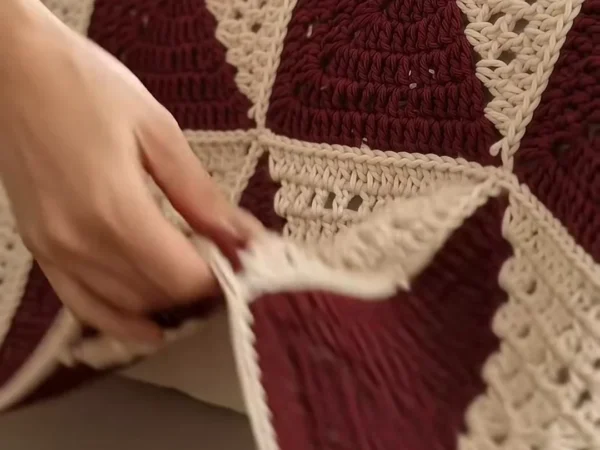 Assembly in progress
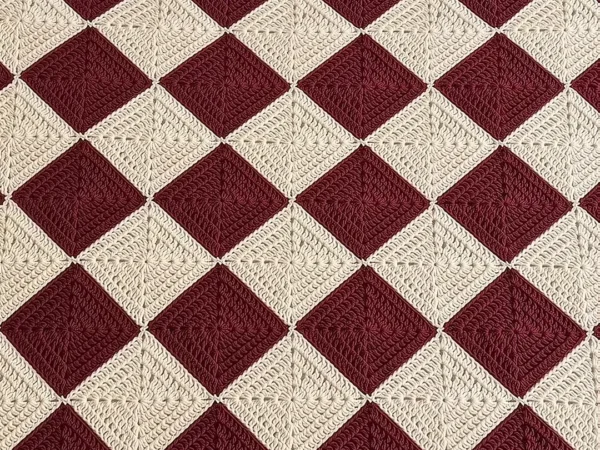 Finished & ready!
About This Burgundy and Cream Triangle Crochet Bedspread
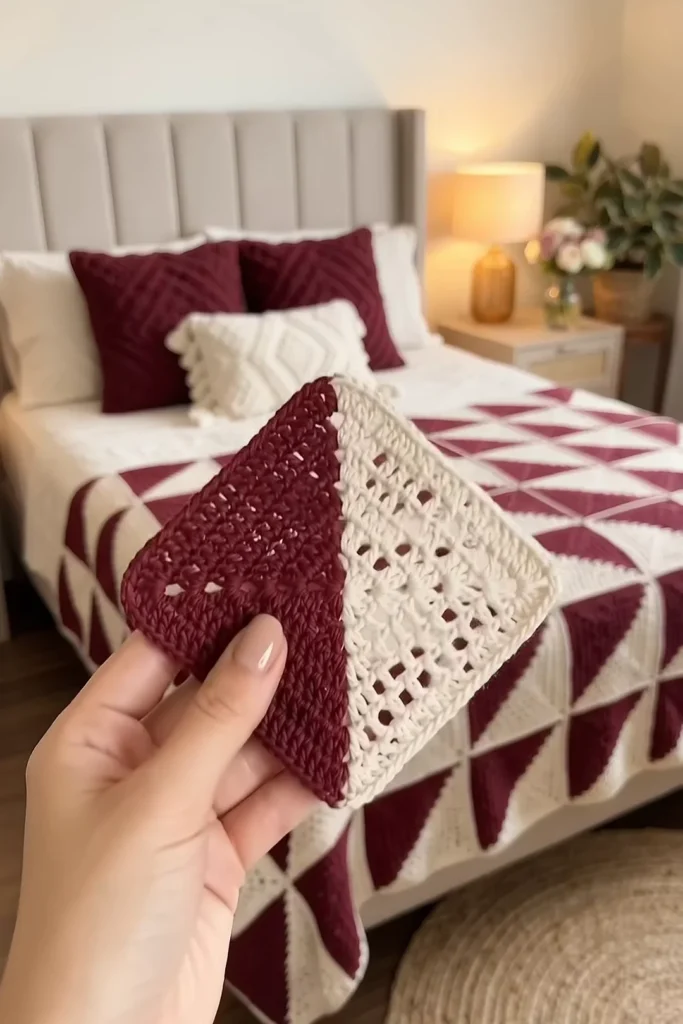
This burgundy triangle crochet bedspread is built from one simple square repeated across the bed: half of it is solid burgundy, the other half is an open cream mesh, and the line between them runs corner to corner. Joined together, the squares make rows of sharp triangles, or turn them and you get a field of burgundy and cream diamonds. The deep red against the soft cream looks bold and cozy at the same time.
Each square is worked corner to corner in diagonal rows. You start at one corner in burgundy and grow the rows with double crochet until you reach the diagonal, then change to cream and shrink the rows again in a dc and chain mesh. The change of stitch is what makes the cream half lighter and lacier than the burgundy half, just like in the photos, and a round of single crochet and half double crochet squares everything up.
A queen bedspread takes about 85 to 95 hours and a throw about 36 to 40. One square takes around 50 minutes. If you can work double crochet and count your stitches, you can make this pattern: there are only two rules to learn, one for growing and one for shrinking.
Materials
- DK weight yarn, burgundy about 4,460 m for a queen bedspread (18 skeins of 100 g / 250 m), or 1,890 m for a throw (8 skeins)
- DK weight yarn, cream about 3,960 m for a queen bedspread (16 skeins), or 1,700 m for a throw (7 skeins)
- 4 mm (G-6) crochet hook
- Stitch markers to mark the first and last st of each row
- Blocking mats and rust-proof pins or a 21 cm square template
- Tapestry needle and scissors
Abbreviations
MRmagic ringchchainsl stslip stitchscsingle crochethdchalf double crochetdcdouble crochetspspaceskskipst(s)stitch(es); in the mesh, each dc and each ch-1 sp counts as 1 strndroundreprepeatRS / WSright side / wrong sideHow the Half Square Triangle Works
Each square is made in diagonal rows that run parallel to the line between the two colors. The first row is a tiny corner of 3 stitches. Every burgundy row adds 2 stitches at each end, so the rows get longer and the piece grows into a right triangle. After 13 rows you have reached the diagonal of the square, 51 stitches long.
Then you change to cream and do the opposite: every row leaves 2 stitches unworked at each end, so the rows get shorter until they close at the far corner. Because the cream rows are a mesh of dc and ch 1, the cream half is lighter, shows little windows, and uses less yarn.
The border round squares up the edges and gives every square the same size, which makes joining easy. The color layout is all in how you turn the squares when you join them.
Sizes and How Many Squares
- Each finished square measures about 21 x 21 cm.
- Cushion front: 4 squares (2 x 2), about 42 cm square.
- Baby blanket: 4 x 5 = 20 squares, about 84 x 105 cm.
- Throw: 6 x 7 = 42 squares, about 126 x 147 cm.
- Queen bedspread: 9 x 11 = 99 squares, about 189 x 231 cm.
- King bedspread: 12 x 11 = 132 squares, about 252 x 231 cm.
- Yarn per square, to plan any size: about 45 m burgundy and 38 m cream (including the border). Add about 2 m of cream per square for joining.
Burgundy Half (make 99 for a bedspread, 42 for a throw)
- Each row starts with ch 3, which counts as the first dc. Turn at the end of every row.
- Row 1: with burgundy, MR, ch 3, 2 dc in ring. Pull the ring tight. (3 sts)
- Row 2: ch 3, turn, 2 dc in first st (at the base of the ch 3), dc in next st, 3 dc in top of turning ch. (7 sts)
- Row 3: ch 3, turn, 2 dc in first st, dc in each st across to the turning ch, 3 dc in top of turning ch. (11 sts)
- Rows 4-13: rep Row 3. Each row adds 4 sts. (Row 4: 15 sts, Row 5: 19, Row 6: 23, Row 7: 27, Row 8: 31, Row 9: 35, Row 10: 39, Row 11: 43, Row 12: 47, Row 13: 51)
- Change to cream in the last yo of Row 13. Do not fasten off burgundy yet if you like to weave the tail over the next row; otherwise cut it with a 15 cm tail.
- The burgundy half is a right triangle with two sides of about 20 cm and a long side of about 28 cm.
Cream Mesh Half
- Each row leaves 2 sts unworked at both ends, so it is 4 sts shorter than the row before.
- Row 14: with cream, turn, sl st in first 3 sts, ch 3 (counts as dc), *ch 1, sk next st, dc in next st; rep from * until 2 sts remain, leave them unworked. (47 sts: 24 dc and 23 ch-1 sps)
- Row 15: turn, sl st in first 3 sts (dc, ch-1 sp, dc), ch 3, *ch 1, sk next ch-1 sp, dc in next dc; rep from * until 2 sts remain, leave them unworked. (43 sts)
- Rows 16-25: rep Row 15. Each row is 4 sts shorter. (Row 16: 39 sts, Row 17: 35, Row 18: 31, Row 19: 27, Row 20: 23, Row 21: 19, Row 22: 15, Row 23: 11, Row 24: 7, Row 25: 3)
- Row 26: turn, sl st in ch-1 sp and in last dc to close the corner. Do not fasten off.
- The mesh grows dc over dc and ch over ch, so you see neat little square windows across the cream half.
Square Border
- Rnd 1: with cream, ch 1, work around the whole square. In each corner work (sc, ch 2, sc). Along each side, *3 sc in the side of the next row, 2 sc in the side of the next row; rep along. Join with sl st to first sc. (33 sc between the corner sc on each side)
- On the burgundy sides you work into 13 dc row ends; on the cream sides into 12 mesh row ends and the closing row, so all four sides have the same count.
- Rnd 2: ch 2 (does not count as a st), hdc in each sc, and (hdc, ch 2, hdc) in each corner ch-2 sp. Join. Fasten off. (37 hdc on each side)
- Block the square to 21 x 21 cm with the color line running straight from corner to corner.
Layouts and Joining
- Triangle rows (as on the bed in the photos): turn every square the same way, burgundy at the bottom left. You get rows of burgundy and cream triangles running across the bed.
- Diamonds (as in the flat lay): work in blocks of 2 x 2 squares and turn them so the 4 burgundy corners meet in the middle. A burgundy diamond forms in each block and cream diamonds form where the blocks meet.
- Lay out all the squares on the floor or a bed first and take a photo, so you can follow it while joining.
- Join with cream: hold two squares RS together and whip stitch through the back loops of the hdc, from corner sp to corner sp. (37 sts plus the corner sps)
- Join all the short seams in rows first, then the long seams. At each crossing, pass the needle through all four corner sps so there is no hole.
- For a raised seam on the front, hold the squares WS together and join with sc through both layers instead.
Bedspread Edging (optional)
- The square borders already give the bedspread a neat edge. Add this edging for a firmer, finished frame.
- Rnd 1: with cream, join in any corner sp. Ch 2, hdc in each st along the sides, working 1 hdc in each joining seam, and (2 hdc, ch 2, 2 hdc) in each outer corner. Join.
- Rnd 2: with burgundy, ch 1, work reverse sc (crab stitch) in each st around, 3 reverse sc in each corner sp. Join and fasten off.
Matching Diamond Cushion
- Front: make 4 squares and join them 2 x 2 in the diamond layout, burgundy corners in the middle.
- Work Rnds 1-2 of the Bedspread Edging around the front. It measures about 44 cm square.
- Back: cut a burgundy cotton fabric 47 x 47 cm and hem the edges, or crochet a solid burgundy panel in rows of dc to the same size.
- Sew the front onto the back with cream yarn around 3 sides, insert a 45 cm cushion form and sew the last side closed.
Finishing
Weave in all ends on the WS, burgundy tails into the solid burgundy half and cream tails along the border hdc. Do not run cream tails through the mesh: they show through the windows.
Lay the bedspread flat, mist it with water and pin each square straight, checking that the color lines stay straight across the whole piece. Let it dry completely before you move it. Wet-block the squares one by one before joining if you can; it makes joining much easier.
Tips for Success
- Count the stitches at the end of every row; the numbers go up by 4 and then down by 4, so a mistake is easy to catch.
- Put a marker in the turning ch at the end of each burgundy row; it is the st you put 3 dc into on the next row.
- Make all the burgundy halves in a batch, then all the cream halves; you will learn each rule by heart.
- Keep an even tension on the sl sts at the start of the mesh rows; tight sl sts pull the cream edge in.
- Block one square to 21 cm and use it as the template for all the others.
- Use a dark yarn needle and good light for the burgundy rows, dark stitches are harder to see.
- Store the cream yarn in a bag while you work with burgundy, so no red fluff gets on it.
Common Mistakes to Avoid
- A curved color line. Each burgundy row must add exactly 4 sts: 2 dc in the first st and 3 dc in the turning ch.
- Forgetting the turning ch. The 3 dc at the end of each burgundy row go into the top of the ch 3, not into the last dc.
- A cream half that is too small. The mesh is looser than dc, but if you pull the ch 1 tight the cream half shrinks. Keep the chains relaxed.
- Windows that zigzag. In the mesh, always dc in a dc and skip the ch-1 sp, never the other way round.
- Squares that are not the same size. Check every square against your template before the border round.
- Turning squares the wrong way when joining. Follow the photo of your layout and join one row at a time.
- Holes at the crossings. Catch all four corner sps when you pass a crossing point.
Ways to Customize This Pattern
- Swap the colors: navy and white, sage and cream, or mustard and gray all look great with this simple square.
- Make both halves solid dc for a heavier, warmer blanket with no windows.
- Turn the squares in pinwheels: in each 2 x 2 block, turn every square a quarter turn from the last.
- Add a third color in the border Rnd 2 so every square gets a thin frame.
- Make a table runner of 2 x 7 squares, about 42 x 147 cm, in the diamond layout.
- Use worsted weight yarn and a 5 mm hook for bigger squares of about 26 cm and a faster blanket.
Frequently asked questions
Yes. You only need chain, slip stitch, single crochet, half double crochet and double crochet. The rows follow one rule to grow and one rule to shrink, and the stitch counts tell you right away if something is off.
About 25 minutes for the burgundy half, 15 minutes for the cream mesh and 10 minutes for the border, so around 50 minutes in total.
99 squares (9 x 11) for a bedspread of about 189 x 231 cm. For a throw on a sofa, 42 squares (6 x 7) make about 126 x 147 cm.
Join the squares in blocks of four and turn them so the four burgundy corners meet in the center of each block. The burgundy then forms diamonds and the cream forms diamonds between them.
Yes. Cotton DK gives very crisp lines and is nice for a summer bedspread, but it is heavier. Check that one square still blocks to 21 cm.
Deep reds can bleed. Wash a joined test piece of both colors before you start, and use a color-catcher sheet in the first washes.
Wash it on a gentle cold cycle inside a large laundry bag and dry it flat, pulling the squares straight while it is damp.