Sage Green Windowpane Filet Crochet Bedspread
Advanced
For experienced crocheters who enjoy complex shaping, fine detail, and ambitious construction
Weekend Project
A satisfying weekend make — start Friday, finish Sunday, enjoy forever.
Handmade Gift
A beautiful keepsake — free forever. Read online or print at home.
 Magic ring & first rounds
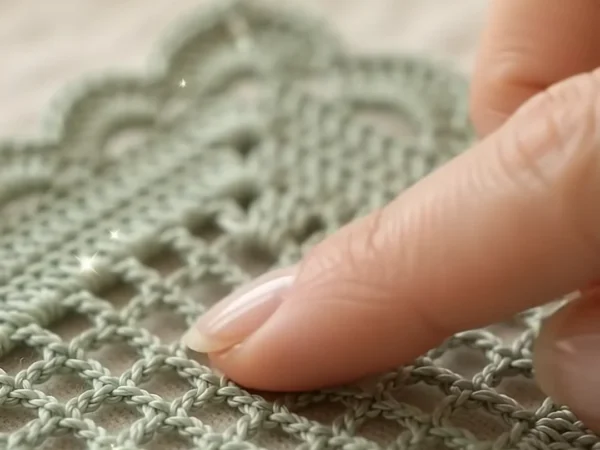 Building the shape
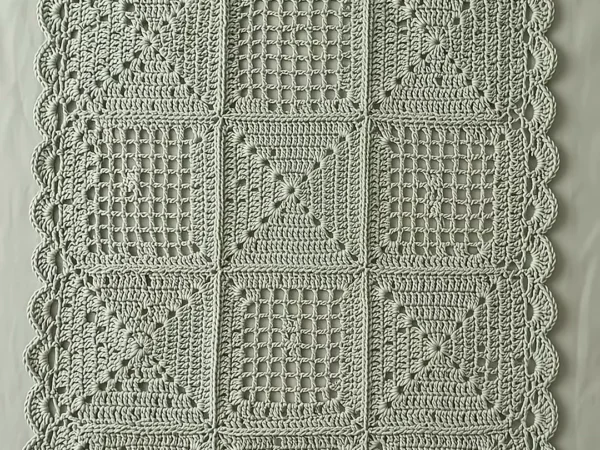 Assembly in progress
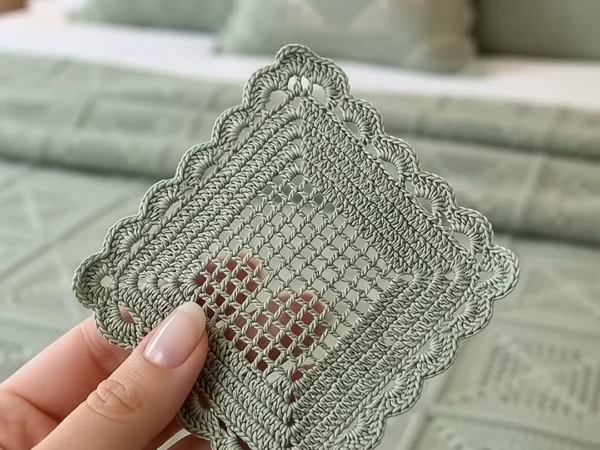 Finished & ready!
About This Sage Green Windowpane Filet Crochet Bedspread
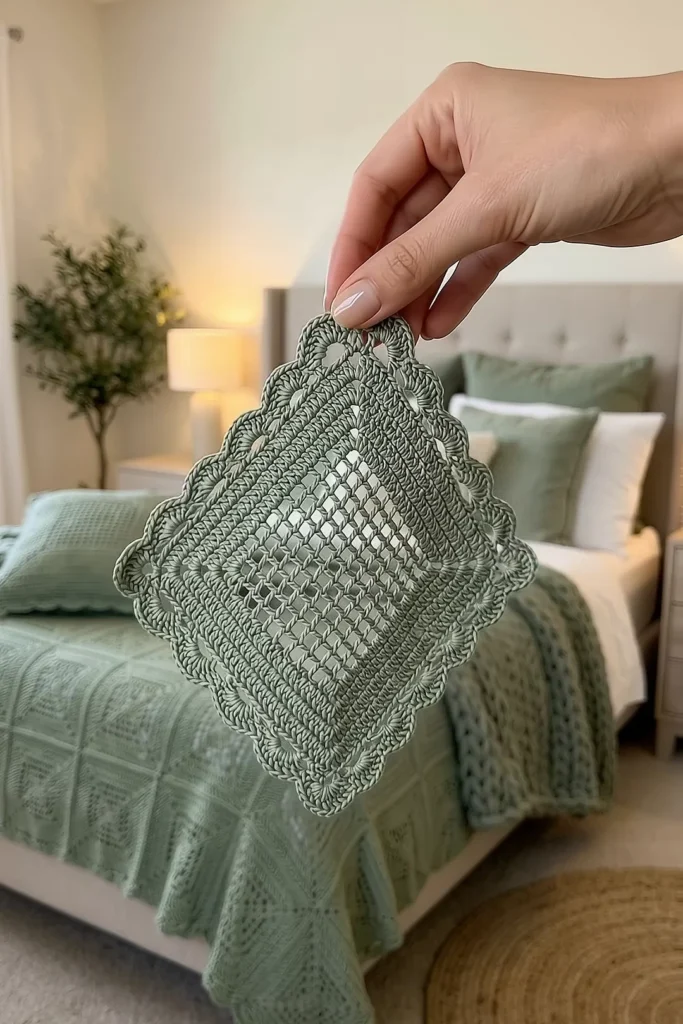
This filet crochet bedspread pattern makes a calm, modern bed cover in one soft color: sage green cotton. Every square has a small round lace center, then grows into open filet mesh with a solid diagonal X running from corner to corner. When you join the squares, the X lines meet and turn into big diamonds across the whole bed, like light coming through a windowpane.
Each square is worked in rounds from the middle. The center is a lace circle of dc spokes and shells, which you turn into a square with taller corners. After that, every round adds 2 units to each side: 2 solid blocks at each corner and open mesh in between. The blocks stack up round after round and draw the X for you, so you never need to read a chart. A solid frame closes each square. The squares are joined with a flat slip stitch seam, and a solid band with a deep scalloped edge finishes the bedspread. Two matching cushions use the same squares, so the diamond shows on the pillows too.
A queen bedspread takes about 85 to 95 hours and a throw about 34 to 40 hours. One square takes about 75 minutes, and each cushion about 10 hours. This is an advanced project for a crocheter who is comfortable with filet mesh, can count stitches every round, and wants a big, elegant piece in a single color.
Materials
- DK weight cotton yarn, sage green about 8,200 m for a queen (41 balls of 100 g / 200 m), or 3,100 m for a throw (16 balls)
- Extra DK cotton, sage green, for the cushions about 1,100 m per 60 cm cushion (6 balls each)
- 4 mm (G-6) crochet hook for the squares, joining and border
- 2 cushion pads, 60 x 60 cm optional, for the matching cushions
- Stitch markers one for each corner while you learn the square
- Blocking mats, rust-proof pins, tapestry needle and scissors
Abbreviations
MRmagic ringchchainsl stslip stitchscsingle crochethdchalf double crochetdcdouble crochettrtreble crochetdc2togdouble crochet 2 together: (yo, insert in next st, pull up a loop, yo, pull through 2 loops) twice, yo, pull through all 3 loopsmeshone open window: ch 1, sk next st, dc in next dcblockone solid unit: 2 dc side by side where a window would bespspaceskskipst(s)stitch(es); each ch-1 counts as 1 st in the side countsrndroundreprepeatRS / WSright side / wrong sideLace Center (Rnds 1-5)
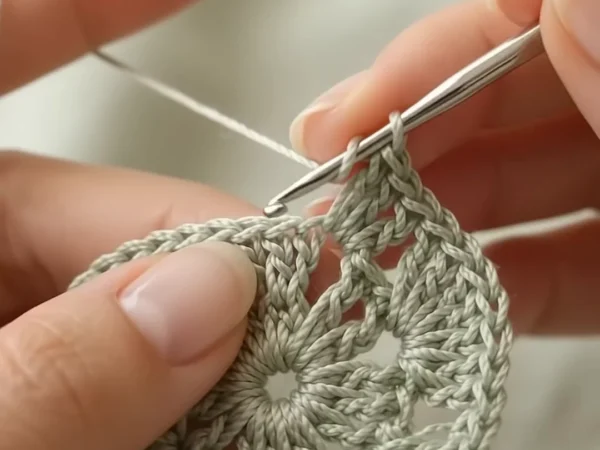
- Rnd 1: with sage and the 4 mm hook, MR, ch 3 (counts as dc here and throughout), 15 dc in ring, join with sl st to top of ch 3. Pull the ring tight. (16 dc)
- Rnd 2: ch 3, dc in same st as join, ch 2, sk next dc, *2 dc in next dc, ch 2, sk next dc; rep from * 6 more times, join to top of ch 3. (16 dc in 8 pairs, 8 ch-2 sps)
- Rnd 3 (shells): sl st in next dc and in next ch-2 sp, ch 3, 4 dc in same sp, ch 1, *5 dc in next ch-2 sp, ch 1; rep from * 6 more times, join to top of ch 3. (8 shells of 5 dc = 40 dc, 8 ch-1 sps) This is the round lace circle with spokes.
- Rnd 4 (squaring): sl st in next 4 dc and in next ch-1 sp. Ch 4 (counts as tr), (tr, ch 3, 2 tr) in same sp for the first corner. *Dc in next dc, hdc in next 3 dc, sc in next dc, sc in next ch-1 sp, sc in next dc, hdc in next 3 dc, dc in next dc**, (2 tr, ch 3, 2 tr) in next ch-1 sp; rep from * 2 more times, then from * to ** once, join to top of ch 4. (15 sts per side, 4 corner ch-3 sps, 60 sts in total)
- Rnd 5: sl st in next tr and in corner sp, ch 3, (dc, ch 3, 2 dc) in same sp, *dc in each st to next corner sp, (2 dc, ch 3, 2 dc) in corner sp; rep from * 2 more times, dc in each remaining st, join to top of ch 3. (19 dc per side) The center is now a solid square, about 11 cm across.
Filet Mesh with the Windowpane X (Rnds 6-12)
- How the rounds work: every filet round is worked the same way. Each corner is (2 dc, ch 3, 2 dc). After the 2 corner dc, you work “dc in next 3 dc”, which makes 2 solid blocks. Then you work a run of mesh, then “dc in next 2 dc” and the next corner, which makes 2 more blocks. Only the number of mesh grows by 2 each round. The blocks next to each corner sit one step further out every round, so they build the solid diagonal X.
- Rnd 6: sl st in next dc and in corner sp, ch 3, (dc, ch 3, 2 dc) in same sp, *dc in next 3 dc, (ch 1, sk next st, dc in next dc) 7 times, dc in next 2 dc, (2 dc, ch 3, 2 dc) in corner sp; rep from * 2 more times, dc in next 3 dc, (ch 1, sk next st, dc in next dc) 7 times, dc in next 2 dc, join to top of ch 3. (23 sts per side: 2 blocks, 7 mesh, 2 blocks = 11 units)
- Rnd 7: work as Rnd 6, but work the mesh 9 times on each side. (27 sts per side: 2 blocks, 9 mesh, 2 blocks = 13 units)
- Rnd 8: work as Rnd 6 with 11 mesh per side. (31 sts per side = 15 units)
- Rnd 9: work as Rnd 6 with 13 mesh per side. (35 sts per side = 17 units)
- Rnd 10: work as Rnd 6 with 15 mesh per side. (39 sts per side = 19 units)
- Rnd 11: work as Rnd 6 with 17 mesh per side. (43 sts per side = 21 units)
- Rnd 12: work as Rnd 6 with 19 mesh per side. (47 sts per side: 2 blocks, 19 mesh, 2 blocks = 23 units)
- Check: on every side, the mesh count is always 4 less than the number of units, and the stitch count is always 2 x units + 1. In a correct square you can see the solid X arms run straight from the corners of the lace center to the corners of Rnd 12, with a triangle of open windows between each pair of arms.
Solid Frame (Rnds 13-15)
- Rnd 13: sl st in next dc and in corner sp, ch 3, (dc, ch 3, 2 dc) in same sp, *dc in each dc and in each ch-1 sp to next corner sp, (2 dc, ch 3, 2 dc) in corner sp; rep from * 2 more times, dc in each remaining st, join. (51 dc per side)
- Rnd 14: sl st in next dc and in corner sp, then work as Rnd 13, with dc in each dc. (55 dc per side)
- Rnd 15: ch 1, sc in same st as join and in each dc around, 3 sc in each corner sp, join with sl st to first sc. Fasten off. (57 sc per side, counting the corner sc at each end; 232 sc in total)
- Block each square to 30 x 30 cm, pinning the corners first and then the middle of each side, so the X arms stay straight.
- Make 56 squares for a queen, or 20 squares for a throw.
Joining the Squares
- Layout: 7 x 8 = 56 squares for a queen (about 210 x 240 cm before the border, about 221 x 251 cm after), or 4 x 5 = 20 squares for a throw (about 120 x 150 cm before, about 131 x 161 cm after).
- All squares are the same in every direction, so you can turn them any way. Lay them out RS up and check that the X arms of each square point into the corners where four squares meet.
- Hold two squares WS together. With sage and the 4 mm hook, sl st through the outer loops of each pair of sc, from corner sc to corner sc. (57 sl st per seam) Keep the sl st as loose as the sc so the seam does not pull in.
- Join all the horizontal seams first, then all the vertical seams, working through the four corner sc at each crossing.
- Where four squares meet, the four X arms touch at the seam crossing. Together they make one big diamond around each square, so the whole bedspread shows a lattice of large diamonds.
Solid Band and Scalloped Border
- Rnd 1: with RS facing, join sage in the outer corner sc of any corner square. Ch 3, (dc, ch 3, 2 dc) in same st. *Dc in each sc along the side, but where two squares meet, work dc2tog over the 2 corner sc of the seam; work (2 dc, ch 3, 2 dc) in the outer corner sc of the next corner square; rep from * 2 more times, then work the last side the same way without the corner, and join to top of ch 3. (Queen: 395 dc on each short side, 451 dc on each long side. Throw: 227 dc on each short side, 283 dc on each long side.)
- Rnd 2: sl st in next dc and in corner sp, ch 3, (dc, ch 3, 2 dc) in same sp, *dc in each dc to next corner sp, (2 dc, ch 3, 2 dc) in corner sp; rep from * 2 more times, dc in each remaining dc, join. (Queen: 399 and 455 dc. Throw: 231 and 287 dc.) This is the solid band.
- Rnd 3 (shells): sl st in next dc and in corner sp, ch 3, 8 dc in same sp. On a short side: sk 1 dc, sc in next dc, *sk 2 dc, 7 dc in next dc, sk 2 dc, sc in next dc; rep from * across, sk 1 dc, 9 dc in corner sp. On a long side: work the same, but sk 2 dc at the start and sk 2 dc at the end instead of 1. Work all 4 sides, ending the last side without the corner, and join to top of ch 3. (Queen: 66 shells on each short side, 75 shells on each long side. Throw: 38 shells on each short side, 47 shells on each long side. Each corner has 9 dc.)
- Count check for Rnd 3: short side = 1 + 1 + 6 x shells + 1 sts, long side = 2 + 1 + 6 x shells + 2 sts. Queen: 3 + 396 = 399 and 5 + 450 = 455. Throw: 3 + 228 = 231 and 5 + 282 = 287. Every shell has a sc on each side of it.
- Rnd 4 (deep scallops): ch 4 (counts as dc and ch 1), (dc in next dc, ch 1) 7 times, dc in next dc to finish the first corner fan. *Sc in next sc, (dc in next dc, ch 1) 6 times, dc in next dc; rep from * across to the last sc before the corner, sc in last sc, then for the corner (dc in next dc, ch 1) 8 times, dc in next dc; rep along all sides, ending with sc in last sc, join to 3rd ch of ch 4. Fasten off. (Each side fan: 7 dc, 6 ch-1 sps. Each corner fan: 9 dc, 8 ch-1 sps.)
Matching Diamond Cushions (make 2)
- Front: make 4 windowpane squares and join them 2 x 2 as for the bedspread. The four X arms meet in the middle and make one large diamond across the front.
- Back: make 4 solid squares. Work Rnds 1-5 as given, then work Rnds 6-12 like Rnd 13, with dc in each st and (2 dc, ch 3, 2 dc) in each corner. (Rnd 6: 23 dc per side, then 27, 31, 35, 39, 43 and 47 dc per side at Rnd 12.) Work Rnds 13-15 as given. (57 sc per side) Join the 4 solid squares 2 x 2.
- Rnd 1 (joining): hold the front and back WS together, front facing you. Work through both layers: join sage in an outer corner sc, ch 3, (dc, ch 3, 2 dc) in same st, dc in each pair of sc along the side, dc2tog over the 2 corner sc at the center seam, and (2 dc, ch 3, 2 dc) in each outer corner. Work 3 sides, insert the 60 cm cushion pad, then close the 4th side and join. (115 dc per side)
- Rnd 2: sl st in next dc and in corner sp, ch 3, (dc, ch 3, 2 dc) in same sp, dc in each dc and (2 dc, ch 3, 2 dc) in each corner sp around, join. (119 dc per side)
- Rnd 3 (shells): sl st in next dc and in corner sp, ch 3, 8 dc in same sp, *sk 2 dc, sc in next dc, (sk 2 dc, 7 dc in next dc, sk 2 dc, sc in next dc) 19 times, sk 2 dc, 9 dc in corner sp; rep from * around, ending without the last corner, join. Fasten off. (19 shells per side: 2 + 1 + 114 + 2 = 119 sts used)
Finishing
Weave in every tail on the WS through the solid sts only: the dc of the X arms, the frame or the lace center. Never weave a tail across an open window, because it will show through the mesh from the RS.
Lay the bedspread flat RS up on a clean sheet or on blocking mats. Mist it well, then pin the seam crossings in a straight grid first, and then pin out the tip of every scallop in the border. Gently pull the windows square with your fingers. Let it dry completely before you move it. Steam the cushion edges lightly so the shells lie flat.
Tips for Success
- Put a stitch marker in each corner ch-3 sp of the first few squares. After that the pattern of 3 dc, mesh, 2 dc is easy to see.
- Count the mesh on one side after each filet round. The X only stays straight if every side has the right number of windows.
- Make the lace centers in a batch (Rnds 1-5 for 10 squares), then finish them. It is faster and the centers come out the same size.
- Keep the ch-1 in the mesh the same size as the width of a dc. A tight ch-1 makes narrow windows and the square curls.
- Buy all the yarn from one dye lot. With a single color, even a small change in shade shows clearly across a big bed.
Common Mistakes to Avoid
- Starting a filet round in the wrong place. Always sl st into the corner sp before the ch 3; if you start one dc too early, the blocks shift and the X bends.
- Working 2 dc instead of 3 after the corner. “Dc in next 3 dc” makes the second block and the post after it; with only 2 dc the side is 2 sts short.
- Working into a ch-1 sp when the pattern says sk next st. In the mesh you skip the st below, whether it is a dc or a ch-1, and work the dc into the next dc.
- A wavy border. If Rnd 1 has the wrong count, the shells will not end at the corners. Check the dc2tog at every seam, then count Rnd 2 before you start the shells.
- Tight seams. Sl st joins that are tighter than the squares make ridges and pull the diamonds out of shape. Go up to a 4.5 mm hook for joining if needed.
Ways to Customize This Pattern
- Make the X arms thicker: work “dc in next 5 dc” after each corner and “dc in next 4 dc” before it, with 2 fewer mesh per side in every round, for 3 blocks at each end.
- Use cream or white cotton for a classic filet look, or dusty blue for a cool bedroom.
- Make a 2 x 2 table topper with the cushion border, or a 3 x 3 square throw for a chair.
- Alternate windowpane squares with solid squares (the cushion back square) for a bolder checkerboard of diamonds.
- Thread a narrow satin ribbon through the outer row of windows on each cushion for a soft, gift-ready finish.
Frequently asked questions
No. The square is worked in rounds and every filet round has the same written steps: 2 blocks at each corner and mesh in between. Only the mesh count changes, by 2 each round, and the X forms by itself.
Yes. Fine (#2) or sport cotton with a 3 mm hook gives a lighter, lacier bedspread. Each square will be about 24 cm, so a queen needs about 9 x 10 = 90 squares. Check the border counts again for your layout.
Cotton keeps the windows square and the blocks crisp after washing. Acrylic stretches and the mesh can lose its shape when the bedspread hangs over the side of the bed.
Yes. On Rnd 15, replace the middle sc of each corner and every sc along a joining side with a sl st into the matching sc of the square next to it. Join as you go saves time, but blocking each square first gives straighter X lines.
Wash it on a gentle cold cycle inside a large laundry bag, or by hand. Press out the water in a towel and dry it flat, pulling the windows and scallops back into shape while it is damp.