Lavender and Gold Spiral Medallion Crochet Bedspread
Advanced
For experienced crocheters who enjoy complex shaping, fine detail, and ambitious construction
Multi-Day Project
A rewarding 12+ hour journey — perfect for dedicated crafters who love detailed work.
Handmade Gift
A beautiful keepsake — free forever. Read online or print at home.
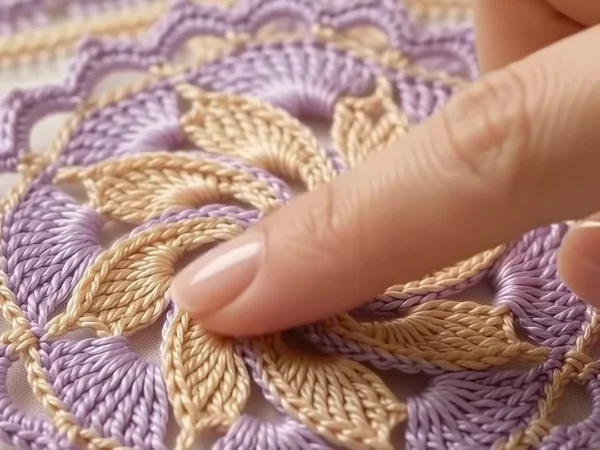
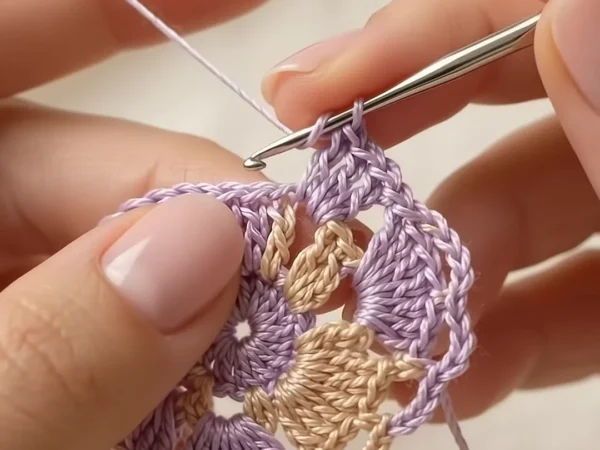 Magic ring & first rounds
 Building the shape
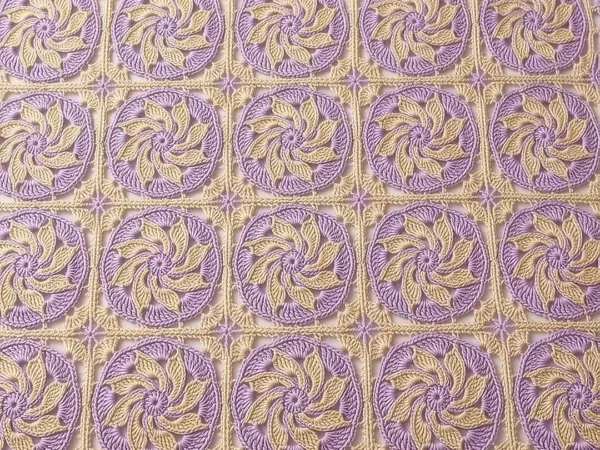 Assembly in progress
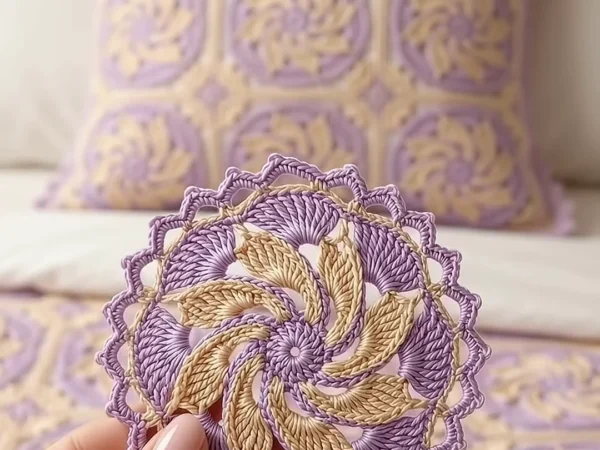 Finished & ready!
About This Lavender and Gold Spiral Medallion Crochet Bedspread
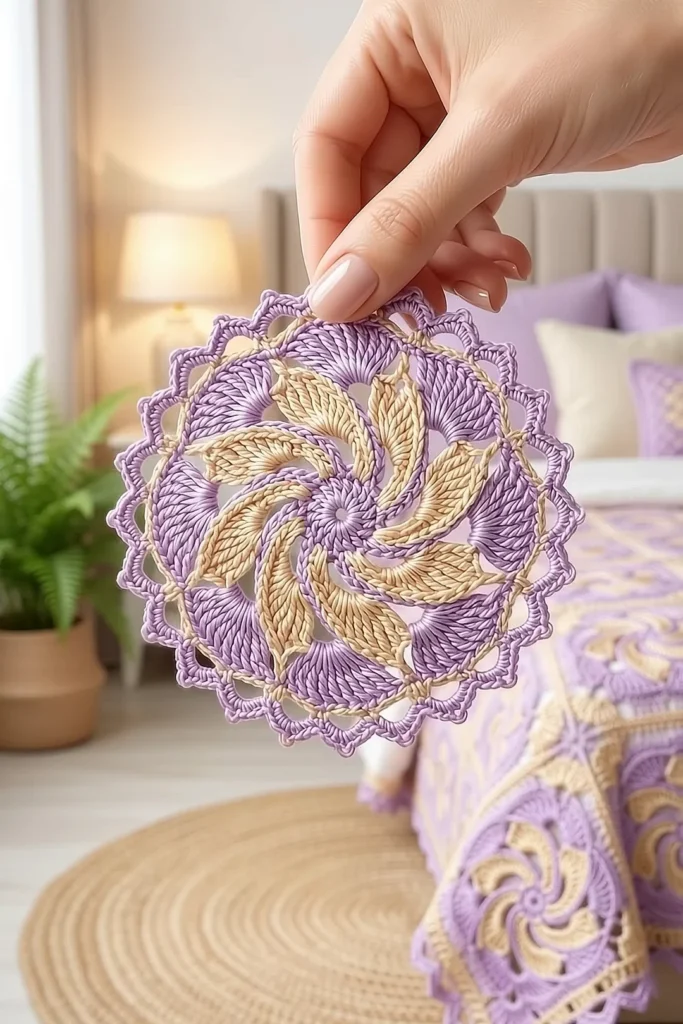
This lavender crochet bedspread pattern is built from round medallions with a spinning pinwheel in the middle: eight pointed gold leaves curve around a small lavender center, and lavender fans fill the gaps between them. A thin gold ring, a round of lavender shells and a pointed picot edge finish each circle, so every medallion looks like a little lace doily.
On the bedspread, each medallion is squared off with gold corners and joined in a grid. From a distance you see rows of lavender circles on a gold background, with a tiny lavender star stitched at every crossing. A scalloped lavender picot border goes around the whole bedspread, and a matching cushion uses nine smaller medallions made with finer cotton.
A queen bedspread takes about 110 to 120 hours and a throw about 52 to 58. One medallion with its gold corners takes about 55 minutes. This is an advanced project for a crocheter who is happy with tall stitches, chain spaces and careful counting, and who enjoys joining many small pieces into one big lace piece.
Materials
- DK weight cotton yarn, lavender about 2,350 m for a queen (12 balls of 100 g / 200 m), or 1,150 m for a throw (6 balls)
- DK weight cotton yarn, honey gold (light golden beige) about 2,800 m for a queen (14 balls), or 1,300 m for a throw (7 balls)
- 4-ply (fingering) cotton yarn, lavender about 250 m for the cushion
- 4-ply (fingering) cotton yarn, honey gold about 450 m for the cushion (front corners and the solid back)
- 3.5 mm (E-4) crochet hook for the bedspread medallions, joining and border
- 2.75 mm (C-2) crochet hook for the cushion
- 45 x 45 cm cushion form
- Stitch markers, rustproof blocking pins, tapestry needle and scissors
Abbreviations
MRmagic ringchchainsl stslip stitchscsingle crochethdchalf double crochetdcdouble crochettrtreble crochet (yarn over 2 times)trtrtriple treble (yarn over 4 times, then work the loops off 2 at a time)picotch 3, sl st in 3rd ch from hookspspaceskskipst(s)stitch(es)rndroundreprepeatRS / WSright side / wrong sideCenter and Pinwheel Leaves
- Rnd 1: with lavender and the 3.5 mm hook, MR, ch 1, 8 sc in ring, join with sl st to first sc. Pull the ring tight. (8 sc)
- Rnd 2: ch 3 (counts as dc), dc in same st, 2 dc in each remaining sc around, join with sl st to top of ch 3. Fasten off lavender. (16 dc)
- Rnd 3 (gold leaves): join gold with sl st in any dc. *Ch 13, sl st in 3rd ch from hook to make the tip loop. Now work back toward the center along the chain: sc in next ch, hdc in next ch, dc in next 2 ch, tr in next 3 ch, dc in next 2 ch, hdc in last ch. (10 sts on the leaf) Sl st in next dc of Rnd 2 to anchor the base of the leaf, then sl st in next dc of Rnd 2. Rep from * 7 more times, but at the end of the last leaf, sl st in the base dc and then in the first sl st of the rnd. Fasten off. (8 leaves; each leaf uses 2 dc of Rnd 2, 8 x 2 = 16)
- All the tall stitches sit on one side of each chain, so every leaf is wide on one side and leans the same way. With the RS facing, gently bend each leaf in the direction it leans. The eight leaves now form the pinwheel.
Lavender Fans, Gold Ring and Picot Edge
- Rnd 4: join lavender in the tip loop of any leaf. Ch 1, sc in same tip loop, ch 7, *sc in tip loop of next leaf, ch 7; rep from * 6 more times, join with sl st to first sc. (8 sc, 8 ch-7 arcs)
- Rnd 5 (fans): sl st in first ch-7 arc, ch 4 (counts as tr), 8 tr in same arc, *sc in next sc, 9 tr in next arc; rep from * 6 more times, sc in last sc, join with sl st to top of ch 4. Fasten off lavender. (72 tr + 8 sc = 80 sts; 8 fans)
- Rnd 6 (gold ring): join gold in the 5th (center) tr of any fan. Ch 1, sc in same st, sc in each st around, including each sc between the fans. Join with sl st to first sc. Fasten off gold. (80 sc)
- Rnd 7 (shells): join lavender in any sc. Ch 1, sc in same st, *sk 1 sc, 5 dc in next sc, sk 1 sc, sc in next sc; rep from * 18 more times, sk 1 sc, 5 dc in next sc, sk last sc, join with sl st to first sc. (20 shells, 20 sc; 20 x 4 = 80)
- Rnd 8 (picot edge): *sl st in next sc, sc in next dc, hdc in next dc, (dc, picot, dc) in center dc, hdc in next dc, sc in next dc; rep from * 19 more times, join with sl st to first sl st. Fasten off. (20 pointed scallops, 20 picots)
- For a single doily or a coaster, stop here and block the medallion to 17 cm round.
Gold Corners (squaring the medallion)
- Count the 20 picots of Rnd 8 and mark every 5th picot: picots 1, 6, 11 and 16 are the corners. Each side then has 4 picots between two corner picots.
- Rnd 9: join gold in a corner picot. Ch 6 (counts as trtr), (trtr, ch 3, 2 trtr) in same picot. *Ch 5, tr in next picot, ch 5, hdc in next picot, ch 5, hdc in next picot, ch 5, tr in next picot, ch 5, (2 trtr, ch 3, 2 trtr) in next corner picot; rep from * 2 more times, ch 5, tr in next picot, ch 5, hdc in next picot, ch 5, hdc in next picot, ch 5, tr in next picot, ch 5, join with sl st to top of ch 6. (each side between the corner ch-3 sps: 4 trtr, 2 tr, 2 hdc and five ch-5 sps = 33 sts; 4 + 2 + 2 + 25 = 33)
- Rnd 10: sl st in next trtr and in corner ch-3 sp. Ch 4 (counts as tr), (2 tr, ch 3, 3 tr) in same sp. *Dc in next 2 trtr, 5 dc in next ch-5 sp, dc in next tr, 5 dc in next ch-5 sp, dc in next hdc, 5 dc in next ch-5 sp, dc in next hdc, 5 dc in next ch-5 sp, dc in next tr, 5 dc in next ch-5 sp, dc in next 2 trtr, (3 tr, ch 3, 3 tr) in corner ch-3 sp; rep from * 2 more times, then work the last side the same way, ending with dc in last 2 trtr. Join with sl st to top of ch 4. (per side: 3 tr + 33 dc + 3 tr = 39 sts)
- Rnd 11: ch 1, sc in each st around, working 3 sc in each corner ch-3 sp. Join and fasten off. (39 sc per side + 3 sc in each corner = 168 sc)
- The tr at each corner of Rnd 10 builds extra height where the circle is farthest from the square edge, so the corners come out flat and sharp. Block the square to 22 x 22 cm.
Joining the Squares
- Layout: 9 x 10 = 90 squares for a queen (about 204 x 226 cm with the border), or 6 x 7 = 42 squares for a throw (about 138 x 160 cm). A single bed is 6 x 10 = 60 squares (about 138 x 226 cm).
- Lay out all the squares RS up. Check that every pinwheel spins the same way; a square that is WS up spins the other way.
- With gold and the 3.5 mm hook, hold two squares WS together. Sl st through the back loops of both layers from corner sc to corner sc. (43 sl st per side: the center corner sc, 41 sts along the side and the next center corner sc)
- Join all the horizontal seams first, then the vertical ones, working through all four corner sc at each crossing.
- Lavender stars: with lavender and a tapestry needle, stitch a small star at every place where four squares meet. Work 8 straight stitches, each about 1.5 cm long, from the crossing out along the seams and diagonals, then a French knot in the middle. A queen has 72 crossings (8 x 9) and a throw has 30 (5 x 6).
Scalloped Picot Border
- Count: n = the number of squares along a side. A queen has n = 9 on the short sides and n = 10 on the long sides; a throw has n = 6 and n = 7.
- Rnd 1: with lavender and the 3.5 mm hook, join in any corner sc of the bedspread. Ch 1, (sc, ch 2, sc) in same st, *sc in each st along the side, working 1 sc in each seam (the two joined corner sc count as 1 st), (sc, ch 2, sc) in next corner sc; rep from * 2 more times, sc in each st along the last side, join. (each side between the corner ch-2 sps has 42 x n + 1 sc: 379 and 421 sc for a queen, 253 and 295 sc for a throw)
- Rnd 2: sl st in corner ch-2 sp, ch 3 (counts as dc), 8 dc in same sp. *Sc in next sc, (sk 2 sc, 7 dc in next sc, sk 2 sc, sc in next sc) 7 x n times, 9 dc in next corner sp; rep from * 2 more times, then sc in next sc, (sk 2 sc, 7 dc in next sc, sk 2 sc, sc in next sc) 7 x n times along the last side, join with sl st to top of ch 3. (queen: 63 and 70 scallops per side; throw: 42 and 49; 1 + 6 x 7 x n = 42 x n + 1 sts used per side)
- Rnd 3: ch 1, sc in first 4 dc of the corner fan, (sc, picot, sc) in next dc, sc in next 4 dc. *(Sl st in next sc, sc in next 3 dc, [sc, picot, sc] in next dc, sc in next 3 dc) across to the next corner fan, sl st in next sc, sc in next 4 dc, (sc, picot, sc) in next dc, sc in next 4 dc; rep from * 2 more times, then work the scallops of the last side the same way, sl st in last sc and join to first sc. Fasten off. (one picot on every scallop and every corner fan)
Matching Cushion (9 small medallions)
- Small squares: with 4-ply cotton and the 2.75 mm hook, work Rnds 1 to 11 exactly as above. Make 9. Each square is about 15 x 15 cm.
- Front: join the squares 3 x 3 with gold sl st seams as for the bedspread, and stitch a lavender star at the 4 inner crossings. The front is about 45 x 45 cm.
- Back: with gold 4-ply and the 2.75 mm hook, ch 110. Row 1: dc in 4th ch from hook and in each ch across, turn. (108 dc, counting the skipped ch as 1 dc) Row 2: ch 3 (counts as dc), dc in each dc across, turn. (108 dc) Rep Row 2 until the back is the same size as the front, about 40 rows. Fasten off.
- Edge: hold the front and back WS together, front facing you. Work Border Rnd 1 with lavender through both layers, using n = 3, so each side has 127 sc between the corner ch-2 sps (42 x 3 + 1). Space the sts evenly along the back panel as you go. Before you close the 4th side, put in the cushion form.
- Work Border Rnds 2 and 3 on the front edge only, with 21 scallops per side (7 x 3). Fasten off.
Finishing
Weave in the ends as you finish each round, under the solid stitches of the same color: lavender ends into the fans and shells, gold ends into the leaves and the gold corners. Never weave a lavender end through the gold ring, because it will show on the RS.
Block every square before you join it. Pin it to 22 x 22 cm, mist it with water, and pin the picots of Rnd 8 out so the circle stays round inside the square. Bend each leaf gently in the direction it leans and let it dry flat.
After the border, lay the whole bedspread flat RS up, mist it again and pin out each picot of the border. Let it dry completely before you move it.
Tips for Success
- Work in batches: make all the centers and leaves (Rnds 1 to 3) first, then all the lavender rounds, then all the gold corners. You change color less often and your tension stays even.
- Put a marker in the first leaf of Rnd 3. It makes it easy to see when you have made 8 leaves.
- Count the picots after Rnd 8 every time. If you don’t have exactly 20, the corners of Rnd 9 will not land in the right place.
- Keep the ch-5 spaces of Rnd 9 relaxed. Tight chains pull the corners in and the square curls.
- Make one extra medallion and keep it as a test piece for washing and for checking the color of new yarn balls.
Common Mistakes to Avoid
- Leaves that point straight out. The tall sts must all go down the same side of the chain. If you work them on both sides, the leaf stands straight and the pinwheel is lost.
- The wrong number of leaves. Each leaf uses 2 dc of Rnd 2, so 16 dc give exactly 8 leaves. Count Rnd 2 before you join the gold.
- A shell round that does not close. Rnd 7 needs exactly 80 sc from Rnd 6. With 79 or 81 sc the last shell is squeezed or has a gap.
- Round corners. The trtr groups of Rnd 9 and the tr groups of Rnd 10 must sit in the corner spaces only. Working them on the sides makes the square bulge.
- Pinwheels that spin in different directions. Never turn a square over before joining; every square must be RS up.
Ways to Customize This Pattern
- Swap the colors: sage green with cream leaves, dusty blue with white leaves, or blush pink with gold for a softer bedroom.
- Use one color for the whole medallion and the corners for a white lace bedspread in the old style.
- Stop after Rnd 8 and join the round medallions by their picots for an open lace table runner or a set of doilies.
- Make the cushion with 16 small medallions (4 x 4) and a 2.25 mm hook for an even finer, more detailed look.
- Add a lavender bead or a French knot in the center of each medallion for a little extra texture.
Frequently asked questions
A queen needs 90 squares (9 x 10), which means 720 gold leaves. A throw needs 42 squares (6 x 7) and 336 leaves. The cushion needs 9 small squares and 72 leaves.
Yes. With 4-ply cotton and a 2.75 mm hook each square is about 15 cm, so you need about 14 x 15 = 210 squares for a queen. It looks finer and lacier, but it takes about twice as long.
The corners of a square are much farther from the circle than the sides. The very tall trtr at the corners, then tr in Rnd 10, fill that gap. The short hdc at the middle of each side keep the sides flat.
Yes. On Rnd 11 of each new square, replace the sc along one or two sides with sl st into the neighboring square. Work the lavender stars at the end, when all the squares are joined.
Wash it on a gentle cold cycle inside a large laundry bag and dry it flat, then pin the border picots out again. Wash a lavender and a gold scrap together first to check that the lavender does not bleed.