White Daisy Join-As-You-Go Crochet Bedspread
Advanced
For experienced crocheters who enjoy complex shaping, fine detail, and ambitious construction
Multi-Day Project
A rewarding 12+ hour journey — perfect for dedicated crafters who love detailed work.
Handmade Gift
A beautiful keepsake — free forever. Read online or print at home.
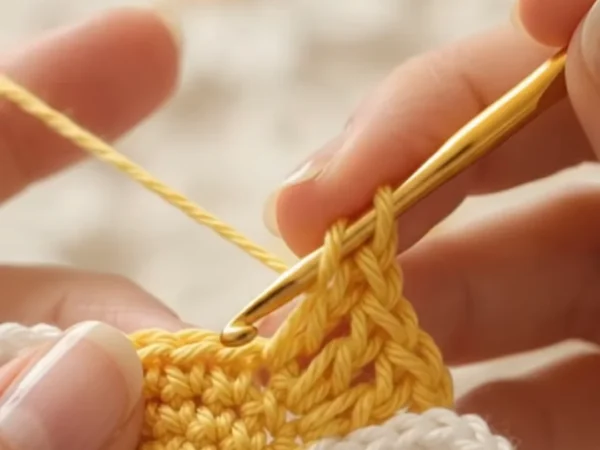 Magic ring & first rounds
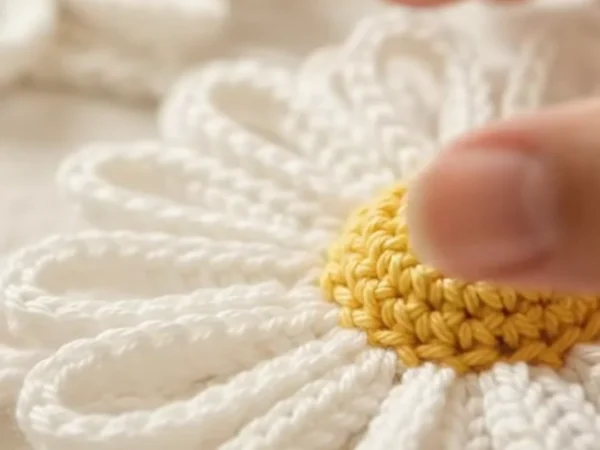 Building the shape
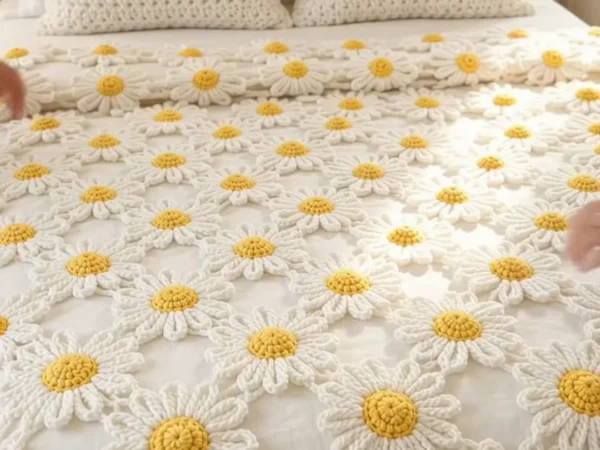 Assembly in progress
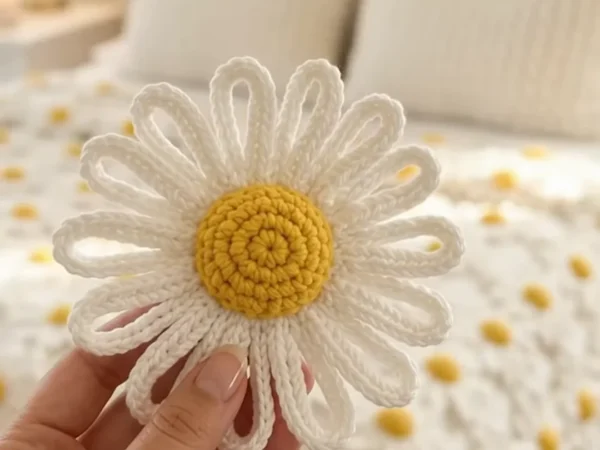 Finished & ready!
About This White Daisy Join-As-You-Go Crochet Bedspread
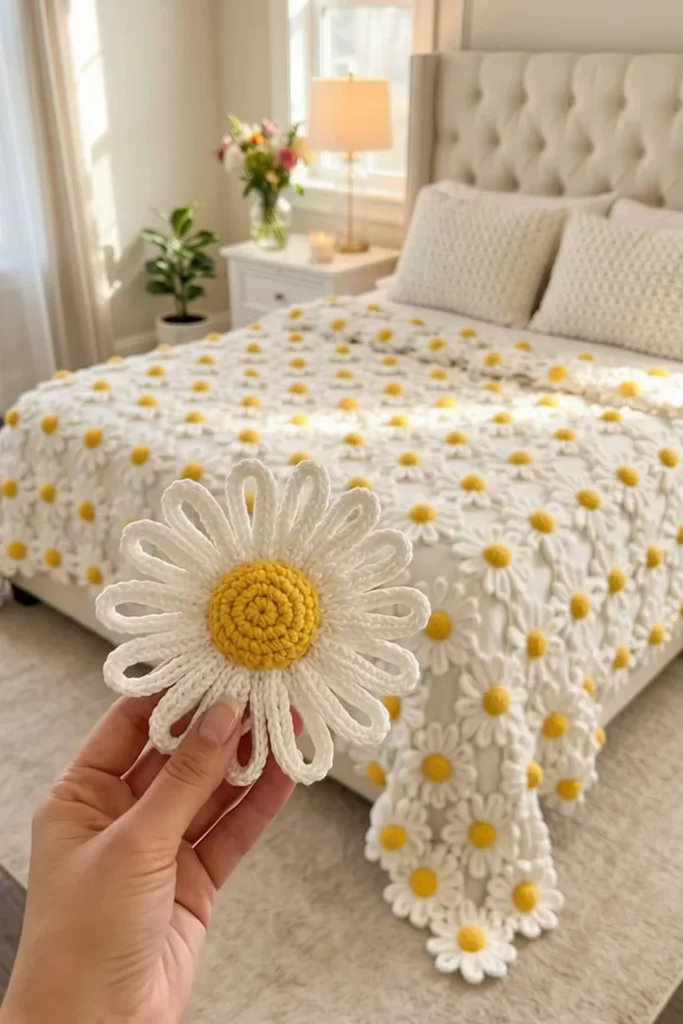
This join as you go daisy crochet blanket pattern makes a bedspread out of flowers and nothing else. There are no squares and no background circles behind the daisies. Each big white daisy has a golden yellow center and 18 long open loop petals, and the daisies hold on to each other only by the tips of their petals. On the bed it looks like a spring garden seen from above, with the white sheet showing through the small gaps.
Every daisy is one piece. You start with a slightly domed yellow center worked in a spiral, change to white for a thin ring, and then make the petals: each one is a long chain loop that you cover with single crochet, so it becomes a soft outlined petal with a hole in the middle. From the second daisy on, you join the petal tips to the daisies you already made while you work the last round. The daisies sit in offset rows, like a honeycomb, and a tiny white lace connector fills each small gap between three flowers. The petals of the outer daisies make the edge, so there is no border to add. A pair of textured white cushions completes the set.
A queen bedspread takes about 155 to 170 hours and a throw about 65 to 72 hours. One daisy takes about 45 minutes, and one lace connector about 4 minutes. This is an advanced pattern for a crocheter who can work in a spiral, count petals without losing track, and enjoys a long project made from many repeated pieces.
Materials
- DK weight cotton yarn, white about 4,100 m for a queen (21 balls of 100 g / 200 m), or 1,750 m for a throw (9 balls)
- DK weight cotton yarn, golden yellow about 1,300 m for a queen (7 balls), or 570 m for a throw (3 balls)
- DK weight cotton yarn, white, for two cushions about 1,450 m extra (8 balls)
- Two cushion inserts 40 x 60 cm
- 3.5 mm (E-4) crochet hook for the daisies and the lace connectors
- 4 mm (G-6) crochet hook for the cushions
- Locking stitch markers at least 6, to mark the spiral start and the joining petals
- Tapestry needle, scissors and rust-proof pins for blocking
Abbreviations
MRmagic ringchchainsl stslip stitchscsingle crochethdchalf double crochetdcdouble crochetBLOback loop onlytip spthe ch-3 space at the end of a petalspspaceskskipst(s)stitch(es)rndroundreprepeatRS / WSright side / wrong sideDaisy Center (golden yellow)
- The center is worked in a spiral. Do not join the rnds. Place a marker in the first st of each rnd and move it up as you go.
- Rnd 1: with yellow and the 3.5 mm hook, MR, 6 sc in ring. Pull the ring tight. (6 sts)
- Rnd 2: 2 sc in each st around. (12 sts)
- Rnd 3: *sc in next st, 2 sc in next st; rep from * 5 more times. (18 sts)
- Rnd 4: *sc in next 2 sts, 2 sc in next st; rep from * 5 more times. (24 sts)
- Rnd 5: *hdc in next 3 sts, 2 hdc in next st; rep from * 5 more times. (30 sts)
- Rnd 6: *hdc in next 4 sts, 2 hdc in next st; rep from * 5 more times. (36 sts) The taller hdc with only 6 increases makes the center rise into a low dome.
- Rnd 7: sc in each st around. (36 sts) This plain rnd turns the edge down a little, so the center stays raised. Sl st in the next st to smooth the step of the spiral and fasten off. Weave the tail into the yellow on the WS.
Daisy Petals (white)
- Rnd 8: with RS facing, join white with a sl st in the back loop of any st of Rnd 7. Ch 1, sc in BLO of the same st and in BLO of each st around, join with sl st to the first sc. (36 sc) The yellow front loops stay on the RS as a thin ridge around the center.
- Rnd 9 (petals): *ch 18, sl st in the same st to make a closed loop. Work into the ch-18 loop, over the chain: 9 sc, (sc, ch 3, sc) at the far end, 9 sc. Sl st in the same st at the base of the petal, then sl st in each of the next 2 sts; rep from * 17 more times. On the last rep, the second sl st lands in the base of the first petal. Fasten off. (18 petals; each petal has 20 sc and 1 tip sp)
- Check the math: each petal uses 2 sts of Rnd 8, and 18 x 2 = 36, so the petals go all the way around with no gap and no overlap.
- Push the sc close together along the chain as you work, so they cover it completely. The chain stays hidden inside and the middle of the petal stays open.
- Each petal is about 4.5 cm long and the full daisy is about 17 cm across. Make 1 daisy like this. All other daisies are joined while you work Rnd 9, as shown in the next section.
Joining the Daisies as You Go
- Joining petals: every third petal is a joining petal, so each daisy has 6 joining petals and 12 free petals. Between two joining petals there are always exactly 2 free petals. This is what keeps the daisies in perfect offset rows: the 6 joining petals point to the 6 neighbors around the daisy.
- Joining tip: when a petal must join a finished daisy, work it like this instead of the normal tip: 9 sc, (sc, ch 1, sl st in the tip sp of the petal on the finished daisy, ch 1, sc), 9 sc. (20 sc per petal, the same as before)
- Hold both daisies RS up. Join only to petal tips that point straight at the new daisy, and never join two neighboring petals of the same daisy to the same flower.
- Layout: the daisies sit in offset rows. Long rows have 12 daisies and short rows have 11. Each daisy of a short row sits in the dip between two daisies of the long row above. Rows go long, short, long, short and so on.
- Queen: 15 rows (8 long rows of 12 and 7 short rows of 11). (173 daisies; about 204 x 223 cm)
- Throw: 10 rows, alternating 5 long rows of 8 and 5 short rows of 7. (75 daisies; about 136 x 149 cm)
- Row 1: make the first daisy. Each new daisy in this row joins 1 petal to the daisy on its left. The 2 joining petals that face down will be joined by Row 2. The 2 that face up stay free and become part of the edge.
- Row 2 (short row): the first daisy joins 2 petals, one to each of the 2 daisies above it. Every other daisy in this row joins 3 petals: 1 to the daisy on its left and 1 to each of the 2 daisies above it.
- Row 3 (long row): the first daisy joins 1 petal to the first daisy of Row 2, above and to the right. The middle daisies join 3 petals each. The last daisy joins 2 petals: to the daisy on its left and to the last daisy of Row 2.
- Repeat Rows 2 and 3 to the end. Before you start a joining petal, lay the new daisy in place and count back: there must be 2 free petals between it and the last joined petal on the same daisy.
Lace Connectors (white)
- Between every 3 daisies that touch each other there is a small triangle gap. Six free petal tips point into it: 2 from each daisy. Fill each inside gap with one connector. Do not fill the half-open gaps along the edges of the bedspread.
- Rnd 1: with white and the 3.5 mm hook, MR, ch 1, 12 sc in ring, join with sl st to the first sc. Pull tight. (12 sc)
- Rnd 2: *ch 4, sl st in the tip sp of the next free petal in the gap, ch 4, sk next sc, sl st in next sc; rep from * 5 more times, going around the gap in order. The last sl st lands in the first sc. Fasten off. (6 joining arms, 2 sc of Rnd 1 for each arm)
- Queen: 14 pairs of rows x 21 gaps = 294 connectors. Throw: 9 pairs of rows x 13 gaps = 117 connectors.
- Make the connectors row by row, after each new row of daisies is finished, so the blanket is never too heavy to turn on your lap.
Matching Textured Cushions (make 2)
- Each cushion has 2 panels, a front and a back. Use white and the 4 mm hook. The texture is lemon peel stitch, a small bumpy pattern made of sc and dc.
- Foundation: ch 115.
- Row 1: sc in 2nd ch from hook, dc in next ch, *sc in next ch, dc in next ch; rep from * to the end. (114 sts: 57 sc and 57 dc)
- Row 2: ch 1, turn. *Sc in next st, dc in next st; rep from * to the end. Every sc now sits on a dc and every dc on a sc. (114 sts)
- Rows 3 to about 64: rep Row 2 until the panel is 40 cm tall. Fasten off. (114 sts per row; the panel is about 60 x 40 cm)
- Make a second panel the same. Hold both panels WS together. Join white in a corner and sc through both layers around 3 sides, working 1 sc in each st along the long sides, 1 sc in each row end along the short sides and 3 sc in each corner st. Put in the cushion insert, then sc the last side closed and join. (about 114 sc on each long side, 64 on each short side, plus 3 sc in each corner)
Finishing
Weave in all ends as you go, each one into its own color: yellow into the back of the center and white into Rnd 8 or along the sc of a petal. Do not carry a white tail across a petal hole, because it will show from both sides.
Lay the bedspread flat on towels, RS up, and mist it with water. Shape each petal with your fingers so it is straight and its hole is open, and pin the outer petals so the edge forms even scallops. Press the domed centers gently from below so they stay round; never flatten them from the top. Let everything dry completely before you lift it.
Tips for Success
- Work all the yellow centers for one row before you pick up the white. Changing yarn once per row is much faster than once per daisy.
- Put a locking marker on each of the 6 joining petals of the daisies at the edge of your work. Then you never have to count petals to find the right tip.
- Keep the chain for each petal at the same tension. A loose chain makes a long, floppy petal and the rows will stop lining up.
- Lay the work on a bed or the floor after each row and check that the short rows sit in the dips of the long rows.
- Use the same brand and dye lot of white for the whole project. Two whites side by side look very different on a white sheet.
Common Mistakes to Avoid
- Too many or too few petals. Rnd 8 must have exactly 36 sts and each petal uses 2 of them. Count Rnd 8 before you start the petals.
- Joining the wrong petal. If there are not exactly 2 free petals between two joins, the daisy turns a little and the whole row slowly bends.
- A flat center. Rnds 5 and 6 must be hdc with only 6 increases each. Sc in those rnds makes a flat disc with no dome.
- Petals with no hole. If you work too many sc in the loop, they pile up and close the middle. Work exactly 9 sc on each side and push them along.
- Pulling the connector arms tight. Ch 4 is enough to reach the petal tips; if you pull hard, the gap closes and the daisies around it pucker.
Ways to Customize This Pattern
- Use pale pink or lilac petals with the same golden centers for a softer flower garden.
- Mix in a few daisies with orange centers, placed at random, so the bedspread looks more like a real field.
- Make a table runner of 2 long rows of 6 daisies and 1 short row of 5 in between.
- Leave out the connectors for a lighter, more open lace that works well as a summer throw over a colored sheet.
- Sew 7 daisies, one in the middle and six around it, onto the front of each cushion instead of the plain lemon peel panel.
Frequently asked questions
A queen bedspread of 15 rows needs 173 daisies and 294 lace connectors. A throw of 10 rows needs 75 daisies and 117 connectors. For other sizes, plan about 17 cm of width for each daisy in a long row and about 14.7 cm of length for each row.
Each daisy has 6 neighbors in the offset rows. With 18 petals, every third petal points to a neighbor and 2 free petals sit in each gap. With 16 petals the joins would not fall evenly and the rows would twist.
Yes, but you will need to sew the petal tips together with a tapestry needle, which is slower and less neat. Joining as you go on Rnd 9 gives a firm join with no extra ends.
The sc cover makes each petal firm, so they keep their shape and do not snag easily. Keep the bedspread away from pets with long claws and from rough Velcro fasteners.
Wash it on a gentle cold cycle inside a large laundry bag, or by hand in the bath. Wash a scrap of the yellow with white first to check it does not bleed. Dry it flat and reshape the petals while it is damp.