Burgundy and Cream Granny Diamond Bedspread
Advanced
For experienced crocheters who enjoy complex shaping, fine detail, and ambitious construction
Multi-Day Project
A rewarding 12+ hour journey — perfect for dedicated crafters who love detailed work.
Handmade Gift
A beautiful keepsake — free forever. Read online or print at home.
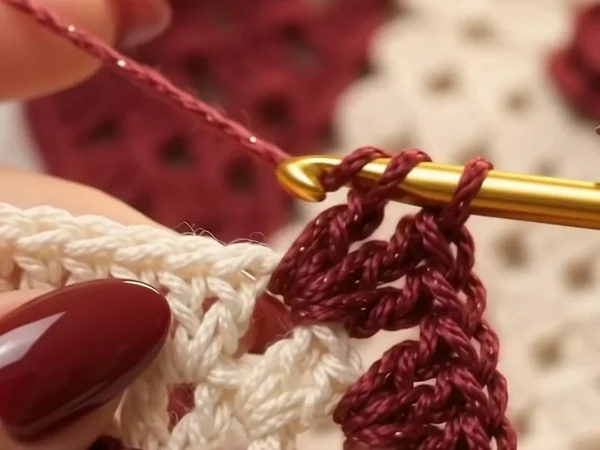 Magic ring & first rounds
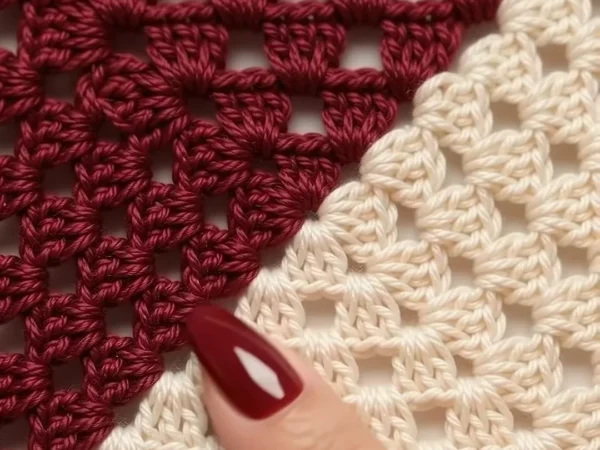 Building the shape
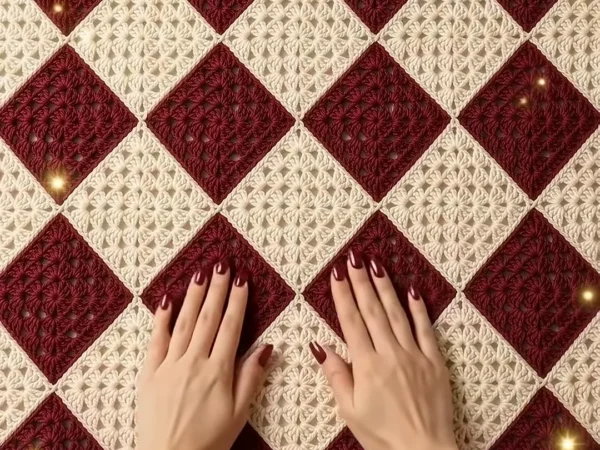 Assembly in progress
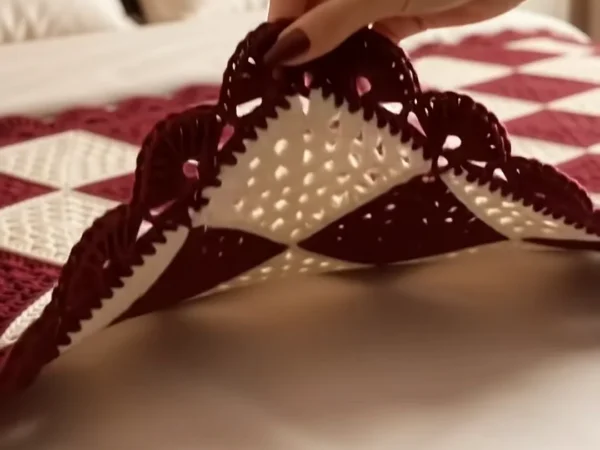 Finished & ready!
About This Burgundy and Cream Granny Diamond Bedspread
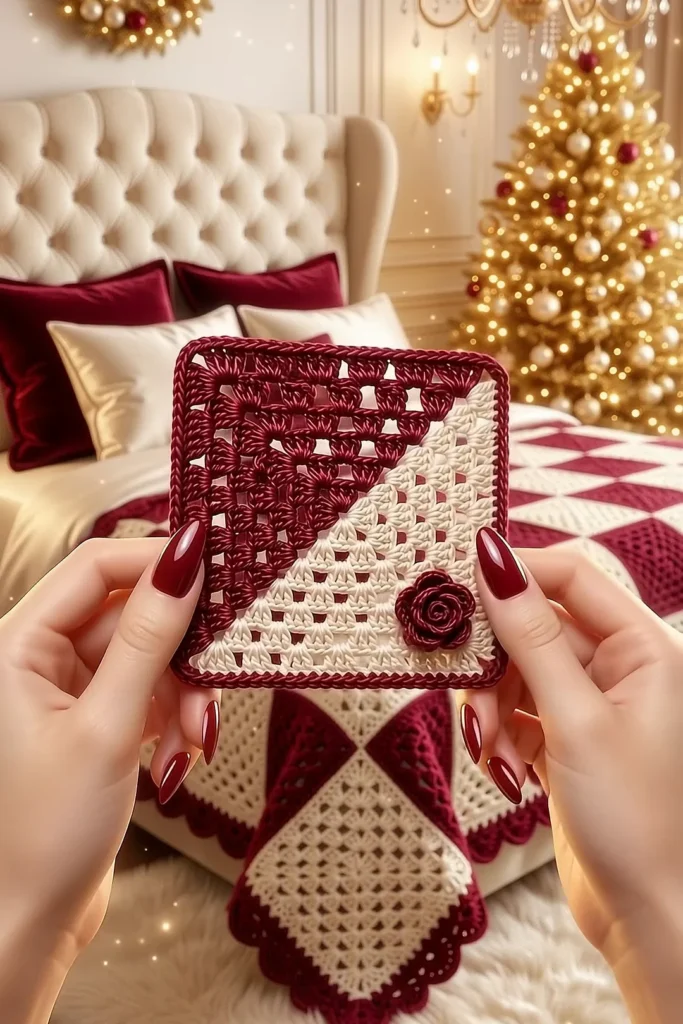
Every square in this burgundy granny square blanket pattern is split from corner to corner: one half is burgundy granny clusters, the other half is cream granny clusters, and a burgundy frame holds them together. When you turn the squares in groups of four, the burgundy halves meet in the middle and make big diamonds, and the cream halves make cream diamonds between them. The whole bed turns into a soft harlequin checkerboard, finished with a scalloped burgundy shell edge with little picots.
The square is not worked in rounds. You start at one corner and work diagonal granny rows: in burgundy each row gets one cluster longer, and after the long middle row you switch to cream and each row gets one cluster shorter. So the open granny texture runs over both halves, and the color line stays sharp and straight. On some squares a small rolled burgundy rosette sits on the cream half, close to the corner, like a little surprise in the pattern.
A queen bedspread takes about 120 to 130 hours and a throw about 65 to 72 hours. One square with its border takes about 70 minutes, and a rosette about 15 minutes. This is an advanced project for a crocheter who knows the granny cluster well and is happy to count clusters, plan a layout and finish a long border.
Materials
- Worsted weight acrylic yarn, burgundy about 2,800 m for a queen (16 skeins of 100 g / 180 m), or 1,550 m for a throw (9 skeins)
- Worsted weight acrylic yarn, cream about 1,100 m for a queen (7 skeins of 100 g / 180 m), or 580 m for a throw (4 skeins)
- 5 mm (H-8) crochet hook for the squares, joining and border
- 4 mm (G-6) crochet hook for the rosettes, so they stay firm
- Stitch markers to mark corner A and the first cluster of each row
- Blocking mats and rust-proof pins or a 22 cm square template
- Tapestry needle and scissors
Abbreviations
MRmagic ringchchainsl stslip stitchscsingle crochetsc2togsingle crochet 2 stitches together (1 st decreased)hdchalf double crochetdcdouble crochetclgranny cluster: 3 dc worked in the same space or stitch (a ch 3 plus 2 dc also counts as 1 cl)picot scsc, ch 3, sl st in the top of the sc just madespspaceskskipst(s)stitch(es)rndroundreprepeatRS / WSright side / wrong sideBurgundy Granny Half (make 80 squares for a queen, 42 for a throw)
- Corners: the corner where you start is corner A. The two ends of the long Row 11 are corners B and D. The last cream cluster sits at corner C, opposite corner A. Put a marker at corner A so you can find it later.
- Row 1: with burgundy and the 5 mm hook, MR, ch 3 (counts as dc), 2 dc in ring. Pull the ring tight. (1 cl)
- Row 2: ch 3 (counts as dc), turn, 2 dc in first dc (at the base of the ch 3), ch 1, sk next dc, 3 dc in top of turning ch. (2 cl, 1 ch-1 sp)
- Row 3: ch 3, turn, 2 dc in first dc, *ch 1, 3 dc in next ch-1 sp; rep from * across, ch 1, 3 dc in top of turning ch. (3 cl, 2 ch-1 sps)
- Rows 4-11: rep Row 3. Each row has 1 more cl and 1 more ch-1 sp than the row before. (Row 4: 4 cl, Row 5: 5, Row 6: 6, Row 7: 7, Row 8: 8, Row 9: 9, Row 10: 10, Row 11: 11 cl and 10 ch-1 sps)
- Row 11 is the diagonal of the square, from corner B to corner D. Fasten off burgundy with a 15 cm tail.
Cream Granny Half
- Each cream row works a cl only in the ch-1 sps of the row below, so it has 1 cl less than the row before. The end clusters are left unworked.
- Row 12: turn the square. With cream, join with a sl st in the first ch-1 sp of Row 11 (sk the end cl). Ch 3 (counts as dc), 2 dc in same sp, *ch 1, 3 dc in next ch-1 sp; rep from * across to the last ch-1 sp. Leave the last cl unworked. (10 cl, 9 ch-1 sps)
- Row 13: turn, sl st in each of the first 3 dc and in the next ch-1 sp, ch 3, 2 dc in same sp, *ch 1, 3 dc in next ch-1 sp; rep from * across to the last ch-1 sp. Leave the last cl unworked. (9 cl, 8 ch-1 sps)
- Rows 14-21: rep Row 13. Each row has 1 cl less. (Row 14: 8 cl, Row 15: 7, Row 16: 6, Row 17: 5, Row 18: 4, Row 19: 3, Row 20: 2, Row 21: 1 cl)
- Row 21 is a single cl and sits at corner C. Fasten off cream with a 15 cm tail.
- Because the cream clusters sit in the burgundy spaces, the granny texture flows over the color line without a gap.
Burgundy Square Border
- Each side of the square has 11 row ends: 1 at each corner and 9 in between. Work 3 sc in the side of each of the 9 middle row ends.
- Corners: at corner A, work 2 sc in the side of the ch 3 of Row 1, ch 2, 2 sc in the side of the last dc of Row 1. At corners B and D, work (2 sc, ch 2, 2 sc) in the top of the outermost st of Row 11. At corner C, work (2 sc, ch 2, 2 sc) in the top of the middle dc of Row 21.
- Rnd 1: with RS facing, join burgundy at corner A and work around the whole square as above. Join with a sl st to the first sc. (31 sc on each side: 2 + 27 + 2, plus 4 corner ch-2 sps; 124 sc)
- Rnd 2: ch 2 (does not count as a st), hdc in each sc around, and (hdc, ch 2, hdc) in each corner ch-2 sp. Join and fasten off. (33 hdc on each side; 132 hdc)
- Weave in the cream tail along the cream sc of the border and the burgundy tails in the burgundy half. Block the square to 22 x 22 cm.
Rolled Rosettes (make 20 for a queen, 12 for a throw)
- Row 1: with burgundy and the 4 mm hook, ch 25, sc in 2nd ch from hook and in each ch across. (24 sc)
- Row 2 (small petals): ch 1, turn, *5 hdc in next sc, sl st in next sc; rep from * 3 more times. (4 small petals, 8 sc used)
- Row 2 continued (middle petals): *5 dc in next sc, sl st in next sc; rep from * 3 more times. (4 middle petals, 16 sc used)
- Row 2 continued (outer petals): *7 dc in next sc, sl st in next sc; rep from * 3 more times. Fasten off with a 30 cm tail. (4 outer petals, all 24 sc used, 12 petals in total)
- Roll the strip up tightly, starting at the small petals, with Row 1 at the bottom. Pin the roll and sew through all the layers at the base with the tail, so it stays round. The rosette is about 4.5 cm across.
- Sew one rosette to the cream half of each accent square (see the layout below), about 5 cm in from corner C, on the line between corner C and corner A. Sew through the base only, so the petals stay free and 3D.
Diamond Layout and Joining
- Sizes: 8 squares across and 10 down = 80 squares for a queen (about 185 x 229 cm with the border). 6 across and 7 down = 42 squares for a throw (about 141 x 163 cm). Number the rows from the top and the columns from the left.
- Turn each square so its corner A points like this: odd row and odd column, corner A to the bottom right; odd row and even column, corner A to the bottom left; even row and odd column, corner A to the top right; even row and even column, corner A to the top left.
- In every block of 2 x 2 squares, the four corners A now meet in the middle. The four burgundy halves make one big burgundy diamond, and the cream halves of four blocks meet to make a cream diamond. This is the harlequin layout from the photos.
- Accent squares: the squares in an odd row and an odd column carry the rosette. That is 20 squares for a queen (5 rows x 4 columns) and 12 for a throw (4 rows x 3 columns). Their corner C points to the top left.
- Lay out all the squares on the floor and take a photo before you join, so you can follow it.
- Join with burgundy and the 5 mm hook: hold two squares RS together and work through the back loops of both squares. Sl st in the corner sp, sl st in each of the 33 pairs of hdc, sl st in the next corner sp. (35 sl st per seam) The seam sits on the WS and the front stays flat.
- Join all the horizontal seams first, then all the vertical seams. At every crossing, catch all four corner sps so there is no hole.
Scalloped Shell Border with Picots
- Rnd 1: with burgundy and the 5 mm hook, join with a sl st in any outer corner sp. Ch 1, 3 sc in same sp, *sc in each hdc of the square, sc in the corner sp of this square, sc in the corner sp of the next square; rep across the side, then sc in each hdc of the last square, 3 sc in the outer corner sp; rep from * around, leaving out the last 3 sc. Join to the first sc. (35 sc per square along each side, not counting the center sc of each corner: queen 280 and 350, throw 210 and 245)
- Rnd 2: ch 1, sc in each sc around and 3 sc in the center sc of each corner. On the way, fix the counts so the shells fit: queen short sides, 1 sc2tog in the middle (281); queen long sides, 2 sc in the middle st (353); throw short sides, 3 sc2tog spread out (209); throw long sides, 2 sc2tog spread out (245). Join. (Each side, not counting the corner center sts, is now 5 plus a multiple of 6)
- Rnd 3 (shells): sl st in the next sc, which is the center sc of a corner. Ch 3 (counts as dc), 8 dc in same st. *Sk 2 sts, sc in next st, sk 2 sts, (7 dc in next st, sk 2 sts, sc in next st, sk 2 sts) across to the next corner center st, 9 dc in the corner center st; rep from * around, ending the last side at the first corner. Join to the top of the ch 3. (Shells per side: queen 46 on the short sides and 58 on the long sides; throw 34 and 40; plus a 9-dc shell in each corner)
- Rnd 4 (picots): ch 1, sc in the same st as the join and in the next 3 dc, picot sc in next dc, sc in next 4 dc, sl st in next sc. *For each 7-dc shell: sc in next 3 dc, picot sc in next dc, sc in next 3 dc, sl st in next sc. At each corner shell: sc in next 4 dc, picot sc in next dc, sc in next 4 dc, sl st in next sc. Rep from * around. Join and fasten off. (1 picot on top of every shell)
Finishing
Weave in all the joining and border tails on the WS. Hide burgundy tails in the burgundy clusters and the border, and cream tails only in the cream clusters, because a dark tail shows through the open granny spaces of the cream half.
Lay the bedspread flat RS up, mist it with water and pin out every scallop with one pin through each picot. Check with a long ruler that the diamond points line up across the bed. Let it dry fully, then fluff each rosette with your fingers. Do not press the rosettes flat.
Tips for Success
- Count the clusters at the end of every row: they go up by 1 in burgundy (1 to 11) and down by 1 in cream (10 to 1). A wrong number shows at once.
- Make all the burgundy halves first, then add all the cream halves, then all the borders. Working in batches makes each rule automatic.
- Keep the ch-1 sps relaxed. Tight spaces pull the cream half in and bend the color line.
- Write the corner A direction on a small paper tag for each square in your layout photo before you join.
- Make the rosettes with the smaller hook and roll them tightly. A loose roll opens up and looks like a flat spiral.
Common Mistakes to Avoid
- Working a cluster in the end cluster of a cream row. The cream rows only use the ch-1 sps, so the end cl is always left unworked. Otherwise the cream half will not shrink.
- Joining cream on the wrong row. The color change comes after Row 11, the row with 11 clusters. Change too early and the line will not reach the corners.
- A wavy square border. Work exactly 3 sc in each middle row end and check for 31 sc per side before you start Rnd 2.
- Turning a square the wrong way. One wrong square breaks a diamond. Check your layout photo before every seam.
- Shells that do not fit at the corners. Do the count fixes in Rnd 2 of the border; skipping them leaves a crowded or stretched corner shell.
Ways to Customize This Pattern
- Change the colors: forest green and ivory, navy and white, or dusty pink and gray all make strong diamonds.
- Use a third color for the square border, for example gold, so every square gets a thin outline inside the diamonds.
- Put a rosette on every square for a richer look, or leave them off for a quicker, simpler bedspread.
- Make a cushion from 4 squares turned with corners A in the middle: one burgundy diamond, framed by Rnds 1-4 of the shell border.
- Turn all the squares the same way instead of in blocks to get rows of zigzag triangles across the bed.
Frequently asked questions
The long diagonal row has to belong to one color, and here it is burgundy. The cream half has 10 rows and the burgundy half 11, but the diagonal row sits right on the center line, so after blocking the two halves look the same size.
Yes. Use a 4 mm hook for the squares and a 3.5 mm hook for the rosettes. Your square will be about 18 cm, so for a queen you need about 10 x 12 = 120 squares. Do the border count fixes again for the new number of squares.
One for each accent square: 20 for the queen and 12 for the throw. Each rosette uses about 4.5 m of burgundy yarn, so one extra skein is plenty if you want a rosette on more squares.
Yes. Work Rnd 2 of the square border on the new square and sl st into the matching hdc of the finished square in place of every second hdc. Sew on the rosettes before you join, because they are hard to place on a big, heavy blanket.
Acrylic can go in the machine on a gentle cool cycle inside a large laundry bag. Dry it flat, then pin the scallops again if they curl. Test a burgundy scrap with a cream scrap first to make sure the red color does not run.