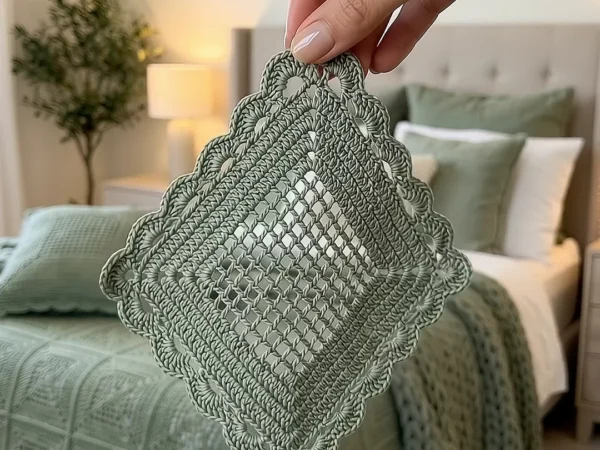
Daisy Hexagon Crochet Blanket
Intermediate
For crocheters comfortable with the basics, ready to try new shaping and assembly techniques
Weekend Project
A satisfying weekend make — start Friday, finish Sunday, enjoy forever.
Handmade Gift
A beautiful keepsake — free forever. Read online or print at home.
 Magic ring & first rounds
 Building the shape
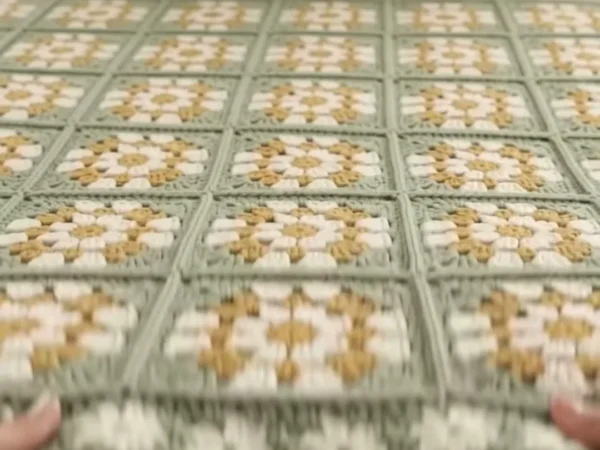
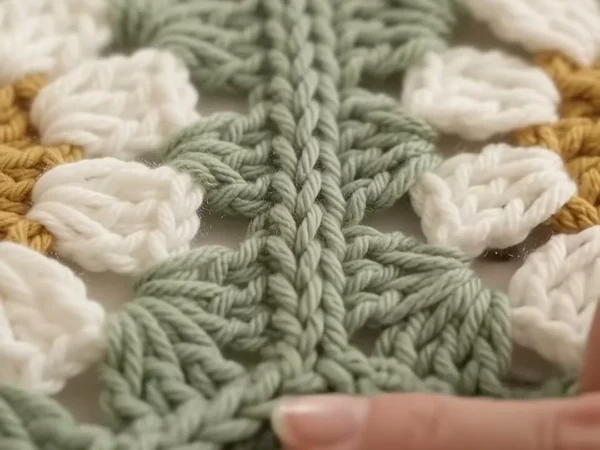 Assembly in progress
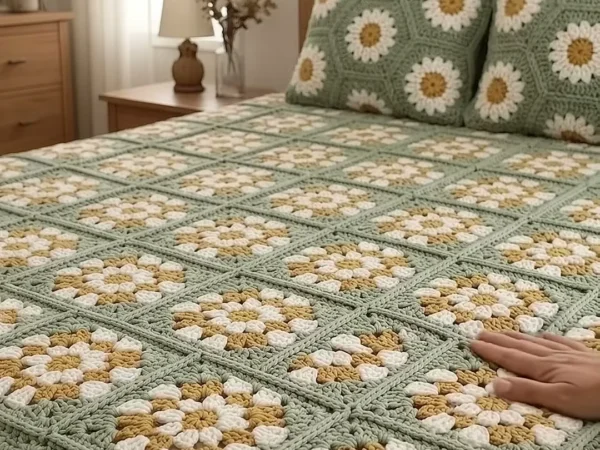 Finished & ready!
About This Daisy Hexagon Crochet Blanket
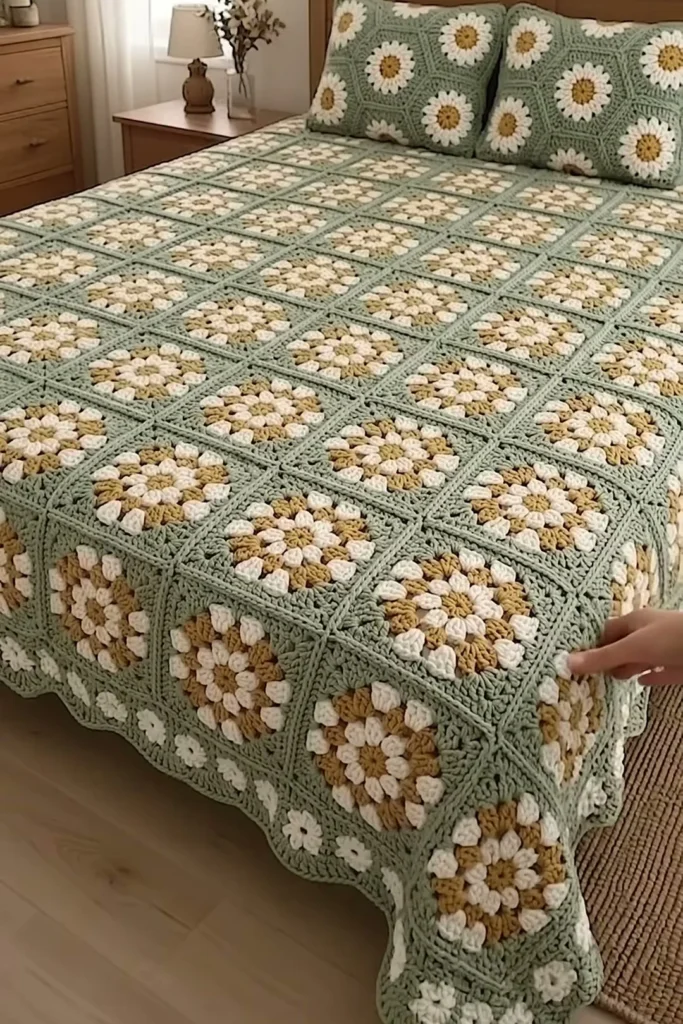
This daisy hexagon crochet blanket pattern covers a whole bed in happy little flowers: sage green hexagons, each with a mustard yellow center and a ring of puffy white bobble petals. The hexagons fit together like a honeycomb, raised seams frame every daisy, and a border with a band of tiny white flowers and a wavy scalloped edge finishes the set.
Every hexagon uses the same seven rounds, so after two or three you will barely need to look at the pattern. The petals are bobbles worked into the second color round, which makes them stand up off the blanket instead of looking printed on. Half-hexagons fill the gaps along the long sides so the edges come out straight before the border goes on.
A queen bedspread takes about 60 to 80 hours, and a sofa throw about 25 to 30. Each hexagon takes around 25 minutes. The pattern suits a crocheter who is comfortable with double crochet and color changes and is ready to try bobble stitches.
Materials
- Worsted weight yarn, sage green about 5,200 m for a bedspread (26 skeins of 100 g / 200 m), or 2,200 m for a throw (11 skeins)
- Worsted weight yarn, white about 900 m for a bedspread (5 skeins), or 400 m for a throw (2 skeins)
- Worsted weight yarn, mustard yellow about 600 m for a bedspread (3 skeins), or 260 m for a throw (2 skeins)
- 5 mm (H-8) crochet hook for the hexagons, joining and border
- Stitch markers at least 6, to mark the corners
- Blocking mats and rust-proof pins
- Tapestry needle and scissors
Abbreviations
MRmagic ringchchainsl stslip stitchscsingle crochetdcdouble crochetbobble4 dc worked in the same st, leaving the last loop of each on the hook, then yarn over and pull through all 5 loopspuff3 dc worked in the same st and closed together like a bobble (border flowers)BLOback loop onlyspspaceskskipst(s)stitch(es)rndroundreprepeatRS / WSright side / wrong sideHow the Daisy Hexagon Works
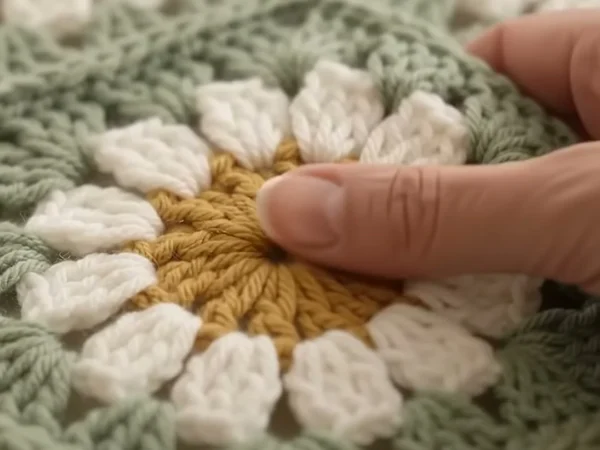
The hexagon starts as a circle. Rounds 1 and 2 make a flat mustard disc of 24 stitches, and Round 3 places 12 white bobbles on it with a ch 2 between each, so the petals have room to puff up instead of crowding together.
Round 4 is the bridge from circle to hexagon. The 3-dc groups in the 12 ch-2 spaces make a round again, and Round 5 turns every second space into a corner with (3 dc, ch 2, 3 dc). From then on you have 6 straight sides that grow by the same number of stitches each round.
The raised seams come from joining with slip stitches through the back loops with the wrong sides together. The front loops of both hexagons stay on top and form a little braid, which frames every daisy like the lines of a honeycomb.
Sizes and How Many Hexagons
- Each hexagon measures 20 cm from flat side to flat side and about 23 cm from point to point.
- Cushion front: 7 hexagons (1 in the middle and 6 around it), about 60 cm across.
- Baby blanket: 19 hexagons and 4 half hexagons, about 80 x 90 cm.
- Throw: 59 hexagons and 8 half hexagons, about 140 x 160 cm.
- Queen bedspread: 147 hexagons and 14 half hexagons, about 220 x 250 cm.
- Yarn per hexagon, to plan any size: about 30 m sage green, 6 m white and 4 m mustard. A half hexagon uses about 12 m of sage.
Daisy Hexagon (make 147 for a bedspread, 59 for a throw)
- Rnd 1: with mustard and 5 mm hook, MR, ch 2 (does not count as a st), 12 dc in ring, join with sl st to first dc. Pull the ring tight. (12 sts)
- Rnd 2: ch 2, 2 dc in each st around, join. Fasten off. (24 sts)
- Rnd 3 (petals): join white in any st. Ch 2, *bobble in next st, ch 2, sk next st; rep from * 11 more times, join with sl st to top of first bobble. Fasten off. (12 bobbles, 12 ch-2 sps) Push every bobble to the RS.
- Rnd 4: join sage green in any ch-2 sp. Ch 3 (counts as dc here and throughout), 2 dc in same sp, ch 1, *3 dc in next ch-2 sp, ch 1; rep from * 10 more times, join with sl st to top of ch 3. (36 dc, 12 ch-1 sps)
- Rnd 5: sl st in next 2 dc and in next ch-1 sp, ch 3, (2 dc, ch 2, 3 dc) in same sp, ch 1, 3 dc in next ch-1 sp, ch 1, *(3 dc, ch 2, 3 dc) in next ch-1 sp, ch 1, 3 dc in next ch-1 sp, ch 1; rep from * 4 more times, join. (54 dc, 6 corner ch-2 sps) The piece is now a hexagon; mark each corner sp.
- Rnd 6: ch 3, dc in each dc and each ch-1 sp around, working (2 dc, ch 2, 2 dc) in each corner sp, join. (90 dc: 15 per side)
- Rnd 7: ch 1, sc in each st around, working (sc, ch 2, sc) in each corner sp, join. Fasten off. (102 sc: 17 per side)
- Weave in the ends and block the hexagon to 20 cm flat side to flat side.
Half Hexagon (make 14 for a bedspread, 8 for a throw)
- Worked in rows in sage green only. Turn at the end of each row.
- Row 1: MR, ch 3 (counts as dc), 6 dc in ring. Do not join. (7 sts)
- Row 2: ch 3, dc in first st, 2 dc in each st across. (14 sts)
- Row 3: ch 3, *2 dc in next st, dc in next st; rep from * 5 more times, 2 dc in last st. (21 sts)
- Row 4: ch 3, dc in first st, dc in next 5 sts, (2 dc, ch 2, 2 dc) in next st, dc in next 7 sts, (2 dc, ch 2, 2 dc) in next st, dc in next 5 sts, 2 dc in last st. (2 corners; sides of 9, 11 and 9 dc)
- Row 5: ch 3, dc in first st, dc in each st to corner, (2 dc, ch 2, 2 dc) in each corner sp, dc in each st to last st, 2 dc in last st. (sides of 12, 15 and 12 dc)
- Row 6: ch 1, 2 sc in first st, sc in each st working (sc, ch 2, sc) in each corner sp, 2 sc in last st, then sc evenly along the flat edge, about 2 sc per row end. Fasten off. (slanted sides of 14, 17 and 14 sc)
- The middle side matches one side of a full hexagon. Blocking evens out the two outer sides.
Joining the Hexagons
- Layout for a throw (about 140 x 160 cm): 9 rows, alternating 7 and 6 hexagons. Layout for a bedspread (about 220 x 250 cm): 14 rows, alternating 11 and 10 hexagons. Place a half hexagon at each end of the shorter rows.
- Join method: hold two hexagons WS together with the edges matched. With sage green and 5 mm hook, sl st through the back loops of both pieces in each matching st, starting and ending in the corner ch-2 sps. (19 sl st per side, including both corners) This leaves a raised ridge on the RS.
- Join the hexagons into rows first, then join the rows to each other.
- Where three hexagons meet, work through all three corner sps so no gap is left.
- Keep the sl sts at an even, medium tension. Tight sts pucker the seam; loose ones make it flop over.
Flower Border
- Rnd 1: with sage green, RS facing, join in any corner. Ch 1, sc evenly around the whole blanket: sc in each st, 2 sc in each seam and 3 sc in each outer corner. Join.
- Rnd 2: ch 2 (does not count as a st), dc in each st around, working 3 dc in each corner st. Join. Fasten off. Each side needs a multiple of 4 sts; skip or add a st near the corners to get there.
- Rnd 3: join white. Ch 1, *sc in next st, ch 1, sk next st, (puff, ch 2, puff, ch 2, puff) in next st, ch 1, sk next st; rep from * around, join. Fasten off. (1 tiny flower every 4 sts)
- Rnd 4: join sage green in a sc between two flowers. Ch 1, *sc in sc, 2 sc in next ch-1 sp, 2 sc in each of the 2 ch-2 sps, 2 sc in next ch-1 sp; rep from * around, join. (9 sc per flower) Each side needs a multiple of 6 sts for the scallops; skip 1 or 2 sts near the corners if needed.
- Rnd 5: ch 1, sc in first st, *sk 2 sts, 6 dc in next st, sk 2 sts, sc in next st; rep from * around, join. Fasten off. (1 scallop every 6 sts)
- The border is about 8 cm wide.
Matching Daisy Pillow Covers (make 2)
- Front: join 3 rows of hexagons, with 4, 3 and 4 hexagons (11 in total), using the raised ridge join.
- Fill the gaps along the long sides with 4 half hexagons, so the front is a rectangle of about 50 x 70 cm.
- Edge: with sage green, work 1 rnd of sc around the front, 3 sc in each corner, then 1 rnd of hdc.
- Back: cut a sage or cream fabric 53 x 73 cm, fold in the edges and sew the crochet front onto it around 3 sides.
- Insert a 50 x 70 cm pillow and sew the last side closed.
Finishing
Weave in all ends on the WS, running the white and mustard tails under the matching color so they don’t show through the sage green rounds.
Lay the blanket flat, mist the border lightly and pat each scallop into a round wave. Let it dry flat. If any daisy has lost its puff, push the bobbles forward from the back with a fingertip while the blanket is still damp.
Tips for Success
- Make the centers and petals in batches. Work Rnds 1-3 on twenty hexagons at a time, then add the sage rounds; the rhythm is faster and the daisies come out the same size.
- Pull the last loop of each bobble snug. A loose bobble flattens and the petal loses its puff.
- Block every hexagon to the same size before joining. A few millimeters per hexagon adds up across a whole bedspread.
- Lay all the hexagons out on the floor and take a photo before joining, so any slight differences in shade or size are spread evenly.
- Weave in ends as you finish each hexagon. Each one has six to eight tails, and a bedspread has more than a thousand.
- Make a few spare daisy centers (Rounds 1-3). They’re handy if one hexagon comes out a different size and has to be redone.
- Count the bobbles after Round 3: there must be 12, evenly spaced, or the hexagon corners won’t line up with the petals.
Common Mistakes to Avoid
- A hexagon that cups or ruffles. Cupping means too few sts or tight tension; ruffling means too many or loose tension. Count Rnd 5 (54 dc and 6 corners) before going on.
- Flat petals. If you work the bobbles too loosely or skip the ch 2 between them, the petals squash together. Keep the ch 2 and push each bobble to the RS.
- The ridge on the wrong side. For a raised seam on the front, hold the hexagons WS together so the RS faces out on both pieces.
- Holes where three hexagons meet. Work through the corner sps of all three hexagons at each meeting point and pull the yarn firm.
- A border that ripples or pulls in. Use 2 sc in each seam and 3 sc at the corners in Rnd 1. If it still ripples, skip 1 st every 10 cm; if it pulls in, add 1.
- Bobbles that sit on the back. Push each one to the RS as you finish it; once Round 4 is on, they’re locked in place.
- Mixing hook sizes between sessions. Keep one 5 mm hook for the whole project; even a different brand can change the size.
Ways to Customize This Pattern
- Change the colors: blush pink hexagons with cream petals for a vintage look, or navy with white daisies for a seaside cottage.
- Change the size: 7 hexagons make a cushion front, 19 make a baby blanket of about 80 x 90 cm, and the stitch counts stay the same.
- Make matching pillow covers: join 10 to 12 hexagons with half hexagons along the edges for each front and sew it to a fabric envelope back.
- Use a different hexagon color for every row for a scrappy rainbow version that uses up leftover yarn.
- Skip the flower band and work the border in sage green with just the scalloped edge for a quicker finish.
- Make the centers in coral and the petals in cream for a warmer, sunnier daisy.
Frequently asked questions
About 19 for a baby blanket, 59 for a 140 x 160 cm throw and 147 for a 220 x 250 cm queen bedspread, plus half hexagons to straighten the long sides.
Yes. On Rnd 7 of each new hexagon, replace the ch 2 at each shared corner and every third sc along a shared side with a sl st into the neighboring hexagon. You lose the raised ridge but skip the joining step.
Yes. Use the hook size on the yarn label and keep the stitch counts the same. DK yarn makes hexagons of about 16 cm, so you will need more of them; chunky yarn makes bigger hexagons and a heavier blanket.
Wash it on a gentle cold cycle inside a large laundry bag, or by hand, and dry it flat. Never hang a heavy wet blanket, because it will stretch out of shape.
About 25 minutes once you know the rounds: 10 for the daisy and 15 for the sage frame. Joining adds a few minutes per hexagon.
The slip stitch join is quick, uses the same yarn and makes the raised braid you see between the daisies. Sewn seams are flatter and almost invisible.
Yes. Work Round 5 with 4 corners (3 dc, ch 2, 3 dc) and 2 groups between them, then continue as a granny square. You lose the honeycomb look but the joining is simpler.