Dusty Rose Flower Granny Square Bedspread
Advanced
For experienced crocheters who enjoy complex shaping, fine detail, and ambitious construction
Weekend Project
A satisfying weekend make — start Friday, finish Sunday, enjoy forever.
Handmade Gift
A beautiful keepsake — free forever. Read online or print at home.
 Magic ring & first rounds
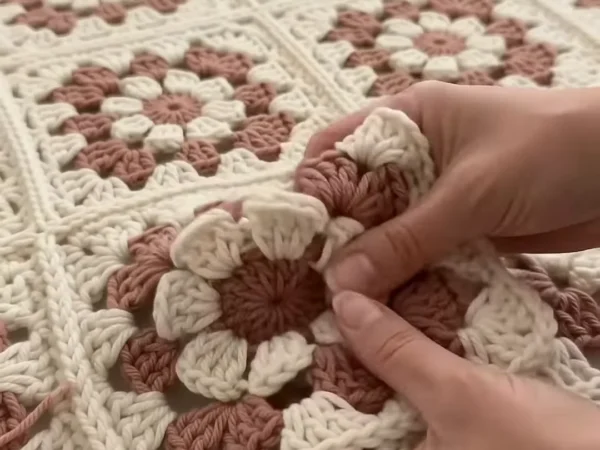 Building the shape
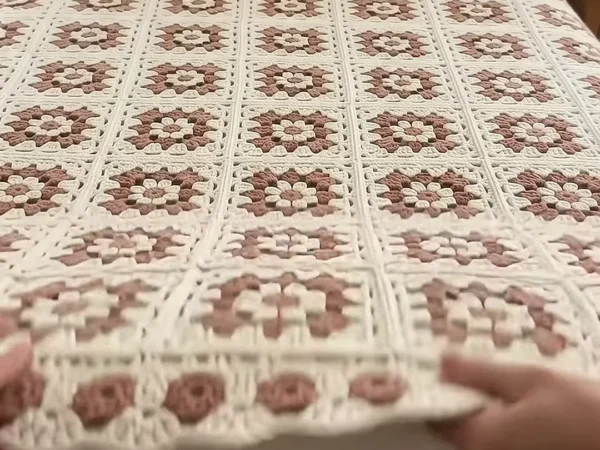 Assembly in progress
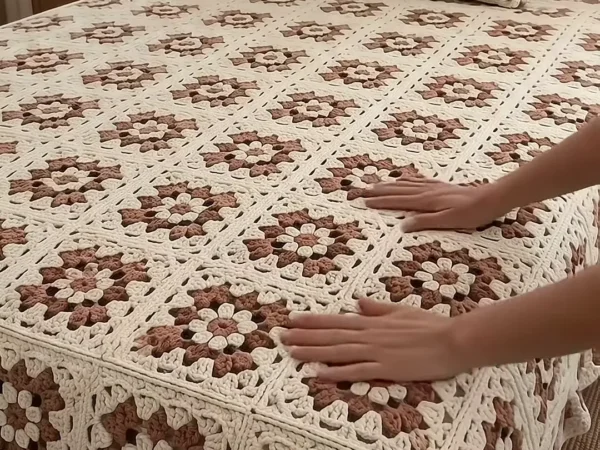 Finished & ready!
About This Dusty Rose Flower Granny Square Bedspread
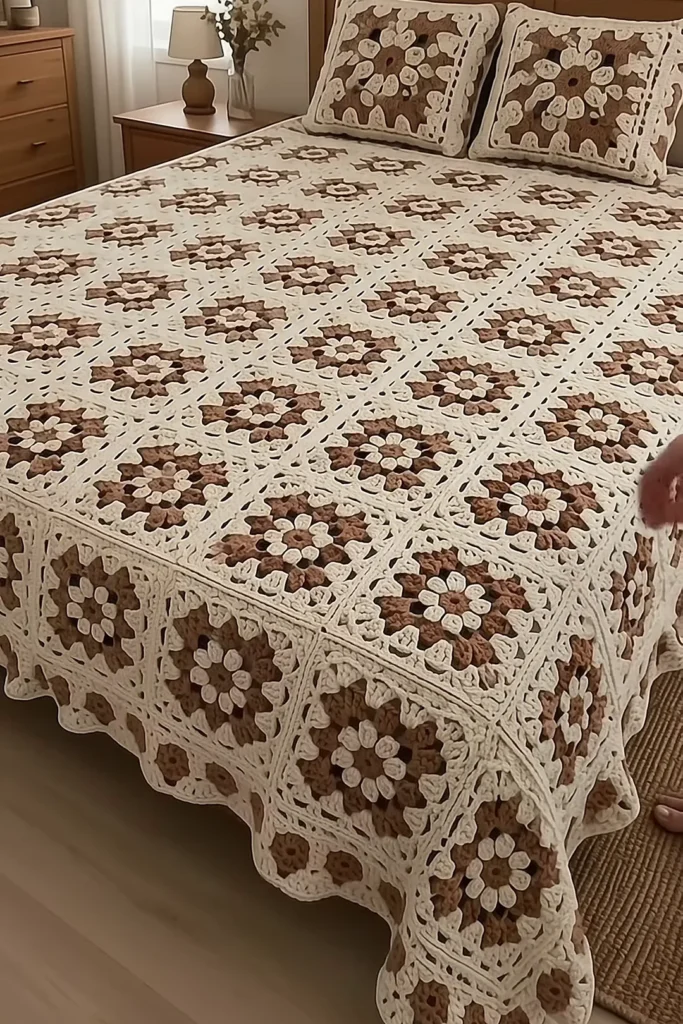
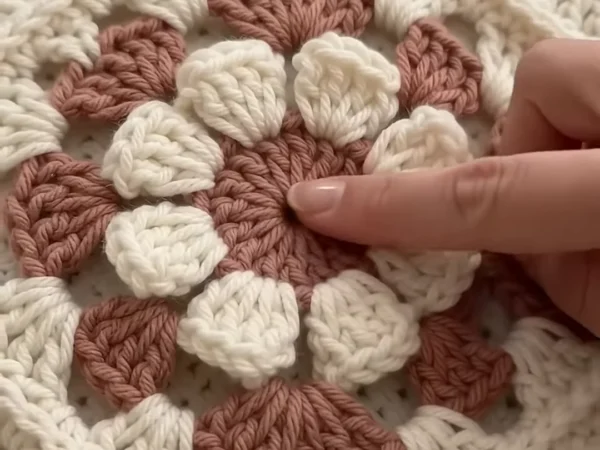
This flower granny square blanket pattern gives every square a soft, layered flower in dusty rose and cream. A solid rose center holds a ring of eight puffy cream petals, and eight rose petals peek out from behind them. Because the two petal rings grow from the front and back loops of the same round, the flower really stands up from the square, and you can feel every petal with your fingers.
Around the flower, cream rounds turn the circle into a square. Small rose fans fill the four corners, and two rows of classic granny clusters frame the motif. The squares are joined with a cream slip stitch seam that sits up like a thin raised line, and the bedspread is finished with a rose round and deep cream scallops. Two matching square cushions use the same motif, worked with a double strand so one flower fills the whole cushion.
A queen bedspread takes about 85 to 95 hours and a throw about 30 to 35 hours. One square takes about 40 minutes once you know the rounds. This is an advanced project for a crocheter who is happy with front and back loop work, clusters and color changes, and who wants a calm, vintage bedspread that looks good on any bed.
Materials
- Worsted weight cotton yarn, cream about 3,900 m for a queen (23 balls of 100 g / 170 m), or 1,400 m for a throw (9 balls)
- Worsted weight cotton yarn, dusty rose about 1,450 m for a queen (9 balls), or 510 m for a throw (3 balls)
- Extra yarn for 2 cushions about 310 m cream (2 balls) and 110 m dusty rose (1 ball)
- 5 mm (H-8) crochet hook for the squares, joining and border
- 6.5 mm (K-10.5) crochet hook for the cushions, with 2 strands held together
- 2 cushion forms 35 x 35 cm
- Stitch markers, blocking mats and pins, tapestry needle and scissors
Abbreviations
MRmagic ringchchainsl stslip stitchscsingle crochethdchalf double crochetdcdouble crochettrtreble crochet3-dc cl3 double crochet cluster: (yo, insert hook, pull up a loop, yo, draw through 2 loops) 3 times in the same st, yo, draw through all 4 loopsdc2togdouble crochet 2 stitches togetherFLO / BLOfront loop only / back loop onlyspspaceskskipst(s)stitch(es)rndroundreprepeatRS / WSright side / wrong sideFlower Center and Petals (Rnds 1-4)
- Make 90 squares for a queen or 30 for a throw. All rnds are joined with sl st to the top of the first st. The beginning ch 3 counts as a dc, and the beginning ch 4 counts as a tr.
- Rnd 1: with dusty rose and the 5 mm hook, MR, ch 3, 15 dc in ring, join. Pull the ring tight. (16 dc)
- Rnd 2: ch 3, dc in same st, 2 dc in each st around, join. Fasten off rose. (32 dc) This is the solid rose center.
- Rnd 3 (cream petals, FLO of Rnd 2): join cream with sl st in FLO of any st. *Sk next st, (hdc, 4 dc, hdc) in FLO of next st, sk next st, sl st in FLO of next st; rep from * 7 more times, working the last sl st in the same st as the joining sl st. Fasten off. (8 petals of 6 sts, 8 sl st) Each petal uses 4 sts of Rnd 2, and 8 x 4 = 32.
- Push the cream petals toward you. The back loops of Rnd 2 are now free behind them.
- Rnd 4 (rose petals, BLO of Rnd 2): join dusty rose with sc in the BLO of the st behind the center of any cream petal. *Sk next st, (3-dc cl, ch 2, 3-dc cl) in BLO of next st, sk next st, sc in BLO of next st; rep from * 7 more times, but on the last rep skip the final sc and join to the first sc. Do not fasten off. (8 rose petals, 8 sc, 8 ch-2 sps) Each rose petal sits behind the gap between two cream petals.
Squaring the Motif (Rnds 5-9)
- Rnd 5 (rose corners): sl st in next 3-dc cl and in next ch-2 sp. Ch 4, (2 tr, ch 3, 3 tr) in same sp, ch 3, sc in next ch-2 sp, ch 3, *(3 tr, ch 3, 3 tr) in next ch-2 sp, ch 3, sc in next ch-2 sp, ch 3; rep from * 2 more times, join. Fasten off rose. (24 tr, 4 sc, 4 corner ch-3 sps, 8 side ch-3 sps) The four tr fans are the small rose triangles in the corners.
- Rnd 6 (cream): join cream in any corner ch-3 sp. Ch 3, (dc, ch 2, 2 dc) in same sp, *dc in each of next 3 tr, 3 dc in next ch-3 sp, tr in next sc, 3 dc in next ch-3 sp, dc in each of next 3 tr, (2 dc, ch 2, 2 dc) in next corner sp; rep from * 2 more times, then dc in each of next 3 tr, 3 dc in next ch-3 sp, tr in next sc, 3 dc in next ch-3 sp, dc in each of next 3 tr, join. (68 sts: 17 per side, with the tr in the middle) The tall tr fills the low point at the middle of each side.
- Rnd 7 (granny): sl st in next dc and in corner sp. Ch 3, (2 dc, ch 2, 3 dc) in same sp, *sk 2 sts, (3 dc in next st, sk 2 sts) 5 times, (3 dc, ch 2, 3 dc) in corner sp; rep from * 2 more times, sk 2 sts, (3 dc in next st, sk 2 sts) 5 times, join. (84 dc: 21 per side, 7 clusters per side counting the corner halves) Check: 2 + 5 x 3 = 17 sts used on each side. The 3rd cluster lands in the middle tr.
- Rnd 8 (granny): sl st in next 2 dc and in corner sp. Ch 3, (2 dc, ch 2, 3 dc) in same sp, *3 dc in each of the next 6 sps between clusters, (3 dc, ch 2, 3 dc) in corner sp; rep from * 2 more times, 3 dc in each of the next 6 sps between clusters, join. (96 dc: 24 per side, 8 clusters per side)
- Rnd 9: ch 1, sc in each dc around and 3 sc in each corner ch-2 sp, join to first sc. Fasten off. (108 sc: 26 sc on each side between the 4 center corner sc) Block to 23 x 23 cm.
Joining the Squares
- Layout: 9 x 10 = 90 squares for a queen (about 207 x 230 cm before the border, 215 x 238 cm with it), or 5 x 6 = 30 squares for a throw (about 115 x 138 cm before the border, 123 x 146 cm with it).
- Turn all squares the same way, so the rose corner fans line up and form small rose diamonds where four squares meet.
- With cream and the 5 mm hook, hold two squares WS together, RS facing out. Sl st through the outer loops of both squares, from corner sc to corner sc. (28 sl st per side: 1 corner sc + 26 sc + 1 corner sc) Keep the sl st loose so the seam is as long as the square.
- Join all the long seams first: square by square, in one long strip across the blanket. Then join the seams in the other direction, working over each crossing in one movement through all four corner sc.
- Because the squares are held WS together, the sl st sits on the RS as the thin raised cream line you see in the photos.
Scalloped Border
- Rnd 1 (cream): join cream in any blanket corner sc. Ch 3, 2 dc in same st. Along each side, work dc in each of the 26 sc of every square and 1 dc in each seam (through both corner sc together). Work 3 dc in each blanket corner sc. Join. On a side of N squares this gives 27N – 1 dc between the corner groups.
- Rnd 2 (dusty rose): join rose in the center dc of any corner. Ch 3, 2 dc in same st, dc in each st around and 3 dc in each center corner dc, join. Each side now has 27N + 3 dc between the center corner sts. Change the count so each side has a multiple of 6 plus 5: on a 9-square side (246 sts) work 1 dc2tog in the middle to get 245; on a 10-square side (273 sts) work 2 dc in 2 sts, spaced out, to get 275. For the throw: on a 5-square side (138 sts) work 1 dc2tog to get 137; on a 6-square side (165 sts) work 2 dc in 2 sts to get 167. Fasten off rose.
- Rnd 3 (cream scallops): join cream in any center corner dc. Ch 3, 8 dc in same st (corner scallop of 9 dc). *Sk 2 sts, sc in next st, sk 2 sts, **7 dc in next st, sk 2 sts, sc in next st, sk 2 sts; rep from ** to the next center corner st, 9 dc in corner st; rep from * around, ending at the first corner, join. (Queen: 40 side scallops on each short side and 45 on each long side; throw: 22 and 27; plus 4 corner scallops)
- Rnd 4 (cream): ch 1, *sk the sc, sc in each dc of the scallop and work 3 sc in the center dc; rep from * around, join and fasten off. (9 sc on each side scallop, 11 sc on each corner scallop)
Matching Cushions (make 2)
- For each cushion make 2 big motifs, one for the front and one for the back. Hold 2 strands of the same color together and use the 6.5 mm hook.
- Work Rnds 1-9 of the square exactly as written, with the same color changes. (108 sc) Each big motif is about 34 x 34 cm.
- Joining Rnd 1: hold the front and back WS together. With 2 strands of cream, join in any corner sc. Ch 1, work sc through both layers in each st around and 3 sc in each corner sc, join. Put the cushion form inside before you close the last side. (116 sc)
- Joining Rnd 2: ch 1, sc in each sc around and 3 sc in each center corner sc, join and fasten off. (124 sc) The finished cushion is about 36 x 36 cm and fits a 35 cm form snugly.
Finishing
Weave in all the ends on the WS of the square they belong to. Hide rose ends under rose sts and cream ends under cream sts, so no color shows through. Weave each end in one direction, then back again, because cotton is slippery.
Lay the bedspread flat RS up, mist it with water and pin out the border scallops one by one. Lift each cream petal with your fingers so it stands in front of the rose petals, and do not press the flowers flat. Let it dry completely. Pull the cushions into a square shape by hand and fluff the petals the same way.
Tips for Success
- Work in batches: make all the Rnd 1-2 centers first, then all the cream petals, then the rose rounds. You change color less often and every square comes out the same.
- Place a stitch marker in the joining sl st of Rnd 3. It shows you where to start the rose petals of Rnd 4.
- Count every round at the end. The counts in brackets tell you at once if a cluster is missing.
- Block every square to 23 cm before joining. Blocked squares join much faster and the seams stay straight.
- Join the squares on a big table or the floor, with the whole blanket laid out, so you can see the rose diamonds line up.
Common Mistakes to Avoid
- Working the cream petals in both loops. Rnd 3 must go in the front loops only, or there is nothing left for the rose petals behind them.
- Starting Rnd 4 in the wrong place. The first rose sc goes behind the center of a cream petal; then the rose petals land between the cream petals.
- Forgetting the tr in Rnd 6. Without it the middle of each side dips and the square looks round, not square.
- Skipping the wrong number of sts in Rnd 7. Always skip 2 sts and work into the 3rd; 5 clusters must fit on each side.
- A tight seam. If the sl st seam is shorter than the square, the blanket puckers. Go up a hook size for joining if you need to.
Ways to Customize This Pattern
- Swap the dusty rose for sage green, mustard, terracotta or soft blue and keep the cream for a different mood.
- Use two shades of rose: a darker one for the center and a lighter one for the back petals.
- Make a baby blanket of 4 x 5 = 20 squares in soft cotton, with a smaller border of Rnds 1 and 3 only.
- Join the squares with join-as-you-go on Rnd 9 instead of a sl st seam if you prefer a flat, invisible join.
- Make a table runner of 2 x 6 squares, or a set of 4 cushions using different petal colors.
Frequently asked questions
You need 90 squares (9 x 10) for a queen bedspread and 30 squares (5 x 6) for a throw. Each blocked square is about 23 cm, and the border adds about 4 cm on every side.
The cream petals are worked in the front loops of the rose center and the rose petals in the back loops of the same round. The two rings sit one in front of the other, so the flower stands up from the square.
Yes. A worsted acrylic makes a lighter, warmer bedspread. Cotton gives the clear stitch shape and the firm, puffy petals you see in the photos, so make a test square first and check the size.
Yes. On Rnd 9 of each new square, replace the sc along one or two sides with a sc worked through the matching sc of the square next to it. You lose the raised seam line, but you have no seams to sew at the end.
Wash it on a gentle cold cycle in a large laundry bag and dry it flat. Wash a small piece of rose yarn with cream yarn first to make sure the color does not run. Fluff the petals with your fingers while the blanket is still damp.