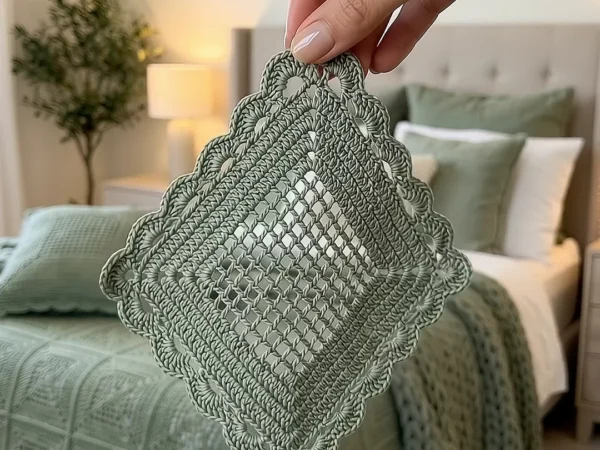
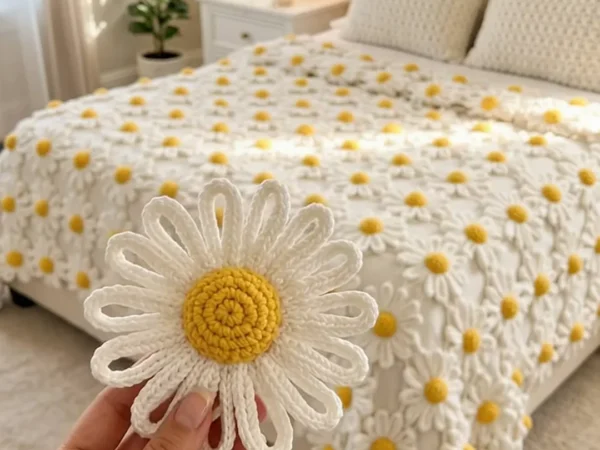
Icy Blue Snowflake Lace Crochet Bedspread
Advanced
For experienced crocheters who enjoy complex shaping, fine detail, and ambitious construction
Weekend Project
A satisfying weekend make — start Friday, finish Sunday, enjoy forever.
Handmade Gift
A beautiful keepsake — free forever. Read online or print at home.
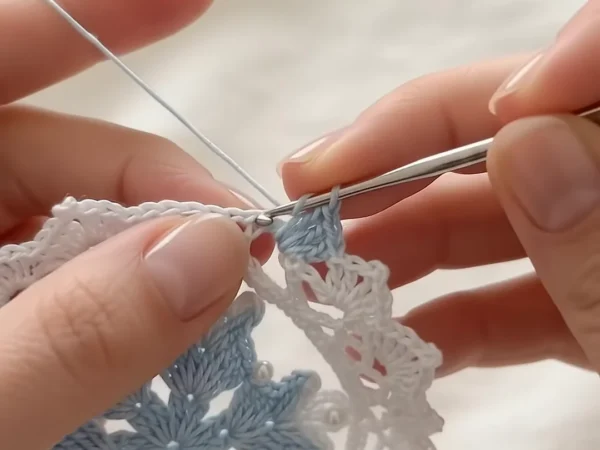 Magic ring & first rounds
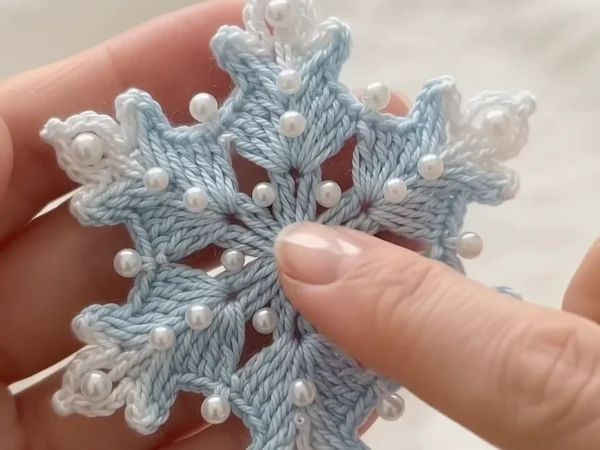 Building the shape
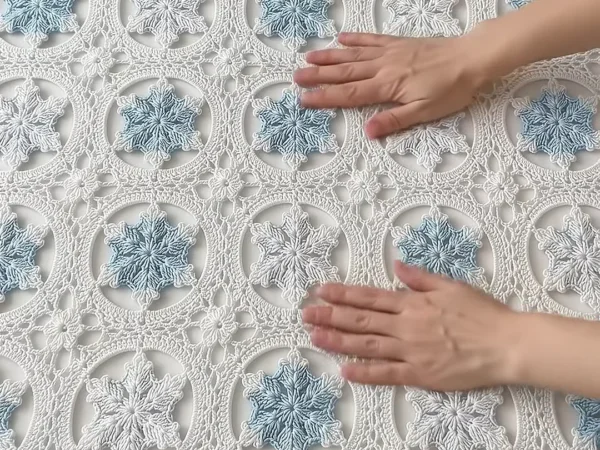 Assembly in progress
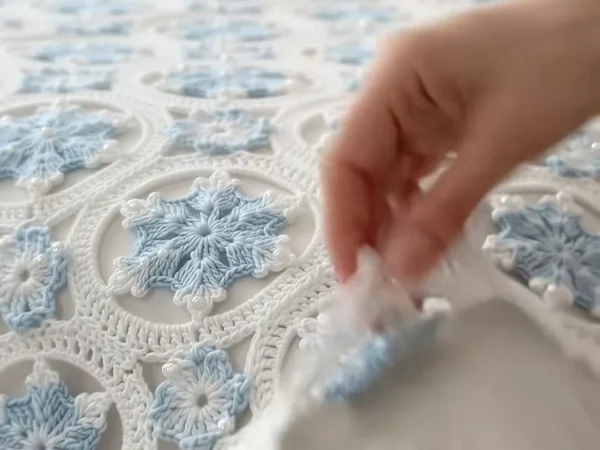 Finished & ready!
About This Icy Blue Snowflake Lace Crochet Bedspread
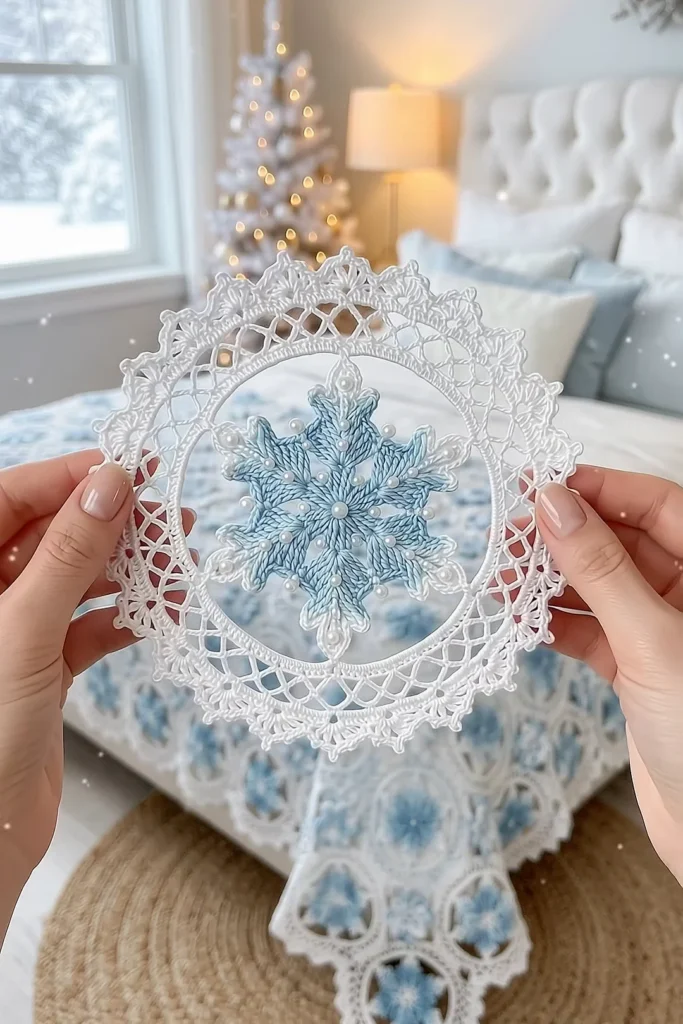
This snowflake crochet blanket pattern turns a bed into a frosty winter window. Every motif is a round white lace frame with an open circle in the middle, and inside it floats a raised 6-point snowflake with thick, textured arms, little side branches and tiny white pearl beads. Icy blue snowflakes and pure white snowflakes alternate across the bed like a checkerboard, and a light blue and white scalloped border goes all around.
The snowflake is crocheted on its own with chain-built arms, so each arm gets a strong center line and a stitch on both sides. A white outline round sharpens the tips and branches. The lace ring is worked separately: a solid inner band, a filet mesh, a round of crossed chain trellis and a scalloped picot edge. The snowflake is then held in the open center by 6 short chain spokes, so the window stays clear. The motifs are joined as you go on the last round, and small white lace flowers fill the gaps between the circles.
A queen bedspread takes about 145 to 160 hours and a throw about 62 to 70 hours. One complete motif, with its snowflake, beads and lace ring, takes about 105 minutes. This is an advanced project for a crocheter who is happy with lace rounds, join-as-you-go and some bead sewing, and who wants a showpiece for the winter bedroom.
Materials
- DK weight cotton yarn, white about 4,850 m for a queen (25 balls of 100 g / 200 m), or 2,050 m for a throw (11 balls)
- DK weight cotton yarn, icy light blue about 890 m for a queen (5 balls), or 430 m for a throw (3 balls)
- White pearl beads, 4 mm 25 per snowflake: about 1,800 for a queen, 750 for a throw
- White sewing thread and a beading needle for the pearls
- 3.5 mm (E-4) crochet hook for the snowflakes
- 4 mm (G-6) crochet hook for the lace rings, fillers, joining and border
- Stitch markers, rustproof pins, tapestry needle and scissors
Abbreviations
MRmagic ringchchainsl stslip stitchscsingle crochethdchalf double crochetdcdouble crochettrtreble crochet (yarn over twice)sc2togsingle crochet 2 stitches togetherdtr2togtwo double trebles (yarn over 3 times) worked in two different places and closed together at the toppicotch 3, sl st in 3rd ch from hookspspaceskskipst(s)stitch(es)rndroundreprepeatRS / WSright side / wrong sideSnowflake (make 36 blue and 36 white for a queen, 15 and 15 for a throw)
- Rnd 1: with blue (or white) and the 3.5 mm hook, MR, ch 1, 6 sc in ring, join with sl st to first sc. Pull the ring tight. (6 sc)
- Rnd 2: ch 1, 2 sc in each st around, join. (12 sc)
- Rnd 3: ch 3 (counts as dc), dc in same st, 2 dc in each st around, join with sl st to top of ch 3. (24 dc)
- Rnd 4 (arm centers and first sides): ch 1, *sc in next dc, ch 12; working in the back bump of each ch: sl st in 2nd ch from hook, sc in next ch, hdc in next 2 ch, dc in next 3 ch, tr in next 4 ch; sk next 2 dc of Rnd 3, sc in next dc; rep from * 5 more times, join with sl st to first sc. Each arm uses 4 dc of Rnd 3. (6 arms of 11 sts, 12 sc on the center; the last ch of each arm stays free at the tip)
- Rnd 5 (second sides and branches): you are at the sc at the base of the first arm. *Working up the free loops of the arm chain: tr in next 4 ch, dc in next 2 ch, make a branch (ch 4, sc in 2nd ch from hook, sc in next 2 ch), dc in next ch, hdc in next 2 ch, sc in next 2 ch; (sc, ch 3, sc) in the free ch at the tip; now working down the tops of the Rnd 4 sts: sc in next 5 sts, make a branch, sc in next 6 sts; sl st in next sc, sl st in next sc; rep from * 5 more times. The last sl st lands in the first sc. Blue snowflakes: fasten off blue. (per arm: 24 sts on the arm, 2 branches of 3 sc, 1 tip ch-3 sp, 2 sl sts)
- Rnd 6 (white outline): with white, join in any tip ch-3 sp. Work around the whole snowflake: (sc, ch 3, sc) in each tip ch-3 sp, sc in each st along the arm sides, sc in the 3 free ch loops going up each branch, (sc, ch 2, sc) in the ch at the branch tip, sc in the 3 sc coming down the branch, and sc2tog over the 2 sl sts in each valley between arms. Join and fasten off with a 40 cm tail. (43 sc per arm, 258 sc in all, 6 tip ch-3 sps, 12 branch ch-2 sps) White snowflakes simply keep going in white.
- Pearls: with sewing thread, sew 25 pearl beads to each snowflake: 1 in the center, and on each arm 1 near the base, 1 on each branch tip and 1 just below the tip. Knot each bead on the WS so they cannot slide.
- Press the arms flat with your fingers and leave the snowflake to rest while you make the ring. It should measure about 14 cm from tip to tip.
Lace Ring (make 72 for a queen, 30 for a throw)
- Foundation: with white and the 4 mm hook, ch 108, join with sl st to the first ch to make a ring. Do not twist the chain. (108 ch)
- Rnd 1: ch 1, sc in each ch around, join with sl st to first sc. (108 sc) This is the smooth inner edge of the window.
- Rnd 2: ch 3 (counts as dc here and throughout), dc in each st around, join. (108 dc)
- Rnd 3 (filet mesh): ch 5 (counts as dc and ch 2), sk next 2 dc, *dc in next dc, ch 2, sk next 2 dc; rep from * 34 more times, join with sl st to 3rd ch of ch-5. (36 dc, 36 ch-2 sps)
- Rnd 4 (trellis): sl st in first ch-2 sp, ch 1, sc in same sp, *ch 5, sc in next ch-2 sp; rep from * 34 more times, ch 2, dc in first sc. The ch 2 and dc make the last loop and bring the hook to the middle of it. (36 ch-5 loops)
- Rnd 5 (crossed trellis): ch 1, sc around the dc just made, *ch 6, sc in next ch-5 loop; rep from * 34 more times, ch 3, tr in first sc. (36 ch-6 loops)
- Rnd 6: ch 3, 4 dc around the tr just made, *5 dc in next ch-6 loop; rep from * 34 more times, join to top of ch 3. Do not fasten off yet; pull up a long loop and put it on a marker. (180 dc)
- Spokes: lay the snowflake RS up in the center of the ring with one arm pointing to where Rnd 1 started. With white, join in the tip ch-3 sp of that arm, ch 2, sl st in the sc of Rnd 1 opposite the tip, sl st back in each of the 2 ch, sl st in the tip sp and fasten off. Rep for the other 5 arms, with 17 sc of Rnd 1 between spokes (one spoke every 18 sc). (6 spokes)
- The last round, Rnd 7, is worked in the next section, because it joins the motifs to each other.
Scalloped Edge and Joining the Motifs
- Layout: 8 x 9 = 72 motifs for a queen (about 230 x 260 cm with the border), 5 x 6 = 30 for a throw (about 147 x 175 cm). Alternate blue and white snowflakes like a checkerboard, so no two blue snowflakes touch side by side.
- Rnd 7 on the first motif: put the live loop back on the 4 mm hook. Ch 1, *sc in next dc, sk next dc, (2 dc, picot, 2 dc) in next dc, sk next dc, sc in next dc; rep from * 35 more times, join to first sc and fasten off. (36 scallops: 72 sc, 144 dc, 36 picots)
- Number the scallops 1 to 36 in the order you worked them, with scallop 1 at the top. The joining points are 4 pairs, a quarter of the circle apart: 36 and 1 (top), 9 and 10, 18 and 19 (bottom), 27 and 28. When you crochet right-handed, 9 and 10 sit on the left and 27 and 28 on the right.
- Joined picot: work (2 dc, ch 1, sl st in the picot of the matching scallop on the finished motif, ch 1, sl st in the first ch, 2 dc) in place of the normal scallop.
- Join to the motif on the left: work scallop 9 joined to its scallop 28 and scallop 10 joined to its scallop 27. Join to the motif above: work scallop 1 joined to its scallop 18 and scallop 36 joined to its scallop 19. In short: always join the 2 scallops that face each other.
- Join the motifs row by row, from left to right, so each new motif joins to 1 or 2 motifs. Keep all the snowflakes the same way up.
Lace Fillers (make 56 for a queen, 20 for a throw)
- Every space where 4 circles meet gets one small filler flower. Each circle gives 2 scallops to the gap: the 2nd scallop on each side of the middle of the curve. These are scallops 4 and 6, 13 and 15, 22 and 24, or 31 and 33, depending on the corner.
- Rnd 1: with white and the 4 mm hook, MR, ch 1, 8 sc in ring, join. Pull tight. (8 sc)
- Rnd 2: ch 1, 2 sc in each st around, join. (16 sc)
- Rnd 3 (joining): place the filler in the gap. Ch 1, sc in first st, *ch 8, sl st in the picot of the next facing scallop, ch 8, sk next sc, sc in next sc; rep from * 7 more times, working the last sc as a sl st in the first sc. Join 2 points to each of the 4 circles. Fasten off. (8 petal loops, 8 joins)
- The filler should lie flat. If it pulls the circles, work ch 9 instead of ch 8; if it ripples, work ch 7.
Scalloped Border
- Each edge motif has 16 free scallops on the outside, between its two joins. Each corner motif has 25 free scallops. The scallops at the very ends of each curve sit in the dip between two motifs.
- Rnd 1 (white, leveling): with the 4 mm hook, join in the 3rd free scallop of an edge motif. On each edge motif: sc in that picot, (ch 5, sc in picot of next scallop) 11 times, ending in the 14th free scallop. (12 sc, 11 ch-5 sps) In each dip between motifs: ch 4, dtr2tog with the first leg in the 2nd-to-last free scallop of this motif and the second leg in the 2nd free scallop of the next motif, ch 4, then go on with the next motif from its 3rd free scallop. (1 dtr2tog, 2 ch-4 sps per dip) On each corner motif: work the same way around the whole curve from the 3rd to the 23rd free scallop. (21 sc, 20 ch-5 sps) Join to first sc.
- Rnd 2 (white): ch 1, sc in each sc, 5 sc in each ch-5 sp, 4 sc in each ch-4 sp and 1 sc in each dtr2tog. Join. (67 sc per edge motif, 121 per corner motif, 9 per dip: 2,496 sc for a queen, 1,584 for a throw) Fasten off white.
- Rnd 3 (blue): join blue in any st, ch 3, dc in each st around. Over the middle 36 sts of each corner motif, work 2 dc in every 4th st, so you add 9 sts at each corner. Join. (2,532 dc for a queen, 1,620 for a throw: a multiple of 6)
- Rnd 4 (blue scallops): ch 1, sc in first st, *sk 2 sts, 7 dc in next st, sk 2 sts, sc in next st; rep from * around, leaving out the last sc, join to first sc. Fasten off blue. (422 scallops for a queen, 270 for a throw)
- Rnd 5 (white picot edge): join white in any sc. Ch 1, *sc in the sc, sc in next 3 dc, (sc, ch 3, sc) in next dc, sc in next 3 dc; rep from * around, join and fasten off. (9 sc and 1 ch-3 picot per scallop)
Finishing
Weave in all ends on the WS, inside the solid rounds: the sc and dc bands of the ring, or the arms of the snowflake. Never weave across the mesh or the open window, because the tails will show through the holes.
Block the bedspread in sections on a carpet or foam mats. Pin each window round, pin the picots of the border out and mist with water. Push each snowflake flat in its window with your fingers, so the spokes are straight. Let it dry fully before you move it, then check that all the pearls are still tight.
Tips for Success
- Make all the snowflakes first, in two piles, blue and white, then sew the pearls in one session. Bead sewing goes faster when you do it in a batch.
- Count Rnd 6 of every ring before you start the scallops. Rnd 7 needs exactly 180 dc for 36 scallops, or the joining points will not line up.
- Put a marker in scallop 1 of every motif, so you always know where the top is.
- Work the spokes before the scallop edge. The ring is still small and easy to hold, and you can check that the snowflake sits flat.
- Lay out the blue and white snowflakes on the floor before you join, and take a photo. Follow the photo as you join row by row.
Common Mistakes to Avoid
- A twisted foundation ring. Check that the 108 ch lie flat before you join, or the window will have a twist you cannot fix.
- Wavy lace rings. If Rnd 6 ripples, your trellis chains are too long or loose; if the ring cups, they are too tight. Change the hook, not the stitch counts.
- Floppy snowflake arms. Work Rnd 4 in the back bump of the chain, so the free loops stay neat for Rnd 5 and the arm has a clean center line.
- Pulled spokes. Spokes that are too short pull the window into a hexagon. The snowflake should sit flat with no tension on the spokes.
- Joining the wrong scallops. With 7 free scallops between each pair of joining points, a mistake of one scallop shifts the whole row. Count from the marker every time.
Ways to Customize This Pattern
- Use only white snowflakes with a silver metallic outline in Rnd 6 for a frosty all-white bedspread.
- Swap the blue for pale lilac, mint or silver grey and keep the white lace for a softer winter look.
- Make a table runner of 2 x 6 motifs or a single motif as a wall hanging in a window.
- Leave out the pearls for a baby blanket or a child’s room, and add a French knot at each branch tip instead.
- Make a set of 4 cushion covers, each with one large motif on the front and a plain blue back.
Frequently asked questions
A queen of 8 x 9 motifs needs 72 snowflakes: 36 blue and 36 white. A throw of 5 x 6 motifs needs 30 snowflakes, 15 of each color, plus 20 lace fillers.
Yes. The snowflakes still look raised and textured without them. For a blanket that small children use, leaving them out is safer.
Cotton keeps the snowflake arms crisp and the lace open after washing. Acrylic is softer but the trellis and picots go fuzzy and the arms lose their sharp tips.
You can work Rnd 7 on every motif and sew the 2 facing picots together at each joining point. It works, but join-as-you-go is faster and gives a neater, stronger join.
Wash it on a gentle cold cycle inside a large laundry bag, or by hand, and dry it flat. Wash a scrap of the blue with white yarn first, so you know the color will not bleed.