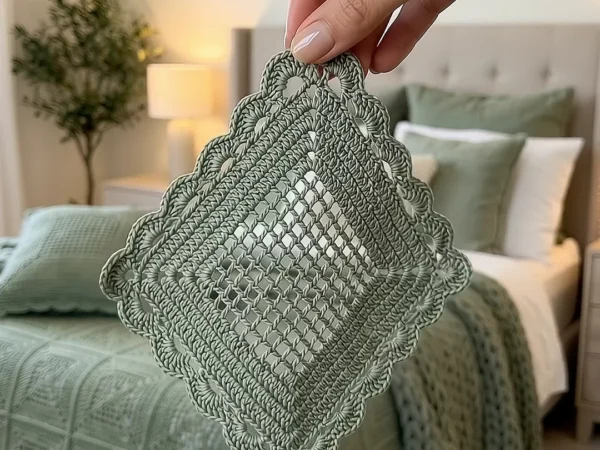
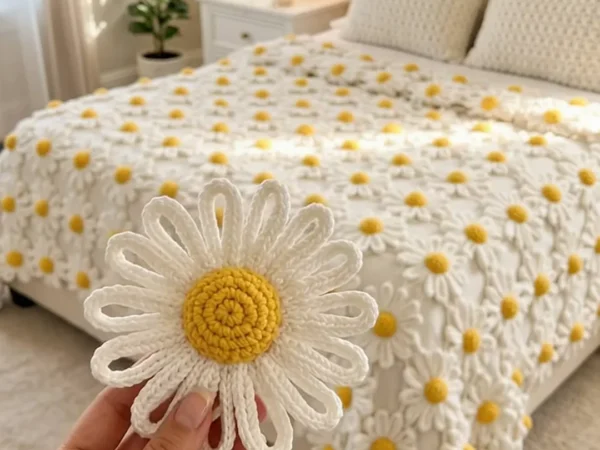
Sage Green 3D Daisy Crochet Bedspread
Advanced
For experienced crocheters who enjoy complex shaping, fine detail, and ambitious construction
Multi-Day Project
A rewarding 12+ hour journey — perfect for dedicated crafters who love detailed work.
Handmade Gift
A beautiful keepsake — free forever. Read online or print at home.
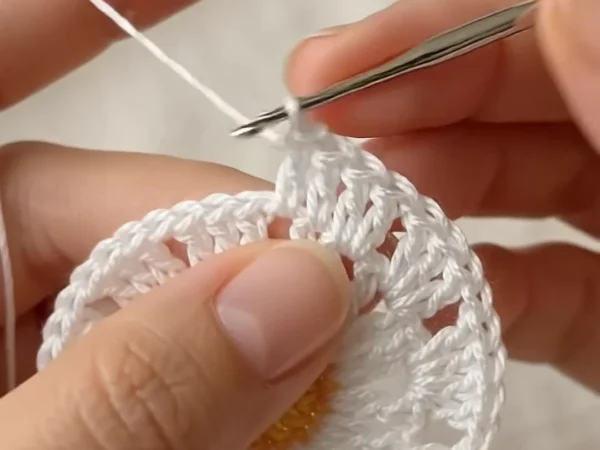 Magic ring & first rounds
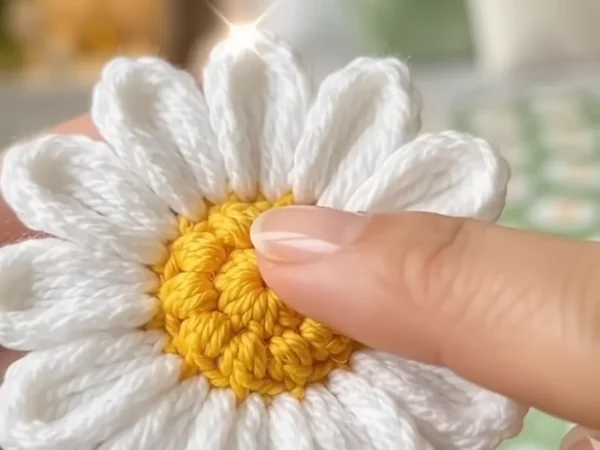 Building the shape
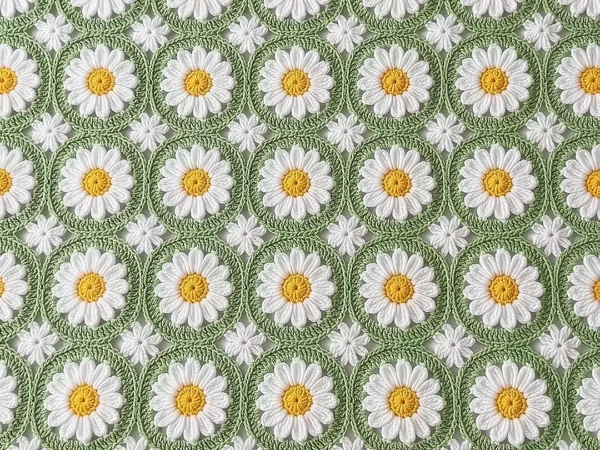 Assembly in progress
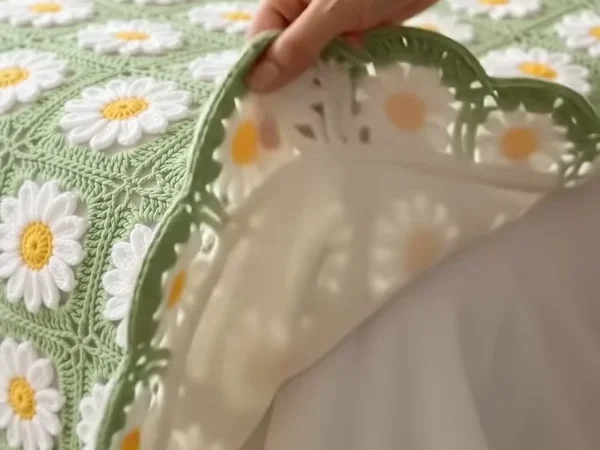 Finished & ready!
About This Sage Green 3D Daisy Crochet Bedspread
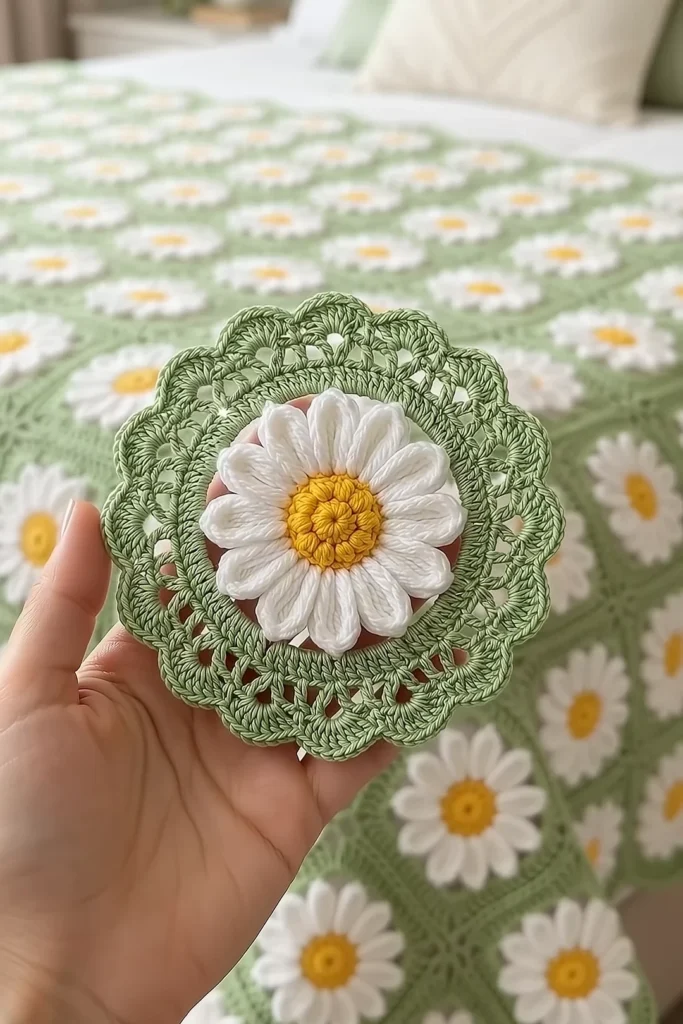
This 3D daisy crochet bedspread pattern turns a whole bed into a field of white daisies. Every circle holds one big daisy that really stands up: a round, puffy golden center and 18 long white loop petals that lift off the fabric. Around each daisy sits a soft sage green lace ring with a line of small windows and a scalloped edge, and little white star flowers fill the gaps where four circles meet.
Each motif is built in two parts. The base starts as a small white lace circle with open spokes, then grows into solid sage rounds, an eyelet round and 16 scallops. The daisy is a separate piece: a puff stitch dome, lightly stuffed, with a ring of chain loops that you wrap with stitches to make thick petals. You sew the daisy on, then join the circles as you go through the tips of their scallops, so there is no long seam to sew at the end. A wavy sage border follows the curves of the outer circles.
A queen bedspread takes about 200 to 215 hours, and a throw about 95 to 105 hours. One full motif with its daisy takes about 70 minutes, and a star filler about 8 minutes. This is an advanced project for a crocheter who is happy working in rounds, can read stitch counts, and likes a big project made of many small pieces.
Materials
- DK weight cotton yarn, sage green about 2,350 m for a queen (12 balls of 100 g / 200 m), or 1,140 m for a throw (6 balls)
- DK weight cotton yarn, white about 3,100 m for a queen (16 balls), or 1,410 m for a throw (8 balls)
- DK weight cotton yarn, golden yellow about 550 m for a queen (3 balls), or 260 m for a throw (2 balls)
- Polyester fiberfill a small handful, only a pinch for each daisy center
- 4 mm (G-6) crochet hook for the medallions, joining and border
- 3.5 mm (E-4) crochet hook for the daisies and star fillers
- Stitch markers, sewing pins, tapestry needle and scissors
Abbreviations
MRmagic ringchchainsl stslip stitchscsingle crochethdchalf double crochetdcdouble crochetpuff(yarn over, insert hook in st, pull up a long loop) 3 times, yarn over and pull through all 7 loops on the hookBLOback loop onlyspspaceskskipst(s)stitch(es)rndroundreprepeatRS / WSright side / wrong sideDaisy Center (yellow dome)
- Rnd 1: with yellow and the 3.5 mm hook, MR, ch 1, 6 sc in ring, join with sl st to first sc. Pull the ring tight. (6 sts)
- Rnd 2: ch 1, 2 sc in each st around, join. (12 sts)
- Rnd 3: ch 1, *puff in next st, 2 sc in next st; rep from * 5 more times, join. (18 sts: 6 puffs, 12 sc)
- Rnd 4: ch 1, *sc in next puff, puff in next sc, sc in next sc; rep from * 5 more times, join. (18 sts: 6 puffs, 12 sc) There are no increases in this rnd, so the center starts to curve into a dome. Keep the puffs on the side facing you; this is the RS.
- Rnd 5: ch 1, sc in BLO of each st around, join. (18 sts) The edge now turns back sharply and the center becomes a round cap. On the last sl st, pull through white and cut yellow, leaving a short tail to weave in.
Loop Petals (white)
- Rnd 6 (petal loops): with white, sl st in first st, *ch 12, sl st in same st, sl st in next st; rep from * 16 more times, ch 12, sl st in same st, join with sl st to first sl st. (18 ch-12 loops, 1 in each st)
- Rnd 7 (petals): sl st in first ch-12 loop, *in the loop work (2 sc, 2 hdc, 3 dc, ch 2, 3 dc, 2 hdc, 2 sc), sl st between this loop and the next; rep from * 17 more times, join. Fasten off with a 40 cm tail for sewing. (18 petals of 14 sts each, with a ch-2 tip)
- The 18 thick petals crowd around a ring of only 18 sts, so they push against each other and stand up. This is what makes the daisy 3D; do not try to flatten it.
- The daisy is about 9 cm across, with a 3 cm center. Make 156 for a queen or 72 for a throw.
White Lace Center (medallion Rnds 1-5)
- Rnd 1: with yellow and the 4 mm hook, MR, ch 3 (counts as dc here and throughout), 11 dc in ring, join with sl st to top of ch 3. Pull tight. (12 dc) Change to white on the joining sl st and cut yellow.
- Rnd 2: with white, ch 3, dc in same st, 2 dc in each dc around, join. (24 dc)
- Rnd 3: ch 3, dc in next dc, ch 1, *dc in next 2 dc, ch 1; rep from * 10 more times, join. (24 dc, 12 ch-1 sps)
- Rnd 4 (open spokes): ch 3, dc in next dc, ch 2, sk ch-1 sp, *dc in next 2 dc, ch 2, sk ch-1 sp; rep from * 10 more times, join. (24 dc, 12 ch-2 sps) The pairs of dc now line up like the spokes of a wheel.
- Rnd 5: ch 1, sc in each dc and 3 sc in each ch-2 sp around, join. Fasten off white. (60 sc: 24 + 36)
Sage Lace Ring (medallion Rnds 6-9)
- Rnd 6: join sage in any sc of Rnd 5. Ch 3, dc in next 3 sc, 2 dc in next sc, *dc in next 4 sc, 2 dc in next sc; rep from * 10 more times, join. (72 dc)
- Rnd 7 (eyelets): ch 3, dc in next dc, ch 2, sk next dc, *dc in next 2 dc, ch 2, sk next dc; rep from * 22 more times, join. (48 dc, 24 ch-2 sps: a ring of 24 small windows)
- Rnd 8: ch 1, sc in each dc and 2 sc in each ch-2 sp around, join. (96 sc: 48 + 48)
- Rnd 9 (scallops), first motif only: ch 1, sc in same st, sk 2 sc, 7 dc in next sc, sk 2 sc, *sc in next sc, sk 2 sc, 7 dc in next sc, sk 2 sc; rep from * 14 more times, join to first sc. Fasten off. (16 scallops: 112 dc and 16 sc) Every other motif gets Rnd 9 while you join it; see Joining the Motifs.
- Number the scallops 1 to 16 in the order you work them. Scallops 1-2, 5-6, 9-10 and 13-14 are the four joining pairs (the sides). Scallops 3-4, 7-8, 11-12 and 15-16 are the free pairs (the diagonals) that face the gaps.
- Block the motif to 17 cm across, scallop tip to scallop tip.
Sewing On the Daisy
- Turn the daisy over. The back of the dome is a small hollow cup. Push a pinch of fiberfill into it, just enough to keep the center round; too much makes it hard and pushes the petals flat.
- Place the daisy, RS up, on the RS of the medallion, with the yellow dome right over the yellow Rnd 1.
- With the white petal tail, sew the daisy down from the back: go through the base of each petal loop (Rnd 6) and into Rnd 2 of the medallion, all the way around. This closes the stuffed cup.
- Do not sew the petals themselves. Leave them free so they stay standing up over the white lace center.
- Sew each daisy before you join its motif to the blanket. It is much easier to handle one loose circle than a heavy bedspread.
Joining the Motifs
- Layout: 12 x 13 = 156 motifs for a queen (about 210 x 227 cm with the border), or 8 x 9 = 72 for a throw (about 142 x 159 cm). Set them in a straight grid, side to side, not offset.
- Make Rnds 1-8 of each new motif and sew on its daisy. Then work Rnd 9 as for the first motif, but join it to its neighbors as you go.
- Join at a scallop: work 3 dc of the scallop, then sl st in the 4th (center) dc of the matching scallop on the motif next to it, then finish the scallop with the 4th to 7th dc in the same sc as usual. (Still 7 dc per scallop; the joining sl st is not counted)
- Join only the two scallops of the pair that faces the neighbor, upper scallop to upper scallop. Each side of a motif is linked to its neighbor at 2 points. A motif that has a neighbor on its left and one above is joined at 4 points in total.
- Do not join the free diagonal pairs. Where four motifs meet, their 8 free scallops leave a small square gap with curved sides.
- Check the count of every new motif before you join it: Rnd 8 must have 96 sc, or the scallops will not line up with the neighbors.
White Star Fillers
- Rnd 1: with white and the 3.5 mm hook, MR, ch 1, 12 sc in ring, join with sl st to first sc. Pull tight. (12 sts)
- Rnd 2 (petals): *ch 6, sl st in 2nd ch from hook, sc in next ch, hdc in next ch, dc in next ch, hdc in last ch, sk next sc, sl st in next sc; rep from * 5 more times. The last sl st goes into the first sc of Rnd 1. Fasten off with a 30 cm tail. (6 petals of 5 sts each)
- The star is about 5.5 cm across. Make 132 for a queen (11 x 12 inner gaps) or 56 for a throw (7 x 8 inner gaps).
- Lay one star in each inner gap, RS up. With the tail, sew the center ring to the 4 sc points that sit between the free scallop pairs of the 4 motifs around it. Then tack the tip of each petal to the scallop it touches, so the star lies flat and does not flip over.
- The gaps along the outer edge do not get a star; the border closes them.
Wavy Sage Border
- Rnd 1: with sage and the 4 mm hook, join in the first free scallop of any edge motif. On each motif, work 1 sc in the sc before the first free scallop that faces out, then 1 sc in each dc of every free outer scallop, with 1 sc in each sc between them, and 1 sc in the sc after the last free outer scallop. At each dip where two motifs meet, ch 3, sc in the joined 4th dc of the two scallops (work through both), ch 3, then go on to the next motif. Join. (Each edge motif with 6 outer scallops: 49 sc. Each corner motif with 10 outer scallops: 81 sc. Each dip: ch 3, 1 sc, ch 3)
- Rnd 2: ch 1, sc in each sc along every motif; at each corner motif, work 2 sc in the sc above the 4th dc of the 4 scallops that face the corner (the diagonal pair and 1 scallop on each side of it). At each dip, work 2 sc in the first ch-3 sp, sc in the dip sc, 2 sc in the next ch-3 sp. Join. (Edge motif: 49 sc. Corner motif: 85 sc. Each dip: 5 sc. Each edge motif plus the dip after it = 54 sts; each corner motif plus the dip after it = 90 sts)
- Rnd 3 (scallops): sl st to the first sc of any motif section, ch 1, *sc in next st, sk 2 sts, 5 dc in next st, sk 2 sts; rep from * around, join. (9 scallops per edge motif section, 15 per corner section: 438 scallops for a queen, 294 for a throw; 6 sts per scallop)
- Rnd 4: ch 1, sc in each st around, working 2 sc in the 3rd dc of each scallop, join. Fasten off. (7 sts per scallop: 3,066 sc for a queen, 2,058 for a throw)
- The border rises over each outer circle and dips between them, so the edge of the bedspread has the same soft waves you see in the photos.
Finishing
Weave in all tails on the WS. Hide white tails inside the white lace center under the daisy, and sage tails inside the solid sage rounds, never across the eyelet windows. Yellow tails disappear best inside the stuffed dome.
Lay the bedspread flat RS up and mist it with water. Pin out the border scallops and gently open the eyelets and the star petals with your fingers. Lift each daisy petal so it stands up again, and press nothing flat. Let it dry completely before you put it on the bed.
Tips for Success
- Work in batches: all the daisy centers, then all the petals, then all the medallion bases. Your tension stays even and every piece comes out the same size.
- Use a stitch marker on scallop 1 of each new motif, so you always know which pairs to join and which to leave free.
- Keep the chain loops in Rnd 6 of the daisy loose and even. Pull each ch-12 loop to the same length before you wrap it.
- Sew the daisies with the long white tail you left in Rnd 7, so there is one less end to weave in per motif.
- Join the motifs one row at a time, left to right, and lay the work flat on a bed or the floor after each row to check that the grid stays straight.
Common Mistakes to Avoid
- A flat daisy center. Rnd 4 must have no increases and Rnd 5 must go in the back loops only; if you add stitches here, the dome stays flat.
- Too many or too few eyelets. Rnd 7 needs exactly 72 dc from Rnd 6 to give 24 windows. Count Rnd 6 before you start.
- Scallops that do not meet the neighbor. Rnd 9 needs 96 sc in Rnd 8 for 16 scallops. With any other count, the joining pairs will not face each other.
- Too much stuffing. A full dome pushes the petals down. Use only a pinch so the center is soft and round.
- Sewing through the petals. Stitch only through the base of the loops in Rnd 6; sewn petals lie flat and lose the 3D look.
Ways to Customize This Pattern
- Change the ring color: pale blue, blush pink or soft lilac all look fresh with white daisies.
- Make a second layer of 9 shorter petals (ch-8 loops) in the front loops of Rnd 4 for an even fuller daisy.
- Make 4 motifs with a star in the middle as a pillow front, and back it with sage fabric.
- Use one motif alone as a coaster or a table mat center, or join 3 in a row for a table runner.
- For a baby blanket, skip the stuffing and sew the petals down at their tips, so nothing can catch small fingers.
Frequently asked questions
A queen needs 156 medallions, 156 daisies and 132 star fillers. A throw needs 72 medallions, 72 daisies and 56 stars. Make a few extra daisies so you can pick the best ones.
Yes. The motifs hold together without them, but the gaps stay open and the bedspread looks lacier. The stars also add weight, which helps the bedspread hang well over the sides of the bed.
That is by design. Eighteen wide petals sit on a ring of only 18 stitches, so they push up and stand around the dome. If they twist too much, check that every loop in Rnd 6 has exactly 12 chains.
You can. Finish Rnd 9 on every motif, then sew the center dc of each joining scallop to its neighbor with a few small stitches. Joining as you go is faster and keeps the points even.
Wash it on a cold, gentle cycle inside a large laundry bag and dry it flat. Fluff the daisies with your fingers while it is still damp. Wash a scrap of sage and yellow with white first to check that the colors do not bleed.