Moroccan Zellige Star Crochet Bedspread
Advanced
For experienced crocheters who enjoy complex shaping, fine detail, and ambitious construction
Weekend Project
A satisfying weekend make — start Friday, finish Sunday, enjoy forever.
Handmade Gift
A beautiful keepsake — free forever. Read online or print at home.
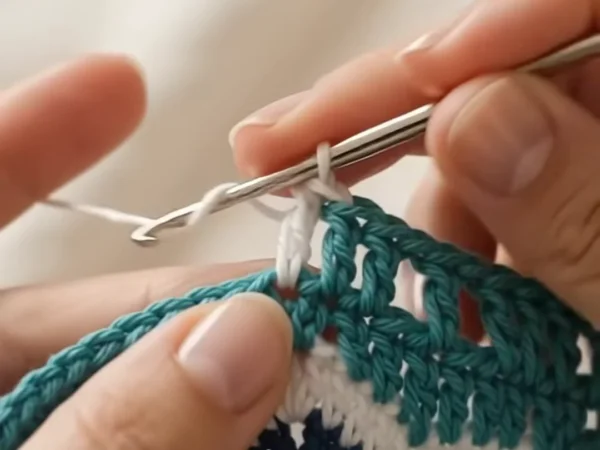 Magic ring & first rounds
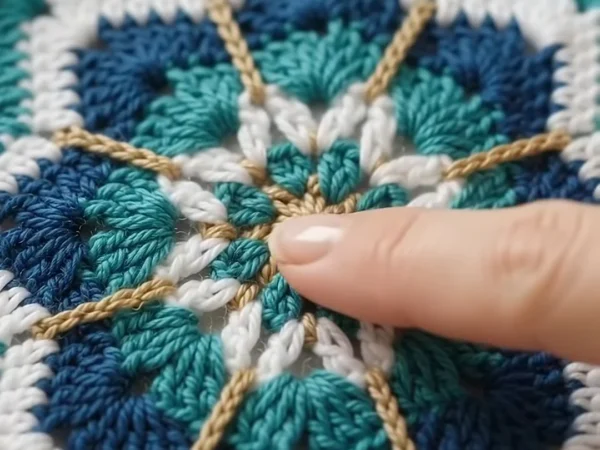 Building the shape
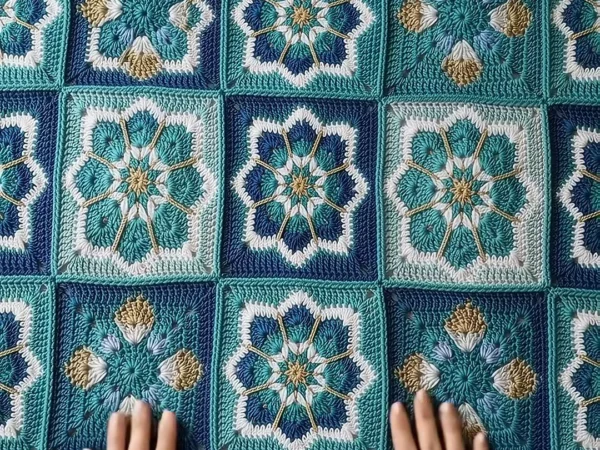 Assembly in progress
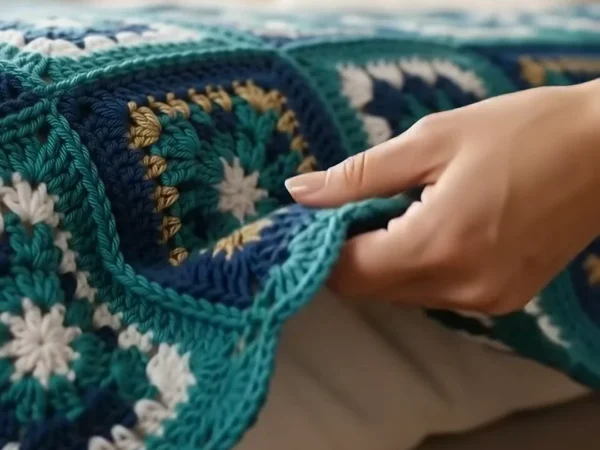 Finished & ready!
About This Moroccan Zellige Star Crochet Bedspread
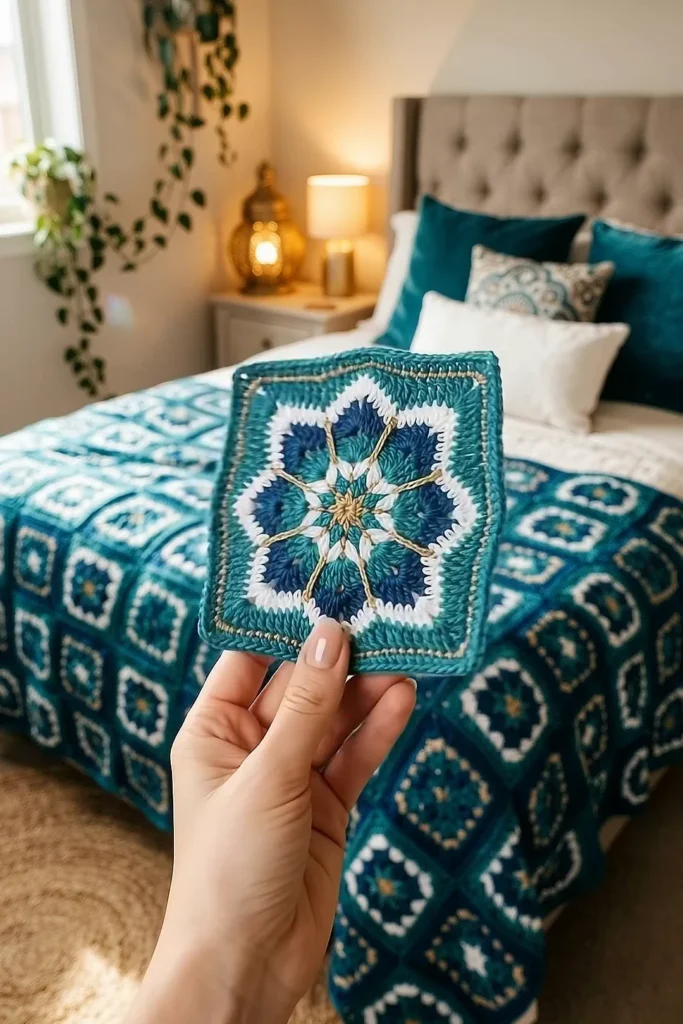
This Moroccan crochet blanket pattern takes its idea from zellige, the geometric tile mosaic you see on fountains, walls and courtyard floors in Fes, Meknes, Marrakech and Tetouan. Each square holds an 8-point star: a gold center, eight shell petals in navy and teal, fine gold lines that run between the petals like the joints between tile pieces, and a crisp white outline around the star points. Navy squares and teal squares alternate in a checkerboard, so the bedspread reads as one large tiled surface.
In real zellige, a master craftsman (maalem) chisels every small piece by hand from glazed clay tiles, and the patterns grow from the eight-point star outward. The crochet follows the same logic. The star is worked in rounds that are all multiples of 8, the gold lines are added on top in surface slip stitch, and then four rounds of tall stitches turn the 8 points into 4 square corners. The squares are joined with a thin teal seam and the whole bedspread gets a gold line and a teal shell border.
A queen bedspread takes about 185 to 200 hours and a throw about 80 to 90. One square, with its gold lines, takes about 70 minutes. This is an advanced project with many color changes and tall stitches, made for a crocheter who likes precise counting and wants a bedspread with a real story behind its design.
Materials
- DK weight cotton yarn, teal about 3,450 m for a queen (18 balls of 100 g / 200 m), or 1,500 m for a throw (8 balls)
- DK weight cotton yarn, navy blue about 2,150 m for a queen (11 balls), or 910 m for a throw (5 balls)
- DK weight cotton yarn, white about 780 m for a queen (4 balls), or 170 m for a throw (1 ball)
- DK weight gold metallic yarn about 900 m for a queen (8 balls of 50 g / 125 m), or 210 m for a throw (2 balls)
- 4 mm (G-6) crochet hook for the squares, joining and border
- 3.5 mm (E-4) crochet hook for the gold surface lines
- Stitch markers to mark the corner points and the middle of each border side
- Blocking mats, rust-proof pins, tapestry needle and scissors
Abbreviations
MRmagic ringchchainsl stslip stitchscsingle crochethdchalf double crochetdcdouble crochettrtreble crochet: yarn over twice, then work off the loops in pairsdtrdouble treble crochet: yarn over 3 times, then work off the loops in pairsV-st(dc, ch 1, dc) in the same spaceshell5 dc (or 7 dc at the border corners) in the same stitch or spacesurface sl stwith the yarn held behind the square, insert the hook from the front, pull up a loop and draw it through the loop on the hookspspaceskskipst(s)stitch(es)rndroundreprepeatRS / WSright side / wrong sideStar Center (Rnds 1 to 6)
- Colors: Square A (teal ground) uses teal for Rnd 4 and navy for Rnd 5. Square B (navy ground) uses navy for Rnd 4 and teal for Rnd 5. All other star rounds are the same. Make 66 A and 66 B for a queen, 28 A and 28 B for a throw. Work all rnds with the RS facing, use the 4 mm hook, and fasten off at the end of each star rnd.
- Rnd 1 (gold): MR, ch 1, 8 sc in ring, join with sl st to first sc. Pull the ring tight. (8 sc)
- Rnd 2 (teal, small fans): join teal in any sc, ch 3 (counts as dc here and throughout), 2 dc in same st, ch 1, *3 dc in next sc, ch 1; rep from * 6 more times, join with sl st to top of ch 3. (24 dc, 8 ch-1 sps: 8 fans of 3 dc)
- Rnd 3 (white, spokes): join white in any ch-1 sp, ch 4 (counts as dc and ch 1), dc in same sp to make the first V-st, ch 2, *V-st in next ch-1 sp, ch 2; rep from * 6 more times, join to 3rd ch of ch 4. (8 V-sts = 16 dc, 8 ch-2 sps) Each V-st is a white spoke; each ch-2 sp sits above a teal fan.
- Rnd 4 (teal for A, navy for B, inner shells): join in any ch-2 sp, ch 3, 4 dc in same sp, sc in ch-1 sp of next V-st, *5 dc in next ch-2 sp, sc in ch-1 sp of next V-st; rep from * 6 more times, join to top of ch 3. (40 dc and 8 sc = 48 sts: 8 shells)
- Rnd 5 (navy for A, teal for B, star petals): join in any sc, ch 1, sc in same sc, *dc in next dc, 2 dc in next dc, (dc, ch 2, dc) in next dc, 2 dc in next dc, dc in next dc, sc in next sc; rep from * 7 more times, but do not work the last sc, join to first sc. (64 dc and 8 sc = 72 sts, 8 ch-2 point sps: 8 petals of 8 dc)
- Rnd 6 (white, star outline): join white in any ch-2 point sp, ch 1, *(sc, ch 2, sc) in point sp, hdc in next 3 dc, dc in next dc, sk next sc, dc in next dc, hdc in next 3 dc; rep from * 7 more times, join to first sc. (80 sts: 16 sc, 48 hdc, 16 dc, and 8 ch-2 point sps) Skipping the sc pulls each valley in, so the outline becomes a sharp 8-point star.
- Check: the white star has 8 points, and between each two points there are exactly 10 sts (sc, 3 hdc, dc, dc, 3 hdc, sc). If one section has 9 or 11, fix it now, because Rnd 7 depends on it.
Gold Zellige Lines (surface slip stitch)
- These 8 lines are the tile joints of the design. Work them now, while the square is small and easy to turn. Use gold and the 3.5 mm hook, so the line stays thin.
- Find the line path: start at the gold center, between two teal fans of Rnd 2. The line goes straight out through the middle of the white V-st (Rnd 3), over the sc between two shells (Rnd 4), over the sc between two petals (Rnd 5), and ends in the valley of Rnd 6, between the two white dc.
- Hold the gold yarn behind the square. Insert the hook in the gold center, pull up a loop, then work surface sl st along the path: 1 sl st at the base of the V-st, 1 in the ch-1 sp of the V-st, 1 into the Rnd 4 sc, 1 into the Rnd 5 sc, and 1 in the valley of Rnd 6. (5 surface sl st per line)
- Cut the yarn, pull the end to the WS through the last loop and leave a 10 cm tail. Rep for all 8 spokes. (8 gold lines)
- Keep every sl st the same size as one round of stitches. If the line is tight, the petals pucker; if it is loose, it sags off the spoke. Weave the tails on the WS under the petals of the same color as the line passes.
Squaring Off (Rnds 7 to 11)
- Mark 4 of the 8 star points, every other one. These become the corners of the square. The other 4 points become the middle of each side. Tall dtr fill the corners, shorter sts fill the valleys, and sc sit on the side points, which are already close to the edge.
- Rnd 7 (teal for A, navy for B): join in a marked ch-2 point sp, ch 5 (counts as dtr), (dtr, ch 2, 2 dtr) in same sp to make the first corner. *Dtr in next 3 sts, tr in next 4 sts, dc in next st, hdc in next st, sc in next st, 2 sc in next ch-2 point sp (middle of side), sc in next st, hdc in next st, dc in next st, tr in next 4 sts, dtr in next 3 sts**, (2 dtr, ch 2, 2 dtr) in next ch-2 point sp (corner); rep from * 2 more times, then rep from * to ** once, join to top of ch 5. (104 sts: 26 per side, 4 corner ch-2 sps)
- Count check for Rnd 7: each side is 2 dtr (corner) + 10 sts + 2 sc + 10 sts + 2 dtr (corner) = 26 sts. The 10 sts on each half are 3 dtr, 4 tr, dc, hdc, sc, mirrored on the other half.
- Rnd 8 (same color): sl st in next dtr and in corner sp, ch 3, (dc, ch 2, 2 dc) in same sp, *dc in each st to next corner sp, (2 dc, ch 2, 2 dc) in corner sp; rep from * 2 more times, dc in each st to end, join. (120 dc: 30 per side)
- Rnd 9 (gold line): join gold in any corner sp, ch 1, (sc, ch 2, sc) in same sp, *sc in each dc to next corner sp, (sc, ch 2, sc) in corner sp; rep from * 2 more times, sc in each dc to end, join. (128 sc: 32 per side)
- Rnd 10 (teal for A, navy for B): join in any corner sp, ch 3, (dc, ch 2, 2 dc) in same sp, *dc in each sc to next corner sp, (2 dc, ch 2, 2 dc) in corner sp; rep from * 2 more times, dc in each sc to end, join. (144 dc: 36 per side)
- Rnd 11 (teal for both A and B): join teal in any corner sp, ch 1, 3 sc in same sp, *sc in each dc to next corner sp, 3 sc in corner sp; rep from * 2 more times, sc in each dc to end, join. Fasten off. (156 sc: 36 per side plus 3 at each corner) The teal edge on every square makes the teal grid when you join.
- Block each square to 19 x 19 cm, with the star points pinned straight toward the corners and the middle of each side.
Optional Square C (gold petal variation)
- Square C is a navy-ground square where the 4 side petals are gold. Work it like Square B, but change colors inside Rnd 5.
- Rnd 5: join teal in any sc. Work the first petal in teal, then on the last yarn over of the sc after it, change to gold. Work the next petal in gold, change back to teal on the next sc, and so on. Carry the unused yarn inside the sts. (4 teal petals and 4 gold petals, alternating; 72 sts and 8 ch-2 point sps as before)
- Skip the gold zellige lines on Square C; the gold petals take their place.
- In Rnd 7, start in the point sp of a teal petal, so the teal petals point to the corners and the gold petals point to the middle of each side.
- If you use Square C, make it in place of some B squares: for example 46 B and 20 C for a queen, or 20 B and 8 C for a throw. It needs about 1.5 m of gold per square instead of the gold lines.
Joining the Squares
- Layout: 11 x 12 = 132 squares for a queen (about 215 x 234 cm with the border), or 7 x 8 = 56 squares for a throw (about 139 x 158 cm).
- Lay the squares in a checkerboard: A, B, A, B across the first row, then B, A, B, A across the second row, and so on. No two squares of the same ground color touch along a side. Spread any C squares evenly over the B places.
- With teal and the 4 mm hook, hold two squares WS together. Sl st through the outer loops of both squares, starting in the middle sc of one corner: 1 sl st in the corner middle sc, 1 in each of the 38 sc along the side, and 1 in the next corner middle sc. (40 sl st per side)
- Join all the horizontal seams first, then all the vertical seams, and work through all four corner sc where the seams cross so there is no hole.
- Worked on the RS, this seam makes a thin raised teal line between the squares, like the grout between tiles.
Gold and Teal Shell Border
- Rnd 1 (gold): join gold in the corner middle sc of any blanket corner, ch 1, 3 sc in same st, *sc in each sc along the side, including both corner middle sc at every seam, 3 sc in the corner middle sc of the next blanket corner; rep from * around, ending without the last 3 sc, join. (Queen: 480 sc on each long side and 440 on each short side between the corner center sc. Throw: 320 and 280.) Each square gives exactly 40 sts per side.
- Rnd 2 (teal): join teal in any corner center sc, ch 1, 3 sc in same st, *sc in each sc to next corner center sc, but work 2 sc in one st near the middle of the side (mark it), 3 sc in corner center sc; rep from * around, ending without the last 3 sc, join. (Queen: 483 and 443 sc per side between the corner center sc. Throw: 323 and 283.)
- Rnd 3 (teal, shells): sl st in next sc (the corner center sc), ch 3, 6 dc in same st (corner shell), *[sk 1, sc in next st, sk 1, 5 dc in next st] 10 times for every square along this side, then sk 1, sc in next st, sk 1**, 7 dc in next corner center sc; rep from * 2 more times, then from * to ** once, join to top of ch 3. (Queen: 120 shells on each long side and 110 on each short side, plus 4 corner shells. Throw: 80 and 70, plus 4 corner shells.)
- Count check for Rnd 3: each side has 40 sts per square plus 3. Every repeat in brackets uses 4 sts, and the final “sk 1, sc, sk 1” uses the last 3, so the next corner shell lands exactly on the corner center sc.
- Rnd 4 (teal): ch 1, sc in each dc and sc around, working 2 sc in the center dc of every shell (3rd dc of a 5-dc shell, 4th dc of a corner shell). Join and fasten off.
Finishing
Weave in every tail on the WS, inside the stitches of the same color: navy tails in navy, white in white, gold under the gold rnd or the petals. With many color changes per square, weave ends as you finish each square, not at the end, or you will face more than 1,500 tails at once.
Lay the bedspread flat RS up, mist it with water and pin the border shells into even scallops. Smooth the star points with your fingers so they all point in the same directions across the grid. Do not iron the metallic yarn. Let it dry completely before you move it.
Tips for Success
- Work in batches: make all the star centers (Rnds 1 to 6) first, then all the gold lines, then square them off. Each step becomes automatic.
- Use a stitch marker in the first dtr of each corner in Rnd 7; it makes Rnd 8 corners easy to find in navy yarn.
- Wind small balls of gold metallic yarn and let them hang free while you work, so the yarn does not twist and split.
- Count Rnd 6 and Rnd 7 on every square. These two rnds set the shape of the star and the square; the rest is simple.
- Keep a finished A and B square next to you as a model, so the colors of Rnds 4 and 5 never get mixed up.
Common Mistakes to Avoid
- Rounded star points. In Rnd 6, the sc in each valley of Rnd 5 must be skipped; working into it fills the valley and the star turns into a flower.
- Wavy squares. If the corners in Rnd 7 are too short, the square bulges at the side points. Use real dtr in the corners and the first 3 sts after them.
- Corners on the wrong points. Mark every other point before Rnd 7. If you choose two neighboring points, the square comes out twisted.
- Tight gold lines. Surface sl st that is too tight pulls the petals together. Keep the yarn relaxed behind the square.
- A border that does not fit. Count Rnd 2 of the border; each side must be 40 sts per square plus 3, or the corner shell will not land on the corner.
Ways to Customize This Pattern
- Use the colors of other zellige panels: green and white with a touch of black, or terracotta, ochre and cream, as on many old fountains.
- Make a matching cushion set: 4 squares joined 2 x 2 for each cushion front, with the shell border around them.
- Use only Square A for a lighter, airy bedspread, or only Square B for a deep navy one with teal stars.
- Replace the gold metallic yarn with mustard cotton if you want a fully washable, softer bedspread with the same look.
- Make a table runner of 2 x 7 squares, or a single square as a placemat or coaster set.
Frequently asked questions
Zellige is the Moroccan art of geometric tile mosaic. Small pieces are cut by hand from glazed clay tiles and set into star and polygon patterns, often starting from an eight-point star. This blanket borrows that star, the tile colors and the thin joint lines.
The star has 8 points, so every rnd from 1 to 6 repeats 8 times: 8 sc, 8 fans, 8 spokes, 8 shells, 8 petals and 8 points. Rnd 7 then splits the 8 points into 4 corners and 4 side centers to make a square.
Yes. A mustard or ochre cotton gives the same tile look and is softer to sleep under. Metallic yarn catches the light like glazed tile, so it is a matter of taste.
Yes. Join each square to its neighbors during Rnd 11 with a sl st into the matching sc of the other square. Make the gold lines first, because they are very hard to add once the square is part of the blanket.
Hand wash in cold water or use a gentle cold cycle inside a large laundry bag, and dry it flat. Test a scrap of navy and teal with white first, so dark colors do not bleed into the white star outline.