Red 3D Camellia Lace Crochet Bedspread
Advanced
For experienced crocheters who enjoy complex shaping, fine detail, and ambitious construction
Multi-Day Project
A rewarding 12+ hour journey — perfect for dedicated crafters who love detailed work.
Handmade Gift
A beautiful keepsake — free forever. Read online or print at home.
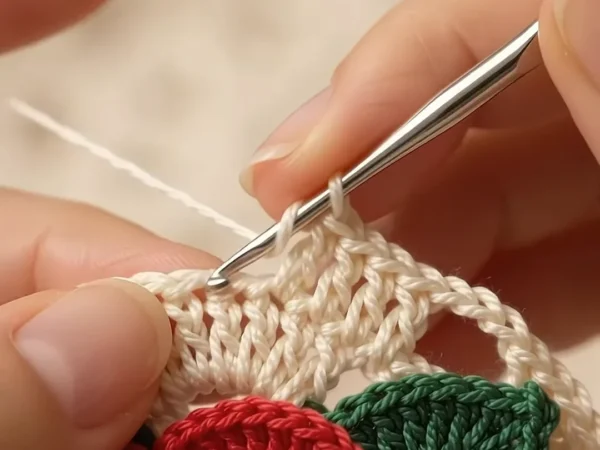 Magic ring & first rounds
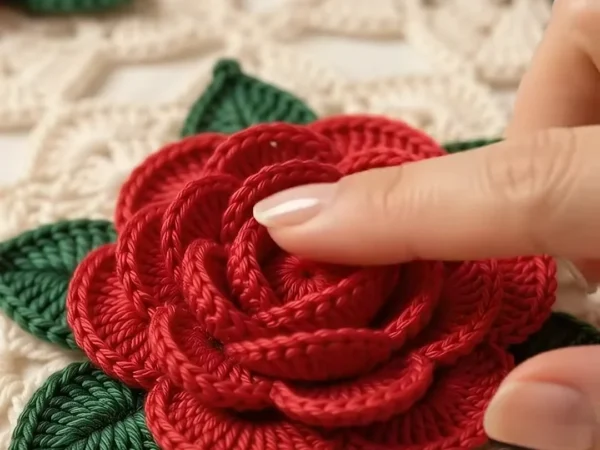 Building the shape
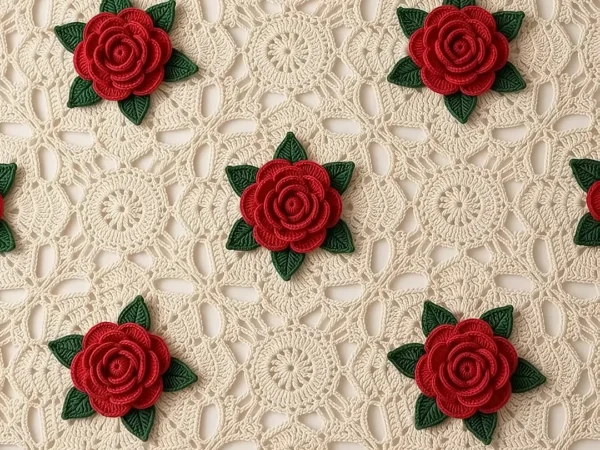 Assembly in progress
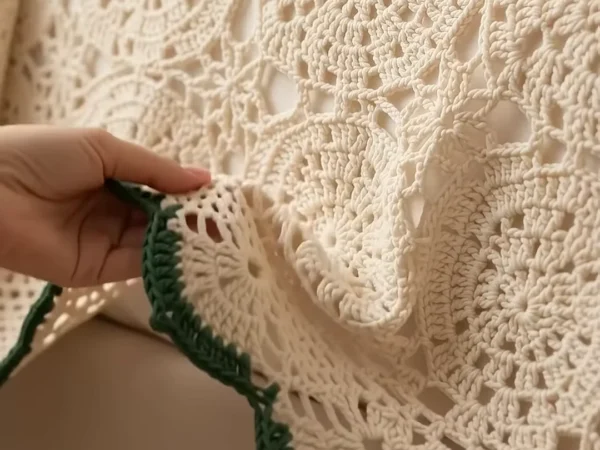 Finished & ready!
About This Red 3D Camellia Lace Crochet Bedspread
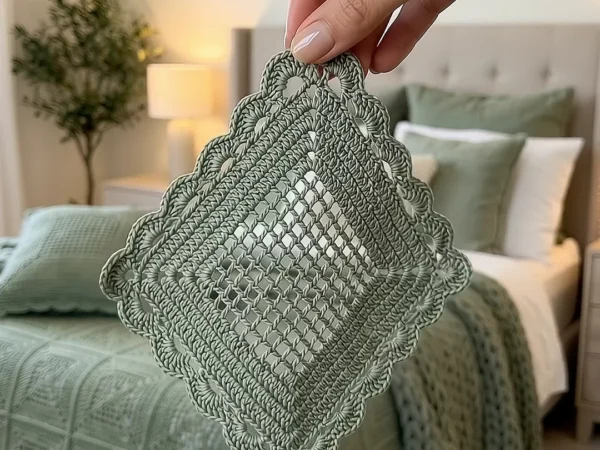
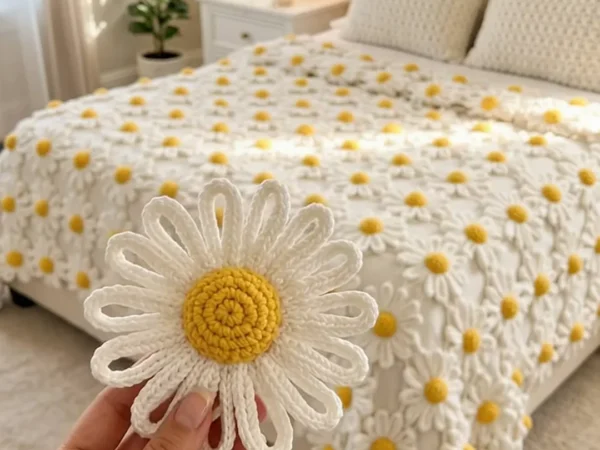
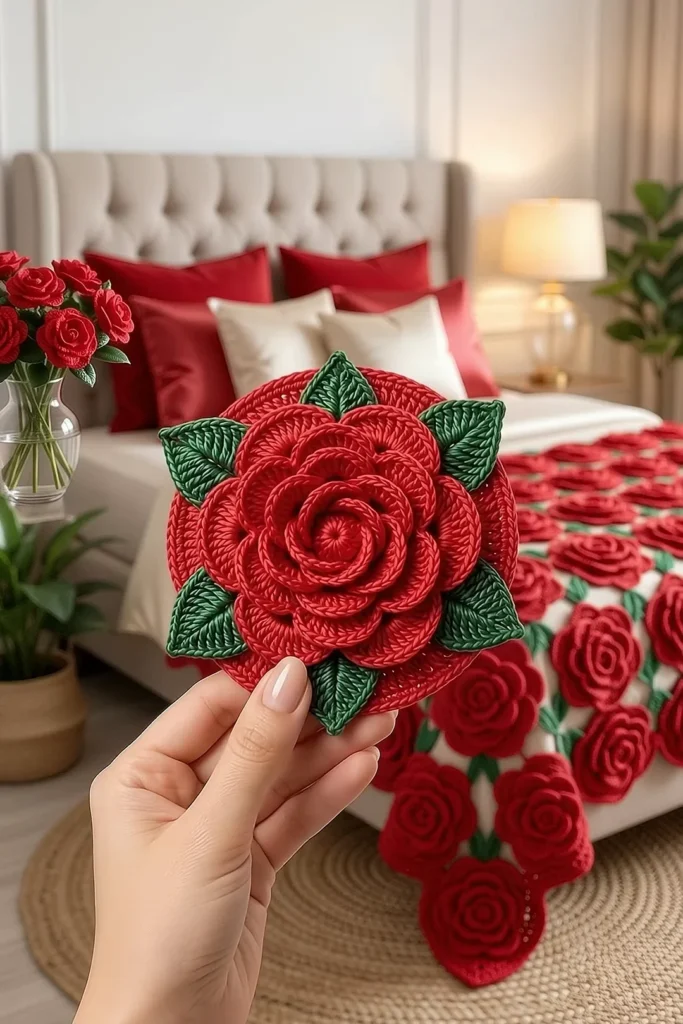
This camellia crochet blanket pattern puts big red flowers on a soft cream lace bed cover. Each motif is a lace octagon with a spoked center, a ring of mesh windows and a round of small shells. On top sits a raised 3D camellia: a rolled spiral in the middle and four layers of neat, rounded, cupped petals around it. Five dark green pointed leaves with a center vein peek out from under the flower.
The octagons are joined as you go on their last round, on four sides only. This leaves a small square gap between every four octagons, and a little lace wheel fills each gap. Half wheels and quarter wheels make the edges straight. You can sew a camellia on every other octagon for a light checkerboard look, or on every octagon for a bed full of flowers. The border is a row of cream scallops with a red line and a dark green edge, and a matching cushion carries one big camellia.
A queen bedspread with the checkerboard layout takes about 225 to 245 hours, and a throw about 105 to 120 hours. One octagon with its camellia and leaves takes about 100 minutes. This is an advanced project for a crocheter who is happy with lace rounds, front and back loop work and many small pieces. If you like a classic white lace bedspread but want real color and texture, this is the one for you.
Materials
- DK weight cotton yarn, cream about 5,600 m for a queen (28 balls of 100 g / 200 m), or 2,750 m for a throw (14 balls)
- DK weight cotton yarn, camellia red checkerboard: about 1,300 m for a queen (7 balls) or 610 m for a throw (4 balls); camellia on every octagon: about 2,450 m for a queen (13 balls) or 1,170 m for a throw (6 balls)
- DK weight cotton yarn, dark green checkerboard: about 630 m for a queen (4 balls) or 320 m for a throw (2 balls); camellia on every octagon: about 1,180 m for a queen (6 balls) or 580 m for a throw (3 balls)
- Extra yarn for the cushion about 160 m cream, 30 m red and 20 m green
- 40 x 40 cm cushion cover and insert red or cream cotton, for the cushion
- 4 mm (G-6) crochet hook for the octagons, wheels, joining and border
- 3.5 mm (E-4) crochet hook for the camellias and leaves
- Stitch markers, sewing pins, tapestry needle and scissors
Abbreviations
MRmagic ringchchainsl stslip stitchscsingle crochethdchalf double crochetdcdouble crochetBLOback loop onlyshell(2 dc, ch 1, 2 dc) in the same sploopa ch-3 sp in the last rnd of the octagonspspaceskskipst(s)stitch(es)rndroundreprepeatRS / WSright side / wrong sideLace Octagon (make 168 for a queen, 80 for a throw)
- Rnd 1: with cream and the 4 mm hook, MR, ch 3 (counts as dc here and throughout), 15 dc in ring, join with sl st to top of ch 3. Pull the ring tight. (16 dc)
- Rnd 2 (spokes): ch 4 (counts as dc and ch 1), *dc in next dc, ch 1; rep from * 14 more times, join with sl st to 3rd ch of ch 4. (16 dc, 16 ch-1 sps)
- Rnd 3: sl st in first ch-1 sp, ch 3, 2 dc in same sp, 3 dc in each ch-1 sp around, join to top of ch 3. (48 dc)
- Rnd 4 (octagon set-up): ch 3, dc in next 5 dc, ch 2, *dc in next 6 dc, ch 2; rep from * 6 more times, join to top of ch 3. (48 dc in 8 groups of 6, 8 corner ch-2 sps)
- Rnd 5: sl st in next 5 dc and in corner sp, ch 5 (counts as dc and ch 2), dc in same sp, *dc in next 6 dc, (dc, ch 2, dc) in next corner sp; rep from * 6 more times, dc in next 6 dc, join with sl st to 3rd ch of ch 5. (64 dc: 8 dc on each side, counting the corner dc at each end; 8 corner ch-2 sps)
- Rnd 6 (mesh windows): sl st in corner sp, ch 5, dc in same sp, *dc in next dc, ch 2, sk next 2 dc, dc in next 2 dc, ch 2, sk next 2 dc, dc in next dc, (dc, ch 2, dc) in next corner sp; rep from * 6 more times, dc in next dc, ch 2, sk next 2 dc, dc in next 2 dc, ch 2, sk next 2 dc, dc in next dc, join to 3rd ch of ch 5. (48 dc: 6 dc and 2 ch-2 windows on each side; 8 corner ch-2 sps)
- Rnd 7 (shells): sl st in corner sp, ch 5, dc in same sp, *sk next 2 dc, shell in next ch-2 window, sk next 2 dc, shell in next ch-2 window, sk next 2 dc, (dc, ch 2, dc) in next corner sp; rep from * 6 more times, sk next 2 dc, shell in next window, sk next 2 dc, shell in next window, join to 3rd ch of ch 5. (80 dc: 10 dc and 2 shells on each side; 8 corner ch-2 sps)
- Rnd 8 (edge and joining rnd): sl st in corner sp, ch 1, (sc, ch 3, sc) in same sp, *sc in next 3 dc, sc in next ch-1 sp, sc in next 2 dc, ch 3, sc in next 2 dc, sc in next ch-1 sp, sc in next 3 dc, (sc, ch 3, sc) in next corner sp; rep from * 6 more times, then work the last side the same way without the corner, join to first sc. Fasten off. (112 sc: 12 sc on each side plus 2 at each corner; 8 corner loops and 8 side loops)
- For the first octagon only, work Rnd 8 as written. For all the others, join them on Rnd 8 as shown in “Joining the Octagons” below.
Red Camellia (make 84 for a queen or 40 for a throw on the checkerboard layout; 168 or 80 for a camellia on every octagon; plus 1 for the cushion)
- Rnd 1: with red and the 3.5 mm hook, MR, ch 1, 6 sc in ring, join with sl st to first sc. Pull tight. (6 sc)
- Rnd 2: ch 1, 2 sc in each st around, join. (12 sc)
- Rnd 3 (BLO): ch 1, working in BLO, *sc in next st, 2 sc in next st; rep from * 5 more times, join. (18 sc) The front loops of Rnd 2 stay free.
- Rnd 4 (BLO): ch 1, *sc in next 2 sts, 2 sc in next st; rep from * 5 more times, join. (24 sc)
- Rnd 5 (BLO): ch 1, *sc in next 3 sts, 2 sc in next st; rep from * 5 more times, join. (30 sc)
- Rnd 6 (BLO): ch 1, *sc in next 4 sts, 2 sc in next st; rep from * 5 more times, join. (36 sc) This is the flat base of the flower. Now the free front loops of Rnds 2, 3, 4 and 5 sit in rings on the RS.
- Rnd 7 (outer petals, both loops of Rnd 6): ch 1, *sc in next st, hdc in next st, 3 dc in each of next 2 sts, hdc in next st, sc in next st; rep from * 5 more times, join. (6 petals of 10 sts = 60 sts)
- Rnd 8 (petal rim): ch 1, sl st loosely in each st around, join. Fasten off with a 40 cm tail for sewing. (60 sl st) This firm rim makes the outer petals round and cupped, like real camellia petals.
- Layer 3: join red in the free front loop of the 3rd st of Rnd 5, so these petals sit between the petals behind them. Ch 1, sc in same loop, 2 dc in next loop, 3 dc in next loop, 2 dc in next loop, sc in next loop, *sc in next loop, 2 dc in next loop, 3 dc in next loop, 2 dc in next loop, sc in next loop; rep from * 4 more times. Join and fasten off. (6 petals of 9 sts = 54 sts, using all 30 loops)
- Layer 2: join red in the free front loop of the 3rd st of Rnd 4. Ch 1, sc in same loop, 3 dc in each of next 2 loops, sc in next loop, *sc in next loop, 3 dc in each of next 2 loops, sc in next loop; rep from * 4 more times. Join and fasten off. (6 petals of 8 sts = 48 sts, using all 24 loops)
- Layer 1 (inner petals): join red in the free front loop of the 2nd st of Rnd 3. Ch 1, sc in same loop, 4 dc in next loop, sc in next loop, *sc in next loop, 4 dc in next loop, sc in next loop; rep from * 4 more times. Join and fasten off. (6 petals of 6 sts = 36 sts, using all 18 loops) These small petals stand almost upright around the center.
- Spiral center: with red, ch 16. Sc in 2nd ch from hook and in next 4 ch, hdc in next 5 ch, dc in last 5 ch. Fasten off with a 25 cm tail. (15 sts)
- Roll the strip tightly, starting from the sc end, so the short sc sit in the middle and the taller dc wrap around them. Sew a few stitches through all layers at the base. Sew the roll into the middle of the flower over Rnds 1 and 2, using the free front loops of Rnd 2 as anchors, so the spiral sits a little higher than Layer 1.
- The finished camellia is about 8.5 cm across and 3 cm high.
Dark Green Leaves (make 5 per camellia)
- With dark green and the 3.5 mm hook, ch 10.
- Sc in 2nd ch from hook, hdc in next ch, dc in next 4 ch, hdc in next ch, sc in next ch, 3 sc in last ch. (11 sts, using all 9 ch)
- Working along the other side of the chain: sc in next ch, hdc in next ch, dc in next 4 ch, hdc in next ch, sc in next ch. (8 sts)
- Pointed tip: in the skipped first ch, work (sc, ch 2, sl st in 2nd ch from hook, sc). Join with sl st to first sc and fasten off with a 20 cm tail. (21 sts plus the pointed tip)
- Vein: thread a 30 cm length of the same green on a tapestry needle and backstitch along the foundation chain on the RS, from the base (the 3 sc end) to 1 cm from the tip. Weave in this end.
- The leaf is about 4.5 cm long. Make 420 for a queen or 200 for a throw on the checkerboard layout, 840 or 400 for a camellia on every octagon, and 5 more for the cushion.
Sewing the Camellia to the Octagon
- Lay the octagon RS up. Set 5 leaves on Rnds 3 and 4, evenly spaced like a star, with the tips pointing out toward Rnd 7. Sew each leaf down by its base only, so the tip stays free.
- Set the camellia in the center so it covers Rnds 1 to 3 and the leaf bases. About 2.5 cm of each leaf should show between the outer petals and the lace.
- With the red tail, sew the camellia on from the WS: first a small circle around Rnd 2 of the flower, then a circle along Rnd 6. Sew through the flat base only, never through the petals, so they stay loose and 3D.
- Sew on the flower before you join the octagon to the bedspread. It is much easier on a single motif than on a heavy cover.
Joining the Octagons
- Layout: 12 x 14 = 168 octagons for a queen (about 204 x 238 cm before the border), or 8 x 10 = 80 for a throw (about 136 x 170 cm). Keep an even number of octagons along every side; the border math in the last section needs it.
- Checkerboard layout (as in the flat lay photo): put a camellia octagon in the top left corner, then alternate camellia and plain octagons along each row, and start each new row with the other kind. A queen has 84 camellia and 84 plain octagons; a throw has 40 and 40.
- Full bloom layout (as on the bed photo): sew a camellia on every octagon. You need 168 camellias for a queen or 80 for a throw.
- Each octagon joins only on 4 sides: the sides that face up, down, left and right. These are the straight sides. The 4 sides at an angle between them are the diagonal sides; they never join to another octagon. They stay free for the lace wheels.
- Join as you go on Rnd 8: work the new octagon as normal, but at each loop that touches a finished octagon, work ch 1, sl st in the matching loop of the finished octagon, ch 1, instead of ch 3. On a joined side you join 3 loops: the corner loop, the side loop and the next corner loop.
- Work the first row from left to right. In every new row, the first octagon joins to the one above it (1 side), and every other octagon joins to the one before it and the one above it (2 sides). Check that there is always one free diagonal side between two joined sides.
- When the octagons are all joined, you see a square gap, turned on its point, between every 4 octagons, and a V-shaped notch between every 2 octagons on the edges.
Little Lace Wheels
- Full wheel (make 143 for a queen, 63 for a throw, one in each square gap): with cream and the 4 mm hook, MR, ch 3, 15 dc in ring, join to top of ch 3. Pull tight. (16 dc)
- Rnd 2 (joining): ch 1, sc in same st, *ch 4, sl st in the free side loop of the next diagonal side, ch 4, sk next dc, sc in next dc, ch 7, sl st through the 2 joined corner loops at the next point of the gap, ch 7, sk next dc, sc in next dc; rep from * 3 more times, but on the last rep skip the final sc and join to the first sc instead. Fasten off. (8 sc and 8 ch legs: 4 short ones to the side loops, 4 long ones to the points)
- Half wheel (make 48 for a queen, 32 for a throw, one in each notch along the edges): MR, ch 3, 6 dc in ring, turn. (7 dc)
- Row 2 (joining): ch 1, sc in first dc, ch 4, sl st in the side loop of the diagonal side on one side of the notch, ch 4, sk next dc, sc in next dc, ch 7, sl st through the 2 joined corner loops at the bottom of the notch, ch 7, sk next dc, sc in next dc, ch 4, sl st in the side loop of the other diagonal side, ch 4, sk next dc, sc in top of ch 3. Fasten off. (4 sc and 3 ch legs) The flat top of the half wheel lines up with the edge of the bedspread.
- Quarter wheel (make 4, one at each corner of the bedspread): MR, ch 3, 3 dc in ring, turn. (4 dc)
- Row 2 (joining): ch 1, sc in first dc, ch 4, sl st in the side loop of the diagonal side of the corner octagon, ch 4, sk next 2 dc, sc in top of ch 3. Fasten off. (2 sc and 1 ch leg) The ring sits at the corner point of the bedspread, so the corner becomes square.
Cream Scallop Border with Red and Green Edge
- Rnd 1: with cream and the 4 mm hook, join with sc in the ring of any quarter wheel, 2 more sc in the same ring (3 corner sc). Along the side: 4 sc along the straight edge of the quarter wheel, then for each octagon on this side work 2 sc in the corner loop, sc in next 6 sc, 2 sc in the side loop, sc in next 6 sc, 2 sc in the next corner loop, and 9 sc evenly across the top of each half wheel between the octagons; end with 4 sc along the next quarter wheel and 3 sc in its ring. Work all 4 sides the same way and join to first sc. (27 x the number of octagons on that side, minus 1, sc on each side between the 3-sc corners: 323 and 377 for a queen, 215 and 269 for a throw)
- Rnd 2: sl st in next sc (the center corner sc), ch 3, 4 dc in same st, dc in each sc around, working 5 dc in each center corner sc, join to top of ch 3. (Counting from the 3rd dc of one corner group to the 3rd dc of the next, there are 329 and 383 dc between them on a queen, 221 and 275 on a throw. Each number is a multiple of 6 plus 5, which is exactly what the scallops need.)
- Rnd 3 (scallops): sl st in next 2 dc (to the center corner dc), ch 3, 8 dc in same st, *sk 2 dc, sc in next dc, (sk 2 dc, 7 dc in next dc, sk 2 dc, sc in next dc) to the last 2 dc before the next center corner dc, sk 2 dc, 9 dc in the center corner dc; rep from * 3 more times, but on the last rep join to top of ch 3 instead of working the corner. Fasten off. (54 and 63 scallops on each side of a queen, 36 and 45 on a throw, plus a 9-dc scallop at each corner)
- Rnd 4 (red line): join red with sl st in any sc between two scallops on a side, ch 1, sc in same sc, *sc in next 3 dc, 2 sc in next dc, sc in next 3 dc, sc in next sc; rep from * around. Over each corner scallop work sc in next 4 dc, 2 sc in next dc, sc in next 4 dc instead, then sc in next sc as usual. On the last rep, do not work the last sc; join to the first sc instead. Fasten off. (9 sc per scallop, 11 sc per corner scallop)
- Rnd 5 (dark green edge): join green with sl st in any red sc that sits over a valley sc. *Sc in next 3 sc, 2 sc in each of next 2 sc, sc in next 3 sc, sl st in next sc (the valley); rep from * around. Over each corner scallop work sc in next 4 sc, 2 sc in each of next 2 sc, sc in next 4 sc, sl st in the next valley. Join and fasten off. (10 sc and 1 sl st per scallop, 12 sc and 1 sl st per corner scallop)
- The border adds about 3.8 cm to each edge.
Matching Camellia Cushion
- Make 4 lace octagons and join them 2 x 2 on Rnd 8, exactly as for the bedspread.
- Add 1 full wheel in the center gap, 4 half wheels (one in each edge notch) and 4 quarter wheels at the corners.
- Work border Rnds 1 to 5 as for the bedspread. With 2 octagons on each side, Rnd 1 has 53 sc between the corners, Rnd 2 has 59 dc between the center corner dc, and Rnd 3 has 9 scallops on each side plus 4 corner scallops.
- Sew 5 leaves and 1 camellia over the center wheel, the same way as on an octagon. The flower covers the wheel and the 4 inner points of the octagons.
- Pin the lace on the front of the 40 x 40 cm cushion cover with the scallops hanging just over the seam. Sew it down along Rnd 2 of the border with cream yarn, stretching it a little so it lies flat.
Finishing
Weave in all the cream ends along the solid dc of Rnds 3 and 4 of the octagons, not through the mesh windows, so they do not show. Weave red and green ends into the base of the camellia or the leaf they belong to, on the WS.
Lay the bedspread flat RS up, mist the lace with water and pin out the octagons, the points of the wheels and each scallop. Do not press the camellias. Gently shape each outer petal into a cup with your fingers and leave the bedspread to dry completely before you move it.
Tips for Success
- Make the camellias in batches: work the bases and outer petals for 10 flowers, then all the Layer 3 petals, then Layer 2, then Layer 1. The rhythm makes them all the same size.
- Put a stitch marker in the front loop of the 3rd st of Rnd 5 and the 3rd st of Rnd 4 as you work them. Then you know where to join each petal layer.
- Mark the 4 straight sides of every octagon with a marker before you join it. It stops you from joining a diagonal side by mistake.
- Join the wheels row by row as soon as each row of octagons is done. The work is still light, and you can check that every gap is square.
- Keep the long red tail on every camellia and use it to sew the flower down, so you have fewer ends to weave in.
Common Mistakes to Avoid
- Wavy octagons. Rnd 5 must have exactly 8 dc on each side and Rnd 6 exactly 6 dc and 2 windows. Count one side before you finish each rnd.
- Joining on all 8 sides. Only the straight sides join. If you join a diagonal side, the octagons pull out of line and there is no room for the wheel.
- Petals in the wrong loops. Rnds 3 to 6 of the camellia must go in the back loops only. If you work in both loops, there are no free front loops left for the petal layers.
- A flat camellia. Skipping Rnd 8 (the sl st rim) or working it tightly loses the cupped shape. Keep the sl sts loose and even.
- A crooked border. Count Rnd 2 on each side before the scallops. If a side is not a multiple of 6 plus 5, find the missing st near a corner before you go on.
Ways to Customize This Pattern
- Make soft pink or white camellias for a lighter bedroom, or mix pink and red flowers in the checkerboard.
- Sew camellias only on the octagons of the top two rows, so the flowers sit at the pillow end of the bed and the rest stays pure lace.
- Work only the edge in red: replace the green Rnd 5 with a second red rnd for an all-red line like the flat lay photo.
- Make a table runner of 3 x 9 octagons with a camellia on every third octagon.
- Make a set of 4 cushions with the camellia in a different spot on each: in the center over the wheel, or on one of the 4 octagons.
Frequently asked questions
With the checkerboard layout you need 84 camellias and 420 leaves for a queen, or 40 camellias and 200 leaves for a throw. With a camellia on every octagon you need 168 for a queen and 80 for a throw, with 5 leaves each.
A camellia has neat, rounded petals in clear layers around a small tight center. The firm sl st rim on the outer petals and the short spiral center give that tidy shape, while a peony is fuller and ruffled.
Cotton shows the lace stitches very clearly and holds the cupped petals and pointed leaves well. Acrylic is softer but the camellias tend to go flat. A cotton blend is a good middle way.
Yes. Work Rnd 1 to Rnd 7 on all octagons first, then add Rnd 8 and join as you go. You can also finish all octagons and sew them together through the loops, but the join-as-you-go seam is flatter and lacier.
Wash it on a gentle cold cycle in a large laundry bag and dry it flat, then reshape the petals with your fingers. Wash a scrap of red with cream first to check that the red does not bleed.