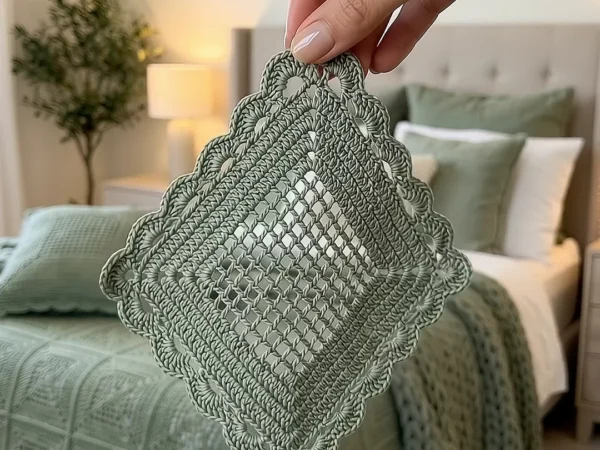
Sage Green 3D Leaf Crochet Bedspread
Advanced
For experienced crocheters who enjoy complex shaping, fine detail, and ambitious construction
Multi-Day Project
A rewarding 12+ hour journey — perfect for dedicated crafters who love detailed work.
Handmade Gift
A beautiful keepsake — free forever. Read online or print at home.
 Magic ring & first rounds
 Building the shape
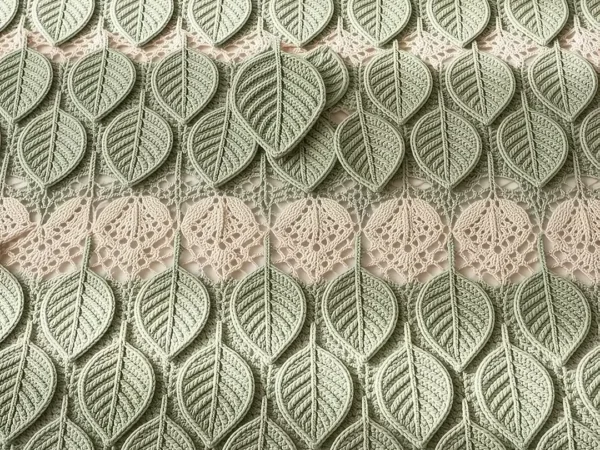 Assembly in progress
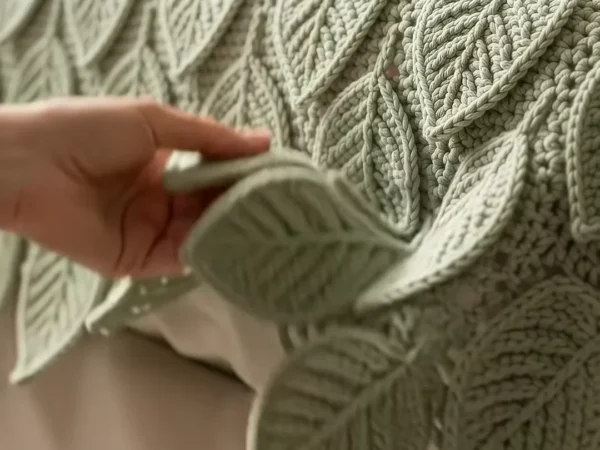 Finished & ready!
About This Sage Green 3D Leaf Crochet Bedspread
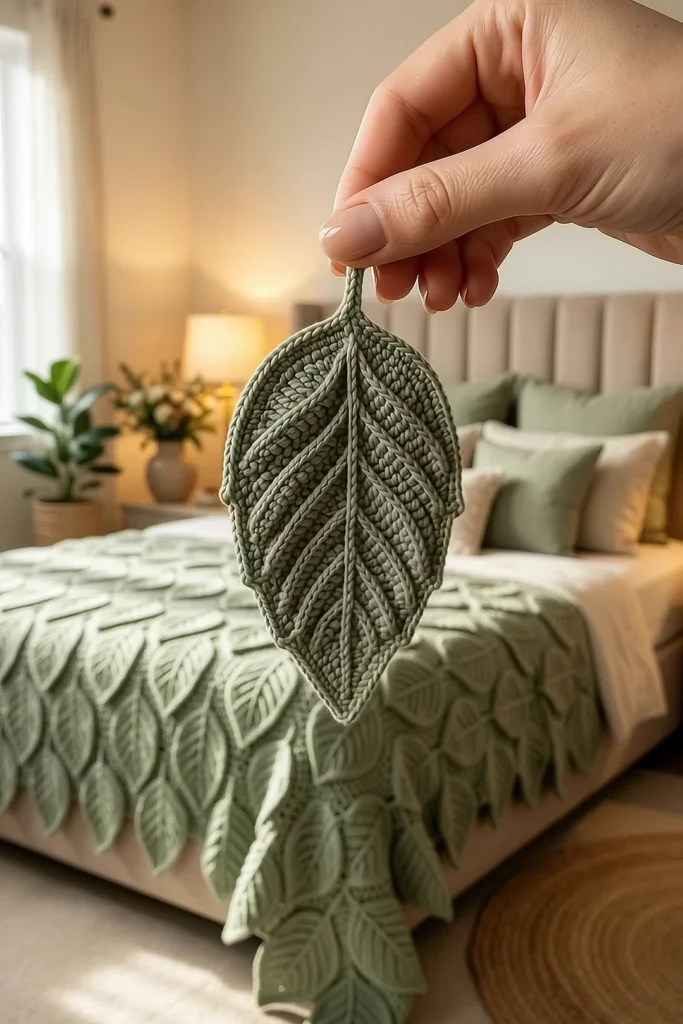
This crochet leaf blanket pattern turns hundreds of sage green leaves into one soft, layered bedspread. Each leaf is about 18 cm long, with a pointed tip, a short stem, a raised center vein and raised side veins that slope toward the tip. The leaves overlap in rows like scales on a pine cone, so every row covers the top of the row below, and the last row hangs off the foot of the bed as a fringe of leaf tips.
The leaves are worked in rounds around a foundation chain, with taller stitches in the middle and short stitches at the ends, so the shape comes from the stitches and not from blocking. The veins are added on top in surface slip stitch, and a round of reverse single crochet gives each leaf its neat corded outline. The leaves are sewn onto light sage mesh strips, and two narrow cream lace bands break up the green, just like in the photos.
A queen bedspread takes about 270 to 290 hours and a throw about 105 to 115. One leaf with its veins takes about 35 minutes, plus 5 minutes to sew it on. This is an advanced project for a patient crocheter who likes repeating one small piece many times and wants a bedspread that nobody else has.
Materials
- DK weight cotton yarn, sage green about 12,000 m for a queen (60 balls of 100 g / 200 m), or 4,700 m for a throw (24 balls)
- DK weight cotton yarn, cream about 350 m for a queen (2 balls), or 120 m for a throw (1 ball)
- 3.5 mm (E-4) crochet hook for the leaves
- 4 mm (G-6) crochet hook for the mesh strips, lace bands, joining and edging
- About 25 stitch markers to mark the leaf positions on each strip
- Sewing pins, tapestry needle, tape measure and scissors
Abbreviations
chchainsl stslip stitchscsingle crochethdchalf double crochetdcdouble crochetrev screverse single crochet (crab stitch): sc worked from left to rightsurface sl stwith the yarn held behind the leaf, insert the hook from the front, pull up a loop and draw it through the loop on the hookskskipspspacest(s)stitch(es); in the mesh strips each ch-1 sp counts as 1 strndroundreprepeatRS / WSright side / wrong sideLeaves (make 328 for a queen, 125 for a throw)
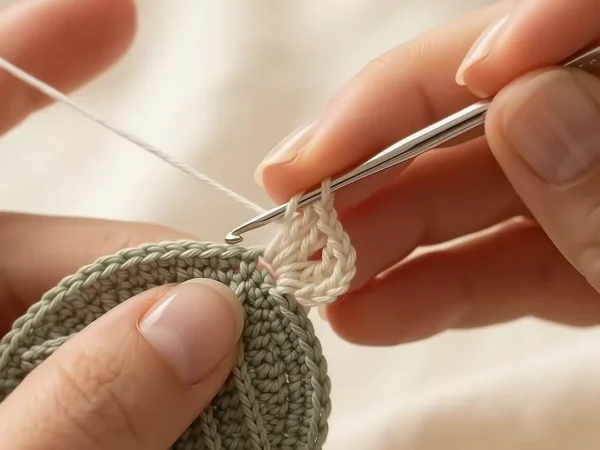
- With sage and the 3.5 mm hook, ch 27. The 2nd ch from the hook is the base of the leaf; the last ch you work into (the first ch you made) is the tip.
- Rnd 1: 3 sc in 2nd ch from hook (base), sc in next ch, hdc in next 3 ch, dc in next 16 ch, hdc in next 3 ch, sc in next ch, 3 sc in last ch (tip). Turn the work and continue along the other side of the chain: sc in next ch, hdc in next 3 ch, dc in next 16 ch, hdc in next 3 ch, sc in next ch, join with sl st to first sc. (54 sts: 3 base, 24 per side, 3 tip)
- Rnd 2: ch 1, 2 sc in each of the 3 base sts; sc in next 2 sts, hdc in next 3, dc in next 14, hdc in next 3, sc in next 2; sc in next st, (sc, ch 2, sc) in center tip st, sc in next st; sc in next 2 sts, hdc in next 3, dc in next 14, hdc in next 3, sc in next 2, join. (58 sts: 6 base, 24 per side, 4 tip, plus 1 ch-2 sp at the tip)
- Rnd 3: ch 1, (sc in next st, 2 sc in next st) 3 times; sc in next 3 sts, hdc in next 3, dc in next 12, hdc in next 3, sc in next 3; sc in next 2 sts, (sc, ch 2, sc) in ch-2 sp, sc in next 2 sts; sc in next 3, hdc in next 3, dc in next 12, hdc in next 3, sc in next 3, join. (63 sts: 9 base, 24 per side, 6 tip, plus ch-2 sp)
- Rnd 4: ch 1, (sc in next 2 sts, 2 sc in next st) 3 times; sc in next 4 sts, hdc in next 16, sc in next 4; sc in next 3 sts, (sc, ch 2, sc) in ch-2 sp, sc in next 3 sts; sc in next 4, hdc in next 16, sc in next 4, join. (68 sts: 12 base, 24 per side, 8 tip, plus ch-2 sp)
- Rnd 5: ch 1, (sc in next 3 sts, 2 sc in next st) 3 times; sc in next 24 sts; sc in next 4 sts, (sc, ch 2, sc) in ch-2 sp, sc in next 4 sts; sc in next 24 sts, join. (73 sts: 15 base, 24 per side, 10 tip, plus ch-2 sp)
- Rnd 6 (outline): ch 1, do not turn. Working from left to right, rev sc in each st around and 3 rev sc in the ch-2 sp at the tip, join. (76 rev sc) This makes the corded outline you see in the photos.
- Stem: fold the leaf in half lengthwise and mark the center st of the base. With RS facing, sl st in the marked st, ch 8, sl st in 2nd ch from hook and in each of next 6 ch, sl st in the same base st. Fasten off with a 40 cm tail for sewing. (7 sl st, about 3 cm long)
- The finished leaf is about 18 x 10 cm, plus the stem. The tip is pointed and the base is round, because the base gets 3 increases per rnd and the tip only gets the (sc, ch 2, sc) point.
Raised Veins
- Cut a 1.5 m length of sage and fold it in half. Work all veins with the yarn doubled and the 3.5 mm hook, so they stand up well above the leaf.
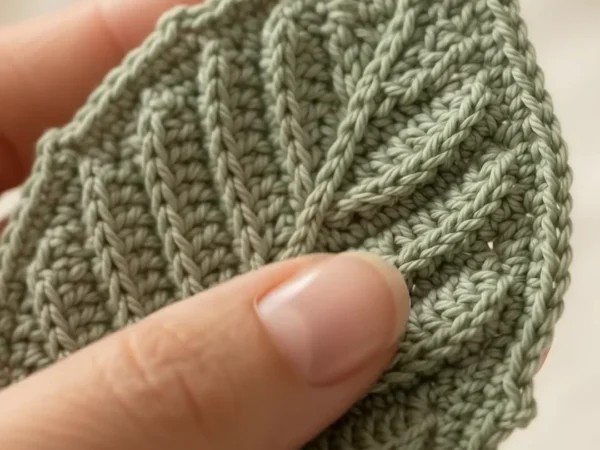
- Center vein: with RS facing, start at the base, right on the foundation chain. Work 1 surface sl st in each ch of the foundation, from the base to the tip. (26 surface sl st) Keep the loops loose.
- Count the foundation ch from the base: 1 to 26. Mark ch 6, 10, 14, 18 and 22. These are the start points of the side veins, on both sides of the center vein.
- Side vein: pull up a loop at a marked ch, next to the center vein. Work 2 surface sl st across Rnd 1, 2 across Rnd 2, 2 across Rnd 3 and 1 across Rnd 4, moving about 2 sts toward the tip in each rnd, so the vein slopes up toward the tip. Stop at the base of Rnd 5. (7 surface sl st per vein) Fasten off on the WS.
- Work 5 side veins on each side of the center vein. (10 side veins per leaf) Make the two sides mirror each other, so the veins meet the center vein in a neat V shape.
- Weave the vein ends on the WS through the dc of Rnds 1 to 3. Do not cut the 40 cm stem tail; you need it for sewing.
Sage Mesh Strips (make 16 for a queen, 10 for a throw)
- Row 1: with sage and the 4 mm hook, ch 380 for a queen (ch 236 for a throw), sc in 2nd ch from hook and in each ch across, turn. (379 sc; throw 235 sc)
- Row 2: ch 4 (counts as dc and ch 1), sk next sc, dc in next sc, *ch 1, sk next sc, dc in next sc; rep from * across, turn. (190 dc and 189 ch-1 sps = 379 sts; throw 118 dc and 117 ch-1 sps = 235 sts)
- Rows 3 to 12: ch 4 (counts as dc and ch 1), sk ch-1 sp, dc in next dc, *ch 1, sk ch-1 sp, dc in next dc; rep from * across, working the last dc in the 3rd ch of the turning ch, turn. (379 sts; throw 235 sts)
- Row 13: ch 1, sc in each dc and in each ch-1 sp across, with the last sc in the 3rd ch of the turning ch. Fasten off. (379 sc; throw 235 sc)
- Each strip is about 210 x 12 cm for a queen, or 130 x 12 cm for a throw. Row 13 is the top edge of the strip. The mesh keeps the bedspread lighter, and it is hidden under the leaves.
Cream Lace Bands (make 2 for a queen, 1 for a throw)
- Row 1: with cream and the 4 mm hook, ch 380 for a queen (ch 236 for a throw), sc in 2nd ch from hook and in each ch across, turn. (379 sc; throw 235 sc)
- Row 2 (fans): ch 1, sc in first sc, *sk 2 sc, 5 dc in next sc, sk 2 sc, sc in next sc; rep from * across, turn. (63 fans and 64 sc = 379 sts; throw 39 fans and 40 sc = 235 sts)
- Row 3 (net): ch 5 (counts as dc and ch 2), sc in center dc of next fan, ch 2, dc in next sc, *ch 2, sc in center dc of next fan, ch 2, dc in next sc; rep from * across, turn. (64 dc, 63 sc and 126 ch-2 sps; throw 40 dc, 39 sc and 78 ch-2 sps)
- Row 4 (fans): ch 1, sc in first dc, *sk ch-2 sp, 5 dc in next sc, sk ch-2 sp, sc in next dc; rep from * across, working the last sc in the 3rd ch of the turning ch, turn. (63 fans and 64 sc = 379 sts; throw 235 sts)
- Rows 5 to 10: rep Rows 3 and 4 three more times. (Row 10 = 379 sts; throw 235 sts)
- Row 11: ch 1, sc in each st across. Fasten off. (379 sc; throw 235 sc)
- Each band is about 11 cm tall. It has the same number of sts as a mesh strip, so the seams match stitch for stitch.
Sewing the Leaves to the Strips
- There are two kinds of leaf rows. A rows have 21 leaves for a queen (13 for a throw). B rows have 20 leaves for a queen (12 for a throw) and sit half a leaf to the side, so the leaves of a B row fall between the leaves of an A row.
- Strip 1 (the top strip) is an A row, strip 2 is a B row, and so on down the bedspread. A queen has 8 A strips and 8 B strips (8 x 21 + 8 x 20 = 328 leaves). A throw has 5 A strips and 5 B strips (5 x 13 + 5 x 12 = 125 leaves).
- Mark the leaf centers on Row 13 (top edge) of each strip, counting from the right edge. A rows: st 10, 28, 46 and every 18th st after that, up to st 370 for a queen (st 226 for a throw). B rows: st 19, 37, 55 and every 18th st after that, up to st 361 for a queen (st 217 for a throw).
- Pin each leaf RS up with the base on the top edge at a marker, the center vein running straight down and the tip pointing down. The stem lies above the top edge; on strip 1 only, move the leaves 3 cm lower so the stems lie on the strip.
- With the stem tail, sew the stem flat. Then sew along the foundation chain from the WS of the leaf, from the base down about 11 cm, so your stitches hide under the center vein.
- Tack each side of the leaf to the strip at its widest point (about 9 cm from the base) with 2 small stitches. The bottom 7 cm of the leaf stays free. This free part hangs over the next strip and gives the 3D scale look.
Joining the Strips and Lace Bands
- Order from the top for a queen: 6 sage strips, 1 lace band, 5 sage strips, 1 lace band, 5 sage strips. For a throw: 6 sage strips, 1 lace band, 4 sage strips. Keep the A and B order of the sage strips going across the lace bands.
- Fold the free leaf tips of the upper strip up and pin them out of the way.
- With sage and the 4 mm hook, hold the bottom edge (Row 1) of the upper piece WS together with the top edge (Row 13 or lace Row 11) of the piece below. Sl st through both pieces in each st across. (379 sl st; throw 235 sl st)
- Use sage for every seam, also the seams on the lace bands, so the joins disappear under the leaves.
- Unpin the leaf tips after each seam. Each row of leaves now covers the top 7 cm of the strip below, where the next leaf bases and stems sit. Below a lace band, the stems lie on the cream lace, as in the flat lay photo.
- The leaves of the last strip hang about 7 cm below the bedspread. This is the leaf-tip fringe at the foot of the bed.
Edging
- Row 1: with sage and the 4 mm hook, RS facing, join at the bottom corner of the right side. Work up the side: 24 sc along each sage strip (1 sc in each sc row end and 2 sc in each mesh row end) and 20 sc along each lace band (1 sc in each sc row end and 2 sc in each fan or net row end). Then work 3 sc in the first st of the top edge, sc in next 377 sts (throw 233), 3 sc in last st, and work down the other side the same way. (Queen: 424 + 3 + 377 + 3 + 424 = 1,231 sc; throw: 260 + 3 + 233 + 3 + 260 = 759 sc)
- Row 2: do not turn. Ch 1 and work back from left to right: rev sc in each sc. Fasten off. (1,231 rev sc; throw 759 rev sc)
- The bottom edge gets no edging. It is hidden behind the hanging leaves.
Finishing
Weave in all ends on the WS. Weave sage ends through the mesh dc posts and cream ends through the lace fans, never across an open net sp, so the lace stays clean.
Lay the bedspread flat RS up and mist it with water. Smooth each leaf with your hand and lift the free tips a little so they curve, but do not press the veins flat. Pin the lace bands straight with the fans open. Let it dry completely, and support the hanging leaf fringe while it dries.
Tips for Success
- Make the leaves in batches of 20 and do the veins on all 20 at the end. You get faster when you repeat the same step many times.
- Put a marker in the center tip st after Rnd 1. It is easy to lose the point on Rnd 2 if you don’t.
- Measure every 10th leaf against your first one. If they start to grow, your tension has loosened; go down half a hook size.
- Sew the leaves onto each strip while it is still a single strip. A small strip on your lap is much easier to handle than a big bedspread.
- Buy all the sage yarn at once from the same dye lot. With hundreds of leaves side by side, even a small color change shows.
Common Mistakes to Avoid
- A crooked leaf. Both sides of every rnd must have exactly 24 sts. Count the sc, hdc and dc groups on each side before you join.
- A round tip. The tip st gets (sc, ch 2, sc) in Rnd 2 and every later rnd goes into that ch-2 sp. If you work 3 sc at the tip instead, the point disappears.
- Puckered veins. Surface sl st that is too tight makes the leaf curl. Keep the loops loose and check that the leaf still lies flat.
- Leaves sewn flat all the way down. Stop sewing about 11 cm from the base; the free bottom part is what makes the scales.
- Leaves in straight columns. Alternate A rows and B rows, so each leaf falls between two leaves of the row above.
Ways to Customize This Pattern
- Use two or three shades of sage and make the top rows lighter, so the bedspread fades from pale to deep green.
- Make autumn leaves in rust, mustard and brown with the same pattern, and use cream or brown lace bands.
- Leave out the lace bands and use only sage strips for a full, unbroken wall of leaves.
- Make a table runner of 3 strips with 7 leaves each and a leaf fringe at both ends.
- Sew a single leaf onto a cushion cover or use leftover leaves as coasters and gift tags.
Frequently asked questions
A queen bedspread needs 328 leaves: 8 rows of 21 and 8 rows of 20. A throw needs 125 leaves: 5 rows of 13 and 5 rows of 12. Make a few extra in case some come out a little smaller.
Yes. The queen size uses about 6 kg of cotton, because the leaves make a double layer. The mesh strips keep the base as light as possible. A cotton and acrylic blend in DK makes it lighter and softer.
The strips hold the leaves in straight rows and carry the weight, so the leaves do not stretch or pull out of shape. They also let the bottom of each leaf hang free, which gives the scale look.
Yes, but everything grows. With worsted and a 4.5 mm hook a leaf is about 22 cm long, so check your gauge and use fewer strips and fewer leaves per row. Keep 18 strip sts per leaf if your strip gauge matches the leaf width.
Wash it on a gentle cold cycle inside a large laundry bag, or by hand in a bathtub. Squeeze the water out without wringing and dry it flat, then lift the leaf tips with your fingers.