White 3D Swirl Lace Crochet Bedspread
Intermediate
For crocheters comfortable with the basics, ready to try new shaping and assembly techniques
Single-Day Project
A satisfying project you can complete in a single afternoon or evening.
Handmade Gift
A beautiful keepsake — free forever. Read online or print at home.
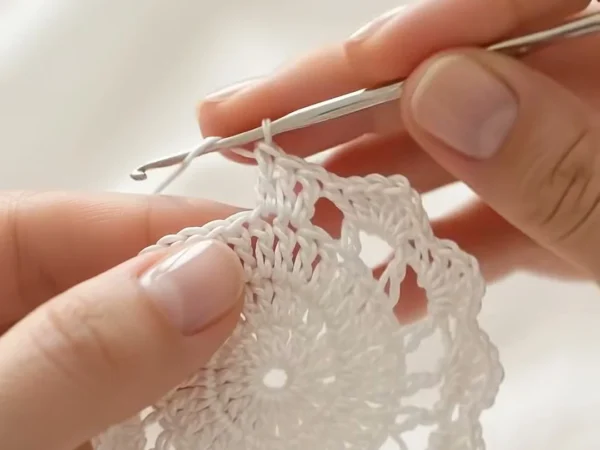 Magic ring & first rounds
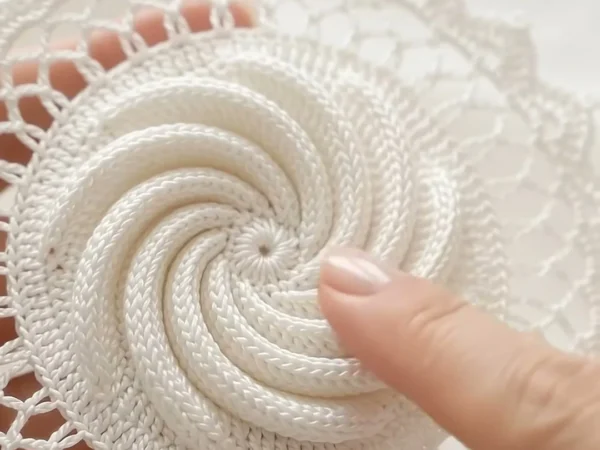 Building the shape
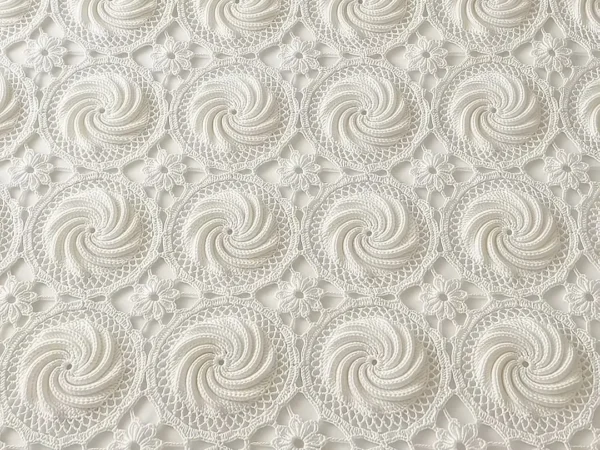 Assembly in progress
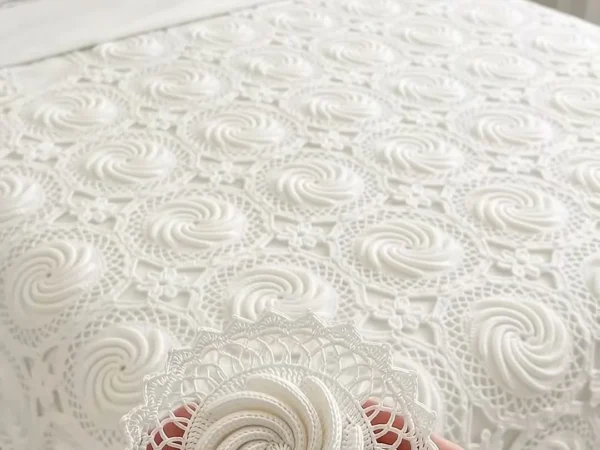 Finished & ready!
About This White 3D Swirl Lace Crochet Bedspread
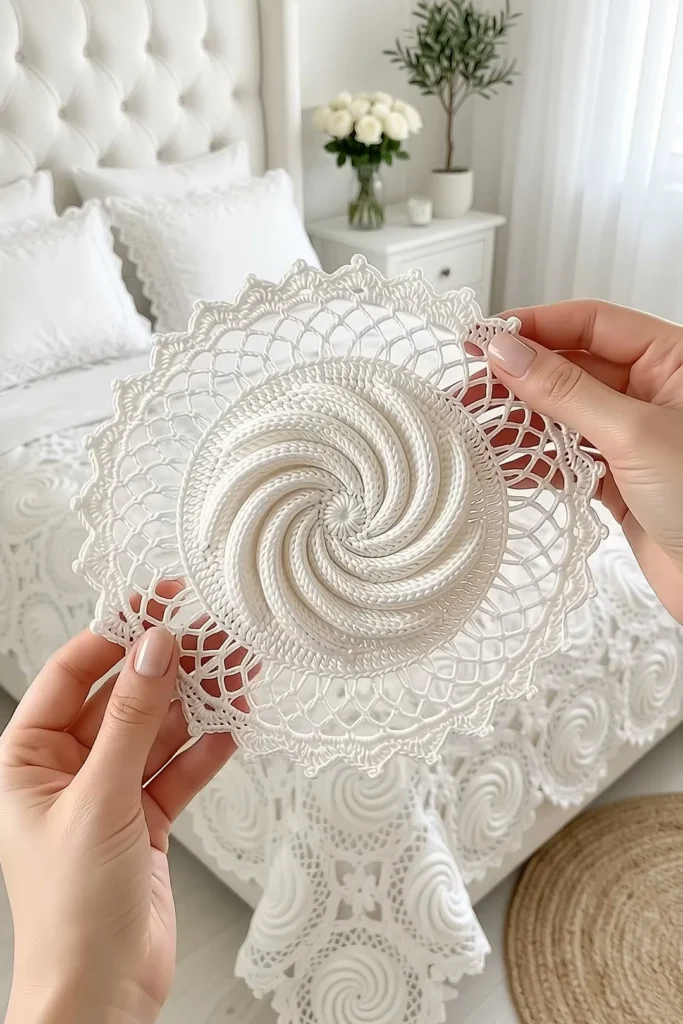
This white swirl crochet bedspread has the look of an heirloom coverlet: crisp white cotton motifs, each with a domed 3D swirl of ten tall raised ridges in the middle and a deep lace ring with pointed edges around it. The points of neighboring motifs join to each other, and a small flower fills each gap, so the finished piece looks like one big piece of lace with soft swirls rising out of it.
The swirl gets its height from front post treble crochet. A treble around the post stands up much higher than a double crochet, and moving it one stitch along each round twists the ridges into a spiral. Ten ridges add only ten stitches per round, a little less than a flat circle needs, so the center rises into a gentle dome. The lace ring has three rounds of chain loops that get longer as they go out, then a round of pointed shells.
A queen bedspread takes about 90 to 110 hours, and a throw about 40 to 45. One motif takes around 75 minutes. It suits a crocheter who knows double and treble crochet and is ready for post stitches and lace.
Materials
- DK weight mercerized cotton, white about 4,650 m for a queen bedspread (23 skeins of 100 g / 210 m), or 1,950 m for a throw (10 skeins)
- 3.5 mm (E-4) crochet hook
- Stitch markers to mark the first post st of each rnd and the joining points
- Blocking mats and rust-proof pins lots of them, for the lace points
- Spray starch (optional) to keep the domes and points crisp
- Tapestry needle and scissors
Abbreviations
MRmagic ringchchainsl stslip stitchscsingle crochetdcdouble crochettrtreble crochetfptrfront post treble crochet: yarn over twice, insert the hook from front to back to front around the post of the st, and work a trpoint(2 dc, ch 2, 2 tr, ch 3, 2 tr, ch 2, 2 dc) worked in the same loopspspaceskskipst(s)stitch(es)rndroundreprepeatHow the 3D Swirl Works
Each ridge is a front post treble (fptr) worked around a stitch of the round below. On every round, the new fptr goes around the stitch just after the old one, and a dc goes into the top of that same stitch. The dc is the increase and the fptr is the ridge, so each round adds 10 stitches and moves all 10 ridges one stitch along. Over 8 rounds they curve into a tight spiral.
A flat circle of double crochet needs about 12 new stitches per round. With only 10, the swirl is slightly smaller than flat, so it lifts into a dome, and the tall treble ridges make that dome look sculpted. This is the shape you see in the photos, and why the motif looks so 3D on the bed.
The lace ring then lets the motif lie flat again around the dome. Its chain loops get longer each round (5, 6, then 7 chains), adding the extra length the outer rounds need without any counted increases.
Sizes and How Many Motifs
- Each joined motif takes up about 25 x 25 cm, and the free points add about 3 cm on each outer edge.
- Cushion front: 4 motifs (2 x 2) and 1 flower, about 50 cm square.
- Baby blanket: 3 x 4 = 12 motifs and 6 flowers, about 80 x 105 cm.
- Throw: 5 x 6 = 30 motifs and 20 flowers, about 125 x 150 cm.
- Queen bedspread: 8 x 9 = 72 motifs and 56 flowers, about 200 x 225 cm.
- King bedspread: 10 x 9 = 90 motifs and 72 flowers, about 250 x 225 cm.
- Yarn per motif, to plan any size: about 63 m of cotton. Each flower uses about 2 m.
Domed Swirl (make 72 for a bedspread, 30 for a throw)
- Every rnd starts with ch 2 (does not count as a st) and is joined with a sl st to the first st.
- Rnd 1: with white, MR, ch 2, 10 dc in ring, join. Pull the ring tight. (10 sts)
- Rnd 2: ch 2, *fptr around next st, dc in top of same st; rep from * 9 more times, join. (20 sts, including 10 fptr)
- Rnd 3: ch 2, *dc in top of next fptr, fptr around next st, dc in top of same st; rep from * 9 more times, join. (30 sts)
- Rnd 4: ch 2, *dc in each st up to the next fptr, dc in top of the fptr, fptr around next st, dc in top of same st; rep from * 9 more times, join. (40 sts)
- Rnds 5-8: rep Rnd 4 four times. (Rnd 5: 50 sts, Rnd 6: 60, Rnd 7: 70, Rnd 8: 80)
- Push the center up from the back with your fingers. The swirl measures about 14 cm across and domes about 2 cm. Do not fasten off.
Pointed Lace Ring
- Rnd 9: ch 1, *sc in next 4 sts, 2 sc in next st; rep from * 15 more times, join with sl st to first sc. (96 sc)
- Rnd 10: ch 1, sc in first st, *ch 5, sk next 2 sts, sc in next st; rep from * 30 more times, ch 5, join with sl st to first sc. (32 ch-5 loops)
- Rnd 11: sl st in next 3 ch, ch 1, sc in same loop, *ch 6, sc in next loop; rep from * 30 more times, ch 6, join. (32 ch-6 loops)
- Rnd 12: sl st in next 3 ch, ch 1, sc in same loop, *ch 7, sc in next loop; rep from * 30 more times, ch 7, join. (32 ch-7 loops) The loops form a diamond mesh.
- Rnd 13 (first motif only): sl st in next loop, ch 1, sc in same loop, *point in next loop, sc in next loop; rep from * 14 more times, point in last loop, join. Fasten off. (16 points)
- Count the points as 4 sides of 4. The 2 middle points of each side join to the next motif; the 2 points at each corner stay free for the flowers.
Joining as You Go
- Layout: 8 motifs across and 9 long for a queen bedspread, or 5 across and 6 long for a throw.
- Work Rnds 1-12 of the next motif, then work Rnd 13 until you reach the first point that must join a finished motif.
- Joining point: work (2 dc, ch 2, 2 tr, ch 1) in the loop, sl st in the ch-3 tip of the matching point on the finished motif, ch 1, then work (2 tr, ch 2, 2 dc) in the same loop.
- Join the next point the same way, then finish the rnd as usual. (2 joined points per shared side)
- From the second row on, join the top side to the motif above and the left side to the motif on the left.
Small Lace Flowers (make 56 for a bedspread, 20 for a throw)
- Work one flower in each gap where four motifs meet. Each gap has 8 free points around it, 2 from each motif.
- Rnd 1: with white, MR, ch 3 (counts as dc), 15 dc in ring, join with sl st to top of ch 3. Pull the ring tight. (16 sts)
- Rnd 2: ch 1, sc in first st, *ch 4, sl st in the ch-3 tip of the next free point, ch 4, sk next st, sc in next st; rep from * 7 more times, ending with sl st to first sc instead of the last sc. Fasten off. (8 joins)
- The flower is about 5 cm across and pulls the four motif corners together into a neat star.
Straight Edge Border (optional)
- The points along the outer edge make a pretty lace edge on their own, as in the photos. Work this border only if you want straight sides.
- Half flowers: in each gap along the outer edge, MR, ch 3, 8 dc in ring, do not join. Turn. Then ch 1, sc in first st, *ch 4, sl st in the tip of the next free point, ch 4, sk next st, sc in next st* 4 times. Fasten off. (4 joins)
- Rnd 1: join in the ch-3 tip of a corner point. Ch 1, sc in same sp, *ch 8, sc in the tip of the next free point; rep along each side, working ch 4, sc in the middle st of each half flower, ch 4 at the half flowers, and (sc, ch 10, sc) at each outer corner. Join.
- Rnd 2: ch 1, sc in each sc, 8 sc in each ch-8 loop, 4 sc in each ch-4 loop and 12 sc in each corner loop. Join.
- Rnd 3: ch 1, sc in first st, *ch 3, sk 1 st, sc in next st; rep from * around. Join and fasten off.
Matching Swirl Pillow Shams (make 2)
- Front: make 2 motifs and join them side by side. Fill the 2 gaps above and below the join with half flowers.
- Work Rnds 1-2 of the Straight Edge Border around the pair. The front measures about 28 x 53 cm.
- Sew the lace front onto the front of a plain white pillowcase with small stitches around the edge, so the swirls sit on top of the pillow.
- For a full sham, make 2 x 3 motifs (about 53 x 78 cm) and sew it to a white fabric back with an envelope opening.
Finishing
Weave in all ends on the WS, hiding them inside the tall post ridges of the swirl, where they are invisible. Avoid weaving ends through the lace loops, because they show through the open mesh.
Cotton lace needs a wet block. Soak the finished piece, roll it in a towel to remove the extra water and lay it flat. Pin each point out sharply and push each dome up from underneath. For a crisp heirloom finish, mist the lace lightly with spray starch while it is still damp, then let it dry completely before you lift it.
Tips for Success
- Mark the first fptr of every rnd; you’ll always know where the swirl moves and can count the 10 ridges easily.
- Work the fptr loosely. Pull up the first loop to the height of the dc around it so the ridge doesn’t pull the fabric tight.
- Use mercerized cotton. Its shine makes the ridges catch the light and the lace stay crisp.
- Keep your hands clean and work on a white towel. Every mark shows on an all-white bedspread.
- Make the motifs in batches of ten and keep them in a clean pillowcase until you join them.
- Use plenty of pins when blocking. Each point needs its own pin to dry sharp.
- Try a small test wash with a finished motif before the big wash, to see how much your cotton shrinks.
Common Mistakes to Avoid
- A cone instead of a dome. If you skip the dc in the top of the same st, the swirl only adds a few sts and rises into a cone. Every rnd must add exactly 10.
- Ridges that don’t twist. The new fptr goes around the st after the old one; working around the old post makes straight spokes.
- A lace ring that ruffles. Check Rnd 9 (96 sc) and skip 2 sts each time in Rnd 10, so you have 32 loops.
- Flat ridges. Using fpdc instead of fptr gives much lower ridges and a flatter swirl.
- Points joined at the wrong place. Mark the 2 middle points of each joining side before Rnd 13.
- Ends that show through. Weave ends into the solid swirl, never across the lace.
- Skipping the starch on a bedspread that will be displayed. Without it, the points slowly curl.
Ways to Customize This Pattern
- Make it in ivory or ecru for an antique look, or in pale pink for a soft romantic bedroom.
- Work a table runner of 2 x 6 motifs, about 55 x 155 cm, or a round tablecloth of 19 motifs set in a hexagon shape.
- Make a single motif as a doily or a large coaster for a vase.
- Use fpdc instead of fptr for a flatter swirl that is easier to sleep under.
- Make a baby blanket in a soft cotton blend, without starch, so it stays soft.
- Add a lining of colored fabric under a throw, so the lace shows up in pale blue, sage or blush.
Frequently asked questions
That is on purpose. Ten ridges add 10 sts per rnd, which is a little less than a flat circle needs, so the center lifts into a soft dome and gives the 3D look in the photos.
Yes. Start with 12 dc in Rnd 1 and work 12 ridges instead of 10. The motif will lie flat, but the swirl will look less sculpted.
About 45 minutes for the swirl and 30 minutes for the lace ring. The flowers take about 10 minutes each.
72 motifs (8 x 9) for a queen bedspread of about 200 x 225 cm, or 30 motifs (5 x 6) for a throw of about 125 x 150 cm, plus a flower for each gap where four motifs meet.
You can, with a 4 mm hook. Acrylic gives a softer, warmer bedspread, but the domes and points won’t stay as crisp, and acrylic can’t be starched.
Hand wash in cool water or use a gentle cycle in a large laundry bag. Roll it in a towel, then lay it flat, push up the domes and pin out the points again while it dries.
It is a good second one. If you have made a granny square and a simple doily, the swirl and loops will feel familiar; the post stitches are the only new skill.